Key Takeaways
- A Box Joint Jig is essential for creating strong, precise joints in woodworking projects.
- Constructing a DIY jig can save money and allow customization for different project needs.
- Proper setup, calibration, and maintenance ensure accurate results and long-term durability.
- Case studies show that both DIY and commercial jigs produce professional-quality joints.
- Following best practices improves safety and efficiency in woodworking projects.
Why a Box Joint Jig is Essential for Every Woodworker
Woodworking is a craft that blends creativity, precision, and skill. One of the biggest challenges for woodworkers is creating joints that are both strong and visually appealing. A Box Joint Jig is an invaluable tool that helps achieve perfectly aligned joints with ease, making drawers, storage boxes, cabinets, and furniture more durable and professional-looking.
Unlike traditional dovetail joints, box joints are simpler to create but still offer impressive strength and stability. Whether you are a beginner hobbyist or an experienced woodworker, using the right jig can save time, reduce mistakes, and ensure consistent results across multiple projects. In this guide, you will learn how to build, set up, and use a box jig, along with practical tips, maintenance advice, and real-world case studies demonstrating its effectiveness.
Understanding the Jig and Its Purpose
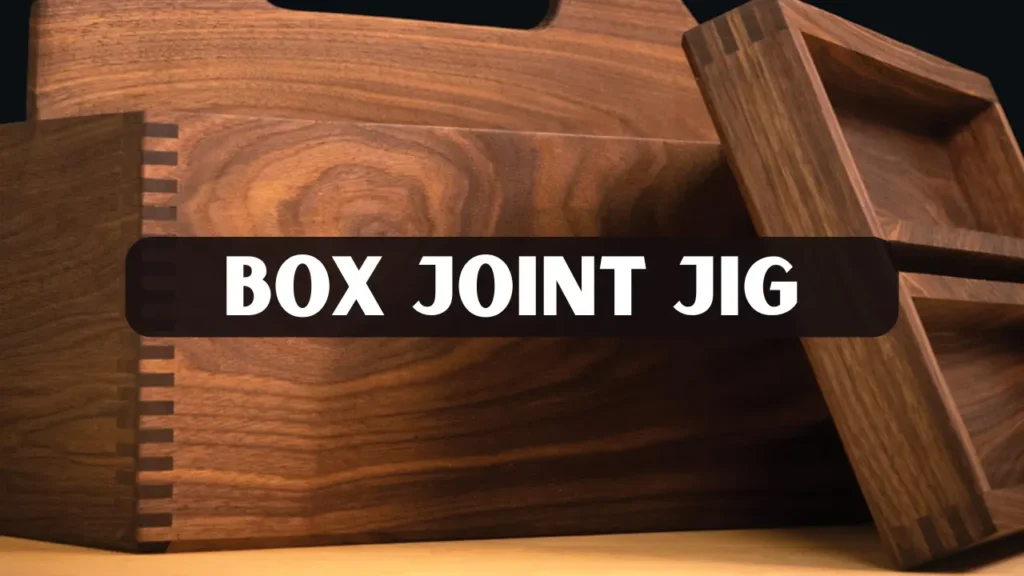
A Box Joint Jig is a specialized woodworking tool designed to cut finger joints with precision and consistency. It ensures each cut aligns perfectly, resulting in strong, tight-fitting joints that add structural integrity to any woodworking project.
Benefits of Using a Jig
- Consistency: Achieves uniform spacing for all cuts, ensuring each joint fits perfectly. This makes assembly faster and reduces gaps in large projects.
- Strength: Offers larger glue surfaces compared to simple butt joints, making the joint more durable. Strong joints can withstand everyday use and heavy loads.
- Efficiency: Reduces time for repetitive cuts by guiding each cut precisely. Multiple pieces can be completed quickly without sacrificing quality.
- Precision: Guarantees accurate alignment for professional-quality results. Every cut matches perfectly, giving a polished finish.
- Versatility: Suitable for drawers, small boxes, and large cabinets alike. The jig adapts to different material thicknesses and project sizes.
Box joints are ideal for drawer construction, storage boxes, and custom furniture. Using a jig allows woodworkers to achieve professional-quality results consistently, whether they are beginners or seasoned professionals.
Materials and Tools Needed
Before starting, gather the right materials and tools to ensure smooth construction or usage of a woodworking jig.
Materials:
- Hardwood or plywood for the jig base and fence
- Screws, bolts, and wood glue
- Clamps for stabilization
Tools:
- Table saw or router table
- Measuring tape, ruler, or calipers
- Pencil or marking tools
- Safety gear including goggles and gloves
Using high-quality hardwood ensures the jig maintains precision and durability over time. Softer or cheaper materials may wear down quickly, reducing the accuracy of your cuts and the longevity of the jig.
Step by Step Construction of a Finger (Box) Jig
Building a DIY joint jig is straightforward with careful planning.
- Prepare Materials: Cut plywood or hardwood to the dimensions needed for the base and fence.
- Assemble the Base: Secure the fence to the base using screws or bolts to ensure stability.
- Install Spacers: Add evenly spaced notches or spacers to guide accurate finger cuts.
- Test Fit: Use scrap wood to verify alignment and ensure the cuts are correct.
- Adjust as Needed: Fine-tune the spacing, fence height, and alignment before cutting the final pieces.
Label your jig for different finger widths. This simple step saves time and prevents mistakes during multiple projects.
Setting Up the Joint Jig
Proper setup is critical for achieving precise and repeatable results.
Setup Steps:
- Secure the jig to your table saw or router table.
- Adjust blade height to match the thickness of your material.
- Perform test cuts on scrap wood to verify alignment.
- Clamp the workpiece firmly to prevent movement during cutting.
Best Practices:
- Double-check all measurements before cutting.
- Use push blocks to maintain control and safety, especially for small boards.
- Take your time on the first cut, as it sets the standard for all subsequent cuts.
A well-set-up jig ensures consistent, high-quality joints across multiple projects.
How to Use a Jig Effectively
Using a finger joint correctly is essential for strong, clean joints.
Step by Step Guide:
- Place the first board against the jig fence.
- Make the initial cut slowly and carefully.
- Slide the board using the jig’s spacing guide for each subsequent cut.
- Cut the mating board to match the first piece.
- Test fit before gluing to ensure a tight and seamless joint.
Tips for Best Results:
- Practice on scrap wood before cutting final pieces.
- Focus on accuracy rather than speed.
- Apply glue evenly and clamp boards carefully to avoid gaps.
When used correctly, this jig creates joints that are both durable and visually appealing.
Case Studies
- Michael, a woodworking enthusiast, built custom drawers using a DIY jig, achieving precise and strong joints with minimal adjustments. This project demonstrated how a simple tool can produce professional-quality results at home.
- Similarly, Emily, a hobbyist, used a commercial jig to make storage boxes, completing the project faster with perfectly aligned joints. Her experience shows that both DIY and commercial tools improve accuracy and save time in woodworking projects.
Maintenance and Safety Tips
Maintaining your jig ensures it remains accurate and safe to use.
Maintenance Tips:
- Clean sawdust and debris after each use.
- Inspect screws, bolts, and moving parts regularly.
- Replace worn or damaged components promptly.
Safety Tips:
- Always wear protective goggles and gloves.
- Keep hands away from the blade path.
- Never remove safety guards from your table saw or router.
Following these precautions prolongs the life of your jig and protects the user from injury.
Advantages
Box joint jigs offer multiple advantages beyond simple cuts:
- Time Efficiency: Speeds up repetitive projects by guiding each cut accurately. This saves hours compared to measuring and marking each piece manually.
- Cost Savings: DIY jigs reduce the need for expensive commercial tools. Woodworkers can achieve professional results without large investments.
- Improved Accuracy: Reduces human error and ensures consistent joints every time. Even complex projects become easier and more reliable.
- Professional Finish: Produces clean, tight joints that look polished and precise. This enhances both the appearance and durability of your projects.
Even beginners can achieve professional-quality results with a little practice and the right jig.
Conclusion
A Box Joint Jig is an essential tool for woodworkers who want precise, strong, and repeatable joints. Building a DIY jig or using a commercial version saves time and improves accuracy, making it easier to complete drawers, boxes, and cabinets with professional-quality results. Real-world case studies demonstrate that both DIY and commercial jigs produce excellent outcomes.
Start using this jig in your next woodworking project and experience the difference that precision and accuracy can make. Proper joints not only enhance the strength of your creations but also give them a professional, polished look. With consistent practice and the right techniques, even complex projects become easier and more enjoyable to complete.
Frequently Asked Questions
1. What is the difference between a box joint and a dovetail joint?
Box joints are simpler and beginner-friendly, while dovetails are more decorative and complex.
2. Can a woodworking jig be used without a table saw?
Yes, a router table with guides can also create box joints accurately.
3. How can mistakes in box joints be corrected?
Check fence alignment, spacing, and blade height, and always test on scrap wood first.
4. Are box joints strong enough for drawers?
Yes, properly glued box joints are very durable and withstand daily use.
5. Can the finger width of a jig be adjusted?
Most jigs allow adjustable finger widths for different project needs.