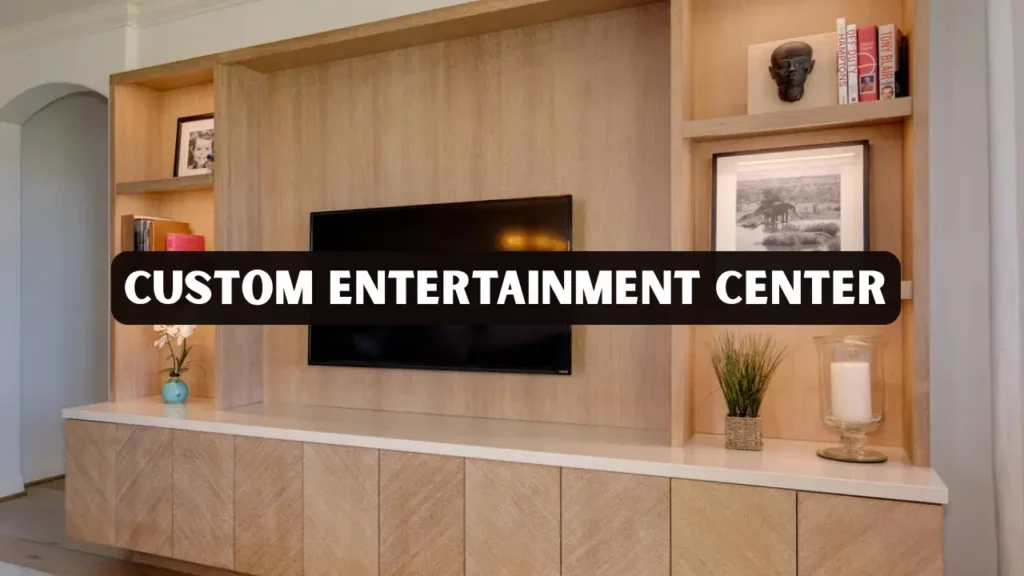
A custom entertainment center goes beyond being a simple TV stand; it becomes the visual anchor of your living room. Designed to suit your space and lifestyle, it blends craftsmanship with technology to create a functional yet stylish centerpiece. With thoughtful planning, you can integrate your television, speakers, books, and decorative pieces into one cohesive design that enhances your space while keeping it organized.
Unlike mass-produced furniture, a custom built-in entertainment center gives you full control over materials, layout, and finish. You can choose hardwood for a timeless look, add hidden compartments for electronics, or integrate LED lighting for a modern touch. This guide explains how to design, plan, and build your own entertainment center using proven woodworking methods. By following each step carefully, you will end up with a durable, elegant, and highly personalized feature for your home.
Key Takeaways
- A well-planned custom entertainment center combines visual appeal and practicality by organizing electronics, cables, and décor.
- Proper measurements, material choices, and ventilation planning ensure both functionality and durability.
- You can modify the project for your TV size and wall dimensions, whether you want a freestanding or built-in design.
- The process involves planning, material selection, cutting, assembly, and finishing.
- Includes real-world examples, materials list, and woodworking techniques based on industry best practices.
Why Choose a Custom Entertainment Center
A custom entertainment center allows you to design furniture that fits your room perfectly and meets your entertainment needs. Instead of adjusting your layout around store-bought units, you can build a design that complements your wall dimensions, ceiling height, and home decor.
Benefits include:
- Efficient space utilization for both large and small rooms. It ensures your layout feels balanced while keeping the room open and functional.
- Concealed cable management for a cleaner aesthetic. This helps maintain a polished look and makes routine cleaning much easier.
- Adjustable shelving for books, speakers, or gaming consoles. It gives you the flexibility to modify storage as your entertainment setup evolves.
- A more durable structure than flat-pack or pressboard furniture. Quality craftsmanship ensures longevity and adds lasting value to your home.
Choosing a custom option gives you full design control. It helps create a focal point that enhances comfort and convenience, while adding long-term property value.
Planning Your Entertainment Center
Before cutting wood, take time to plan every detail. A thoughtful plan will save hours of rework and material waste.
Checklist:
- Measure your wall, TV width, and height precisely. Accurate measurements ensure your unit fits perfectly without leaving awkward gaps.
- Ensure the viewing height is comfortable, generally 42–48 inches from the floor to screen center. This keeps your viewing experience ergonomic and reduces neck strain during long hours of use.
- Plan for ventilation; electronics need airflow, so allow 1–2 inches of clearance behind components. Proper ventilation helps prevent overheating and extends the lifespan of your devices.
- Mark where outlets, cable ports, and speakers will go. Organizing these placements early makes wiring and future upgrades much simpler.
- Decide whether shelves will be adjustable or fixed. Adjustable shelves allow flexibility for changing equipment or décor over time.
- Verify your wall can support the structure if it’s built-in. A sturdy mounting surface ensures safety and stability for heavier custom-built units.
Good preparation helps achieve a seamless design that feels both aesthetic and functional.
Design Essentials
1. Proportion and Scale
Balance is crucial. Keep your entertainment center proportional to your wall size. A 10-foot wall works well with a 7–8-foot-wide unit. For narrow spaces, opt for a taller and slimmer design.
2. Ergonomics and Sightlines
Mount or position your TV so that the center aligns with seated eye level. Use a slight tilt mount if your seating varies in height.
3. Ventilation and Accessibility
Ventilation slots or cutouts behind shelves help prevent electronics from overheating. Ensure you can remove back panels easily when servicing equipment.
4. Cable Management
Plan for a central chase to conceal wires. Use grommets, cable sleeves, and recessed outlets for a neat and safe setup.
5. Material Aesthetics
Choose materials that reflect your style. Paint-grade plywood suits modern spaces, while oak or walnut adds a traditional touch.
Materials and Tools
Materials
- ¾-inch birch or maple plywood for cabinet boxes.
- Hardwood lumber (oak, walnut, or maple) for face frames and trim.
- Veneer or laminate for a premium finish.
- Back panels: MDF or thin plywood for rigidity.
Hardware and Accessories
- Soft-close hinges and drawer slides.
- Adjustable shelf pins for flexibility.
- Concealed power strip for electronics.
- Magnetic latches or push-to-open mechanisms.
Tools
- Circular or table saw.
- Router with edge guide.
- Pocket-hole jig or biscuit joiner.
- Cordless drill, clamps, and sander.
- Paint sprayer or brushes for finishing.
Investing in quality tools ensures cleaner joints and professional results.
Step-by-Step Guide to Building a Custom Built in Entertainment Center
Step 1: Sketch and Measurements
Start by drawing your design. Include every measurement and space allocation for the TV, soundbar, storage, and décor. For example, a 65-inch TV usually requires an opening around 58–62 inches wide. Add clearance for cables and ventilation.
Step 2: Cut the Panels
Cut top, bottom, and side panels from plywood according to your plan. Use a straightedge guide for precise cuts. Label each piece to avoid confusion during assembly.
Step 3: Assemble the Frame
Attach panels using pocket-hole screws or biscuits. Check all corners for squareness before securing with glue and screws. Add a central divider if your design includes symmetrical cabinets.
Step 4: Build Cabinets and Shelving
Construct drawers and doors separately. Use full-extension slides for drawers and adjustable shelf pins for flexibility. Sand all edges to remove splinters.
Step 5: Cable Management and Ventilation
Drill holes for wiring channels. You can also cut narrow slots or add metal grilles to ensure proper ventilation for devices.
Step 6: Attach Doors and Trim
Install doors using concealed hinges. Add trim or face frames for a clean and finished look. If going for a minimalist style, use flat panels with invisible handles.
Step 7: Sanding, Painting, and Finishing
Sand all surfaces using 150–220 grit sandpaper. Apply primer, then paint or stain depending on your desired finish. Seal with polyurethane for durability. Allow each coat to dry completely before reassembly.
Step 8: Lighting and Accessories
Add LED strips or puck lights to highlight shelves. These not only improve visibility but also enhance aesthetics during evening use.
Real-World Example: Modern Built-In Project
A homeowner designed a custom built-in entertainment center for a 65-inch TV and family gaming console setup. Using Baltic birch plywood and oak veneer, the project took 60 hours and cost approximately $1,800.
Design highlights:
- Recessed lighting under top shelves.
- Ventilated compartments for game consoles and receivers.
- Pull-out drawers for DVDs and accessories.
- Floating base with hidden cable management system.
- The result was a seamless wall unit that complemented the home’s interior design and offered long-term durability.
Styling Options and Finishing Touches
Your custom entertainment center should reflect your personality and home style. Consider these design inspirations:
- Modern minimalist: Flat panels, matte colors, no handles, hidden wiring.
- Farmhouse rustic: Reclaimed wood, open shelves, and vintage metal accents.
- Mid-century classic: Warm walnut veneer, tapered legs, and horizontal grain.
- Industrial edge: Metal frames, open mesh panels, and distressed finishes.
Add texture through contrasting materials like glass doors, LED lighting, or metallic hardware. Always test finishes on scrap wood before applying to your main structure.
Maintenance Tips
Keeping your custom built-in entertainment center looking fresh requires regular upkeep:
- Dust surfaces weekly with a soft microfiber cloth.
- Clean wood finishes using mild soap and water; avoid ammonia cleaners.
- Refinish or re-oil wooden surfaces every few years.
- Check hinges and slides annually for wear and tighten if necessary.
Proper care ensures the furniture lasts for decades while maintaining its visual appeal.
Conclusion
Building a custom entertainment center is one of the most rewarding woodworking projects you can take on. It provides the perfect balance between functionality, design, and craftsmanship. With accurate planning, high-quality materials, and proper execution, your entertainment center will become a lasting highlight in your home.
Whether you aim for a modern minimalist piece or a classic built-in with crown molding, this project enhances your home’s comfort, organization, and visual harmony. By combining skill, patience, and creativity, you’ll craft furniture that reflects your style and stands the test of time.
Frequently Asked Questions
What makes a entertainment center different from store-bought units?
Custom units are designed for your space, ensuring perfect fit and functionality. They also use higher-quality materials and allow personalization in layout and finish.
How long does it take to build a custom built in entertainment center?
For beginners, it may take 50–80 hours. Experienced woodworkers can complete it faster depending on complexity.
What are the best materials for durability?
Plywood for structure and hardwood for trim work offer long-term strength. Avoid low-density particleboard for load-bearing areas.
Do I need professional help for installation?
If you’re installing a built-in structure with electrical components, hiring a licensed electrician is strongly advised for safety compliance.
How much does it cost to build one?
DIY projects range from $1,000–$2,500 depending on materials, finishes, and hardware. Professional installation can double that cost.


