Key Takeaways
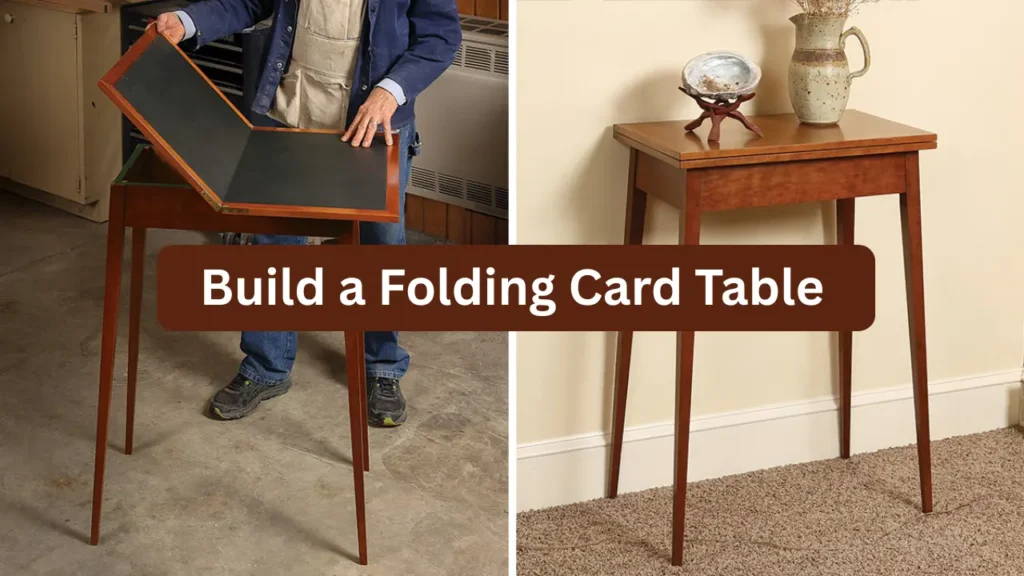
- Learn how to build a folding card table using precise woodworking techniques and lathe-turned legs.
- Discover expert tips on wood selection, cutting, turning, and hinge installation for durability.
- This project enhances folding mechanisms, balance, and finishing, ideal for small spaces and game nights.
- Detailed maintenance, troubleshooting, and customization ideas are included for long-term usability.
Why Build a Folding Card Table
Benefits of Building Your Own Folding Card Table
Many store-bought folding tables prioritize convenience but sacrifice beauty and longevity. Building your own gives you the freedom to blend design with function.
- Customization: Choose the wood species, dimensions, and finish that fit your décor.
- Durability: A handcrafted hardwood frame can last for decades if properly maintained.
- Skill development: Learn joinery, turning, and hardware alignment in one cohesive project.
- Sustainability: Using locally sourced wood reduces waste and environmental impact.
- Cost efficiency: With basic materials and effort, you can create a higher-quality table for less than a retail price.
Tools and Materials
Gather everything before starting to ensure uninterrupted progress.
Essential Tools
- Lathe and turning tools
- Table saw or circular saw
- Drill with assorted bits
- Orbital sander
- Clamps and measuring tools
- Carpenter’s square, pencil, and safety glasses
Materials
- Hardwood boards (oak, maple, or birch) for tabletop
- Four hardwood blanks for legs
- Folding leg brackets or hinges
- Screws, glue, and protective finish
- Felt pads or rubber feet
Choosing strong yet lightweight wood is key. Maple offers strength, oak adds beauty, and birch provides a clean, uniform look ideal for staining.
Step by Step Guide to Build a Folding Table
Step 1: Plan and Measure
Decide on final dimensions before cutting any wood. A typical folding card table measures 30–36 inches square, but you can adjust depending on available space. Draw a simple plan, marking leg positions and hinge placement. Accurate measurements now prevent alignment issues later.
Step 2: Cut and Prepare the Tabletop
Cut the tabletop to your chosen size using a table saw or circular saw. If the design includes a split top, divide it into two equal halves. Sand edges smooth and ensure the surface is perfectly flat. Use progressively finer grits for an even texture ready for finishing.
Step 3: Prepare the Leg Blanks
Cut four leg blanks slightly longer than needed. This extra length allows for precise turning and trimming later. Mark centers on both ends and check grain orientation for consistency. Using matching grain patterns gives a more professional, symmetrical appearance.
Step 4: Turn the Legs on the Lathe
Mount each leg blank between centers on your lathe. Rough out the shape, then refine using gouges and chisels. Create gentle tapers or decorative beads as desired. Turning legs in pairs helps achieve consistent profiles. Always wear protective gear and work at safe lathe speeds.
Step 5: Sand and Finish the Turned Legs
Once the legs are shaped, sand them directly on the lathe with fine-grit paper. Apply an initial coat of wood oil to highlight grain patterns. Let the legs dry thoroughly before removing them. This small detail enhances both appearance and protection.
Step 6: Build the Folding Frame
The frame supports the tabletop and folding mechanism. Cut apron pieces from the same wood species. Join corners with glue and screws, ensuring each angle is square. Add corner blocks for extra stability. A well-aligned frame prevents future wobbling.
Step 7: Install Hinges and Folding Brackets
Position the folding brackets where legs will attach. Mark holes, pre-drill, and secure the hardware with screws. Test each bracket’s motion to confirm it folds freely without binding. Installing hardware before finishing allows easy adjustment and prevents damaging your finish later.
Step 8: Attach Legs to the Frame
Mount the legs into the brackets or onto leg plates using bolts and washers. Check that each leg folds smoothly and locks securely when extended. Test the table upright, making sure all four legs contact the floor evenly. Adjust bracket positions if necessary.
Step 9: Sand, Stain, and Finish
Lightly sand all surfaces once assembled to remove any glue residue or tool marks. Apply your chosen finish in thin coats, sanding lightly between applications. For a natural sheen, use Danish oil or a clear polyurethane that enhances the wood’s natural warmth. Let each layer cure fully before use.
Step 10: Test Folding and Stability
Set up the table on a flat surface. Fold and unfold it several times to test the mechanism. Apply moderate pressure to check sturdiness. A well-balanced frame with secure brackets should fold smoothly and feel stable under normal weight.
Troubleshooting Common Issues
Even well-built tables can develop minor issues during construction or use. Here are quick fixes for the most common problems:
- Legs don’t fold evenly: Loosen hardware slightly, realign, then retighten.
- Tabletop rocks on flat surfaces: Add felt pads or adjust leg bracket placement.
- Stiff hinges: Lubricate lightly with furniture wax or silicone spray.
- Rough folding edges: Sand lightly around hinge areas for smoother movement.
These small adjustments ensure your build a folding card table project performs reliably every time it’s set up.
Customization Ideas
You can personalize your folding card table to make it unique.
- Decorative turned legs: Add grooves or spiral patterns for a more elegant profile.
- Engraved tabletop edges: Use a router or wood-burning tool to add designs.
- Removable top: Attach using figure-eight fasteners for easier storage.
- Two-tone finish: Combine contrasting stains for a custom appearance.
- Added functionality: Install cup holders or a small drawer beneath the frame for accessories.
Creativity turns a standard folding table into a centerpiece for game nights and gatherings.
Maintenance and Care
A folding card table built with hardwood and quality hardware can last decades if maintained properly.
- Keep the table dry to prevent warping or rusting brackets.
- Wipe spills immediately and avoid harsh cleaners.
- Reapply oil or finish annually for continued protection.
- Store folded in a cool, ventilated space.
- Tighten screws and hardware periodically.
Proper maintenance not only extends life but also preserves the beauty of your handcrafted table.
Expert Experience and Real-World Insight
From experience, the key to a successful build a folding card table project is balancing precision with patience. Many woodworkers rush hardware placement or skip test fits. Aligning hinges and brackets correctly before finishing saves hours later. Always dry-fit the legs and frame before applying any stain or varnish. This ensures all parts move freely and the final result looks professional.
If you’re new to using a lathe, practice turning a test leg first. Focus on maintaining consistent diameters and smooth transitions. Finishing techniques like buffing oil or applying multiple thin coats of varnish add both protection and depth. Remember, fine craftsmanship comes from small, careful refinements.
Conclusion
Learning how to build a folding card table is more than just creating furniture. It’s a chance to refine your woodworking accuracy, improve your understanding of joinery, and design something that fits your exact needs. From planning and cutting to turning legs and applying the final coat, each step contributes to a piece that reflects your craftsmanship.
This project encourages a balance between functionality and art. With care and attention to detail, your handmade folding card table will serve as both a practical tool and a lasting example of your skill. Whether it’s for family gatherings, card games, or craft work, the satisfaction of unfolding something you built yourself is unmatched.
Frequently Asked Questions
How long does it take to build a folding table?
Most woodworkers can complete the project in two to three days, depending on drying time for finishes. Beginners may take longer as they refine turning and assembly skills.
What is the best wood for a folding table?
Hardwoods like oak, maple, and cherry are excellent. They provide stability and beauty while resisting dents and scratches better than softwoods.
Can beginners make this project?
Yes. The steps are straightforward, and the tools required are basic. Following accurate measurements and taking time during assembly ensures good results.
How do I make sure the table folds flat?
Check hardware specifications before buying. Brackets labeled “flush folding” are designed to fold completely under the tabletop when stored.
Can I use metal legs instead of wood?
You can. Metal folding legs save time and weight but remove the handcrafted appeal. Combining metal brackets with turned wooden legs balances function and style.


