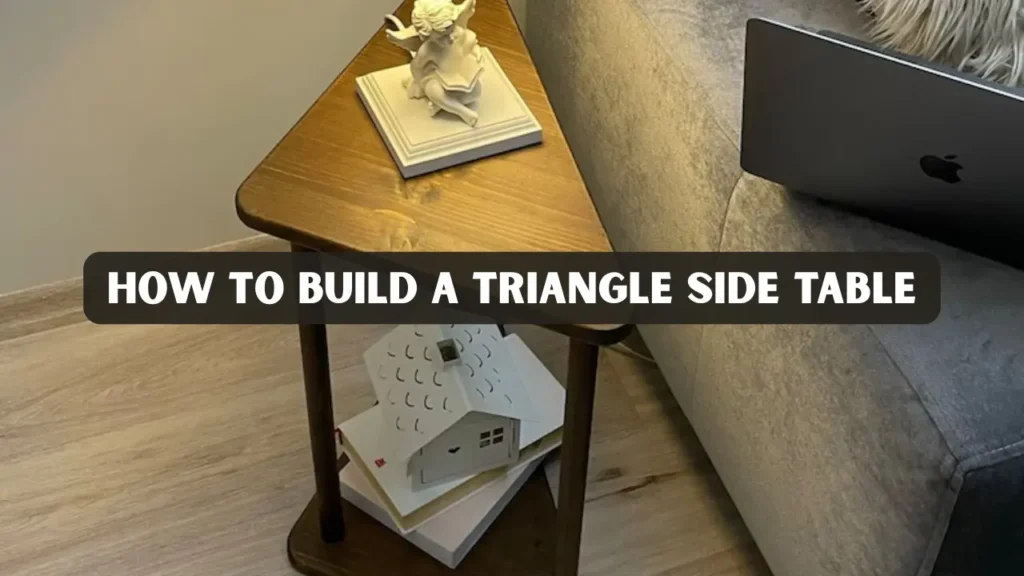
Building a Triangle Side Table is one of the most rewarding woodworking projects you can take on. Its geometric design brings visual interest to small spaces, while its compact footprint makes it a practical addition beside a bed, sofa, or hallway corner. Unlike rectangular or round tables, the triangular form challenges your layout precision and strengthens your understanding of balance, symmetry, and joinery.
This project also gives you a chance to experiment with lathe turning for the legs, custom edge shaping, or creative wood combinations. By the end of this guide, you will not only have a beautiful piece of furniture but also a deeper understanding of woodworking fundamentals.
Key Takeaways
- A Triangle Side Table is an elegant woodworking project that enhances both skill and home décor.
- It teaches precision in measuring, cutting, and finishing, making it ideal for DIY enthusiasts.
- Using solid wood, durable joinery, and a smooth finish ensures long-lasting results.
- Average material cost: $25–$120. Typical build time: 4–10 hours depending on experience level.
- This guide provides a detailed process, design variations, and expert insights for building your triangular end table.
Why a Triangle Side Table is Perfect for Small Spaces
The geometry of a triangle makes this table ideal for corners and compact rooms. Its three-point base offers excellent stability without consuming much floor area. This combination of beauty and efficiency makes it one of the best beginner-to-intermediate projects in woodworking.
Moreover, its minimalist design pairs well with modern, Scandinavian, or rustic interiors. You can adapt it easily by changing wood type, color, or finish to match your room’s theme.
Materials and Tools You Will Need
Materials
- Hardwood board (12–18 inches wide, ¾–1 inch thick) for the tabletop
- Three legs (tapered or turned)
- Wood glue (PVA type recommended)
- 1½–2 inch screws, pocket screws, or dowels for joints
- Sandpaper (80, 120, 220 grit)
- Finish: oil, varnish, shellac, or water-based polyurethane
Tools
- Table saw or circular saw for straight cuts
- Jigsaw or band saw for shaping
- Drill/driver with pilot bits
- Dowel jig or pocket hole jig
- Clamps (2–4 minimum)
- Lathe for turned legs (optional)
- Measuring tape, combination square, marking gauge
- Router for edge finishing (optional)
Expert Tip: Choose kiln-dried hardwood to reduce warping and ensure a smooth, even finish.
Design and Planning
A good plan sets the foundation for a successful Triangle End Table build. Start by sketching an equilateral triangle for visual balance.
Suggested dimensions:
- Overall height: 18–24 inches
- Top side length: 14–18 inches
- Top thickness: ¾–1 inch
- Leg inset: 2–3 inches from each corner
Layout Instructions
- Draw your triangle using a straight edge and compass.
- Measure each side precisely; even minor deviations will affect the look.
- If you choose an equilateral triangle, the height equals side length × 0.866.
- Mark leg locations 2–3 inches from each corner, keeping them equidistant.
This planning ensures a stable base and proportional design that looks balanced from every angle.
Step by Step Build
Step 1: Cutting and Preparing the Top
Cut your board to the chosen size using a table saw or circular saw. Mark the triangle carefully before cutting to ensure accuracy. Once cut, sand all edges smooth and check for symmetry by measuring each side and angle.
If desired, you can add a beveled or rounded edge using a router. This small touch adds visual depth and removes sharp corners.
Step 2: Marking and Drilling Leg Holes
Flip the tabletop upside down and mark the leg positions. From each corner, measure inward the chosen inset distance. Use a combination square to ensure the marks are equal.
Drill perpendicular pilot holes for screws or dowels. For pocket holes, use a pocket hole jig to maintain the correct angle. Precision here prevents wobbling after assembly.
Step 3: Creating the Legs
Legs give the Side Table its personality. You can turn them on a lathe for a classic, rounded look or create tapered legs using a table saw jig.
If turning on a lathe:
- Mount each leg blank securely.
- Shape gentle tapers or decorative beads.
- Sand smooth while still on the lathe.
If tapering manually:
- Mark your taper lines using a ruler and straight edge.
- Cut carefully and sand smooth for consistency.
Whichever method you use, ensure all legs are exactly the same length. Even a 1/8-inch difference can cause instability.
Step 4: Joining Legs to the Tabletop
There are multiple joinery methods for attaching the legs:
- Pocket Screws: Fast and strong, ideal for beginners.
- Dowels: Provide a clean, seamless look. Use a dowel jig for perfect alignment.
- Mortise and Tenon: Traditional and sturdy for experienced woodworkers.
- Screws and Cleats: Attach a triangular cleat beneath the tabletop for added strength.
Apply wood glue to the joints before final assembly. Clamp each leg in place and allow it to dry completely according to the glue manufacturer’s instructions.
Step 5: Checking Alignment and Stability
Once the glue has dried, place your triangular end table upright on a flat surface. Check that all three legs touch evenly. If it wobbles, sand the bottom of the longer leg slightly until it sits flat.
For additional reinforcement, install a small triangular cleat connecting all three legs under the top. This not only adds structural integrity but also prevents racking when the table is moved.
Step 6: Sanding and Finishing
Sanding is what transforms your project from rough to refined. Progress through grits: 80 to remove tool marks, 120 for smoothing, and 220 for final polishing.
After sanding, remove dust with a tack cloth or vacuum. Apply your chosen finish in thin coats. Oil finishes (like tung or linseed oil) enhance grain, while polyurethane or varnish adds durability. Let each coat dry and lightly sand between applications for a flawless surface.
Professional Insight: Many furniture makers use a combination of oil and wax for a natural, low-gloss finish that ages beautifully.
Step 7: Adding Custom Design Features
To personalize your Side Triangle Table, consider:
- Inlays: Add a small center inlay using contrasting wood.
- Two-Tone Finish: Paint the legs and stain the top for modern contrast.
- Extra Shelf: Add a triangular lower shelf for books or décor.
- Edge Banding: Use solid wood strips on plywood tops for a high-end appearance.
Small details like these transform a basic project into a unique furniture piece.
Real-World Experience and Case Study
When I built my first Triangle Side Table, I used walnut for the top and maple for the legs. The biggest challenge was aligning the dowels perfectly. I solved this by building a simple drilling jig that ensured each hole was perpendicular and equidistant from the table edge.
This experience taught me that the secret to a stable table is precision, not speed. Beginners often rush the leg fitting process, but taking the time to test each fit before applying glue can save hours of rework later.
Such real-world experience highlights the importance of patience and measuring accuracy in woodworking.
Troubleshooting Common Mistakes
- Uneven Legs: Ensure each leg is the same length. Sand minor differences to level.
- Loose Joints: Add additional glue and clamps or insert dowels for strength.
- Cracked Wood: Use pilot holes before screwing and avoid overtightening.
- Finish Streaks: Apply thinner coats and sand lightly between applications.
These solutions come directly from workshop experience and ensure your table looks professional.
Cost and Time Estimate
- Materials Cost: $25 (pine) to $120 (walnut or oak).
- Time Required: Beginners: 8–12 hours; Intermediate: 5–8 hours.
- Tools Needed: Basic home workshop setup.
This project is both affordable and rewarding, offering a strong learning opportunity for new woodworkers while allowing creativity for advanced makers.
Safety Tips
- Always wear safety glasses and hearing protection.
- Keep hands clear of blades and bits.
- Secure workpieces with clamps before cutting or drilling.
- Ventilate your workspace when applying finishes.
Responsible tool use ensures not only a great result but also a safe woodworking experience.
Maintenance and Longevity
Proper maintenance can keep your Triangle Side Table looking new for decades.
Tips:
- Wipe spills immediately with a soft cloth.
- Avoid placing directly near heat sources.
- Reapply wax or oil finish annually for protection.
- Use coasters to prevent water rings.
With care, a handmade side table can become a family heirloom passed down through generations.
Conclusion
A Triangle Side Table combines function, artistry, and geometry in one rewarding project. It challenges your craftsmanship while offering practical results that enhance any living space.
By following this guide, using accurate measurements, and applying proper joinery, you will create a sturdy and elegant piece of furniture that reflects your woodworking skills. Whether this is your first handmade table or part of a growing collection, every project adds experience, expertise, and pride in craftsmanship.
Frequently Asked Questions
How thick should the tabletop be?
A thickness between ¾ and 1 inch offers the best balance between strength and appearance.
Can I use reclaimed wood?
Yes. Clean, dry, and check for nails before cutting. Reclaimed wood adds unique character.
What finish should I use for daily use?
Polyurethane or varnish provides durable, water-resistant protection.
Do I need advanced tools to build this table?
No. A basic saw, drill, and clamps are sufficient. Optional tools like a router or lathe add refinement.
How can I prevent wobbling?
Ensure all legs are equal in length and glued securely. Use a flat surface for assembly.


