A craftsman entry door is more than just a functional opening for a home. It represents skill, design precision, and the timeless appeal of wood. For woodworking enthusiasts, building such a door is an opportunity to showcase craftsmanship, learn advanced joinery techniques, and create a project that can last for decades. This guide will take you from planning and materials selection to construction, finishing, and presenting the project professionally.
Whether you are a hobbyist, a small shop owner, or looking to create premium plans for sale, understanding every aspect of the door ensures that your project meets high standards for aesthetics, durability, and usability.
Key Takeaways
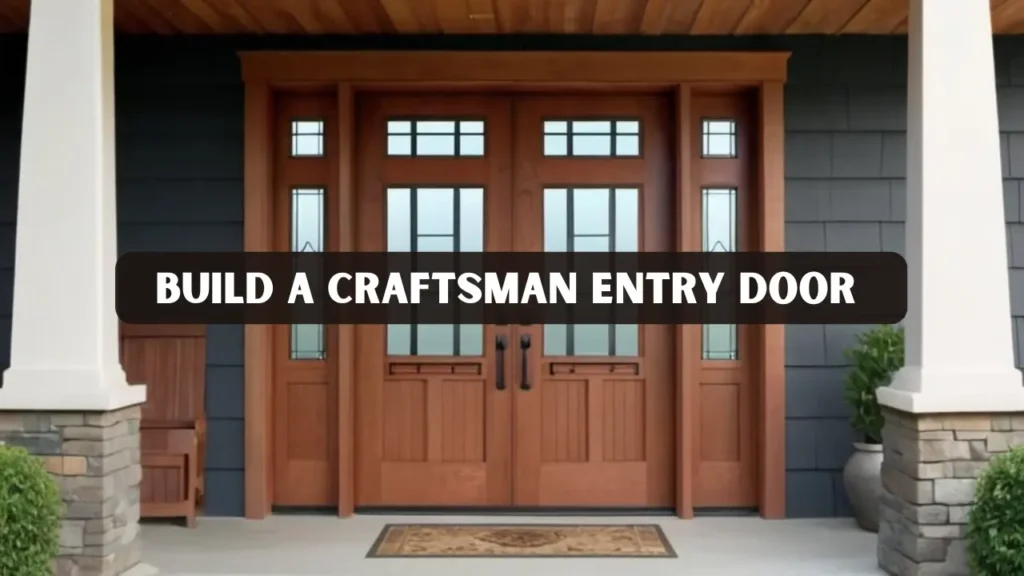
- A craftsman entry door blends strong construction, simple lines, and natural materials to enhance curb appeal.
- Using proper shop plans allows precise joinery, accurate dimensions, and professional finishes.
- Typical features include solid wood panels, small upper glass panes with grids, robust trim, and exterior-grade finishes for durability.
- This guide covers design elements, materials, step-by-step construction, energy efficiency, cost, and tips for showcasing your woodworking project online.
Key Design Characteristics of a Craftsman Entry Door
Understanding what makes a craftsman entry door distinctive is essential for creating a successful project. This style originates from the Arts and Crafts movement and focuses on natural materials, simple geometric forms, and visible craftsmanship.
Core features include:
- Panel layout: Two or three vertical panels at the bottom with a row of small glass panes at the top.
- Glass configuration: Prairie-style grids in the upper section allow natural light while maintaining privacy.
- Stiles and rails: Thick, sturdy stiles and rails showcase strong joinery and contribute to the door’s structural integrity.
- Materials: Oak, mahogany, or other exterior-grade hardwoods are preferred. Stains enhance natural wood grain rather than hiding it.
- Trim and accents: Minimal decorative trim keeps the focus on material and proportion. Some doors include sidelites or a transom window to increase visual interest without cluttering the design.
The combination of these elements not only provides a visually appealing entryway but also ensures longevity and energy efficiency when built correctly.
Planning Your Craftsman Entry Door Build
Proper planning saves time, reduces mistakes, and ensures a high-quality outcome. Before cutting wood, consider these critical steps:
Planning essentials:
- Purchase or create detailed plans: Premium woodworking plans include exploded views, material lists, and step-by-step assembly instructions. These plans are invaluable for both beginners and experienced woodworkers.
- Measure accurately: Check the existing door opening, including height, width, and plumb. Decide if this will be a retrofit or a new pre-hung door.
- Building codes: Confirm local regulations for door width, fire rating, glazing requirements, and egress standards.
- Hardware selection: Mortise locks, hinges, and handles influence rail and stile dimensions and installation details.
- Finishing considerations: Determine your stain, varnish, and weatherproofing approach before construction. A good finish protects against moisture and UV damage, increasing the door’s lifespan.
Investing time in planning ensures your entry door project will meet both aesthetic and functional expectations.
Materials and Tools Required
Using the right materials and tools is crucial for constructing a door that is both beautiful and durable.
Primary Materials:
- Hardwood stock: Oak, maple, or mahogany is ideal for stiles, rails, and panels.
- Engineered panels or plywood: For the inner core or recessed panels to reduce movement.
- Glass panes: Tempered, insulated glass for the upper portion. Prairie-style grids maintain the traditional look.
- Weatherstripping and threshold: For energy efficiency and protection against moisture.
Tools Needed:
- Table saw, router with pattern bits, jointer or planer, clamps, mortising tools, and drill/driver.
- Finishing tools such as random-orbit sanders, brushes, stain pads, and sprayers.
Selecting high-quality materials and tools not only improves the final look but also contributes to the longevity and functionality of your craftsman wooden entry door.
Step-by-Step Construction Process
Constructing a craftsman front entry door requires precision and attention to detail.
1. Cut and Prep Stock
Dimension stiles and rails to exact thickness and width. Always leave them slightly oversized for final trimming. This step ensures all components fit seamlessly during final assembly and maintain structural accuracy.
2. Joinery
Mortise-and-tenon or loose-tenon joints provide strength and stability. Proper alignment is crucial to ensure a tight, long-lasting fit. This traditional woodworking technique enhances durability and prevents the frame from twisting or warping over time.
3. Panel Creation
Raised or flat panels are routed to fit into grooves in the stiles and rails. Choose high-quality wood panels for durability and aesthetic appeal. Using premium-grade material not only highlights the natural grain but also reinforces the timeless charm of handcrafted design.
4. Glazing Pockets
Cut precise openings for the glass panes. Install muntins for traditional grid layouts to enhance the overall style. Adding energy-efficient or tempered glass can improve insulation and safety without compromising the authentic look.
5. Dry Assembly
Clamp all pieces together to check for squareness and fit before applying any glue. This step helps catch alignment issues early. It also allows for easy adjustments to ensure the door remains perfectly balanced once fully assembled.
6. Glue-Up and Trimming
Apply exterior-grade glue, clamp the frame securely, and trim edges for perfect alignment once the glue sets. The right glue-up process ensures long-term joint stability, even under varying outdoor temperatures.
7. Finishing
Sand all surfaces smoothly, apply your chosen stain, and finish with multiple coats of exterior-grade varnish for weather resistance and beauty. Always test the stain on a scrap piece first to confirm color accuracy and wood absorption.
8. Hardware Installation
Pre-drill holes and install hinges, handles, locks, and weatherstripping. Ensure smooth operation and a snug fit. Using high-quality brass or stainless steel hardware complements the handcrafted look while resisting rust and corrosion.
A well-planned construction ensures the door is structurally sound, visually appealing, and long-lasting.
Customizing Your Craftsman Door
Woodworkers can add their personal touch while maintaining the essence of the craftsman style.
Popular variations:
- Full-glass top lite: Modernizes the design while keeping the lower panels traditional.
- Sidelites and transoms: Enhance light and entry aesthetics.
- Double door configuration: Wider openings require reinforced stiles and center meeting rails.
- Mixed materials: A combination of solid wood face and composite or steel core for increased security.
Customizations must balance aesthetics with functionality, especially in regions with extreme weather conditions.
Energy Efficiency and Durability
Cost, Timeline, and Practical Considerations
Material and build costs:
- DIY plan + materials: $250–$1,200 depending on hardwood choice.
- Premium shop plans: $15–$80 for downloadable instructions and diagrams.
- Custom builds: $1,000–$5,000 depending on size, hardware, and finish.
Timeline:
- Hobbyist: 1–6 weekends.
- Small shop: 2–6 weeks, depending on complexity and workflow.
Budgeting for quality materials and professional-grade plans ensures your project is worth the time and investment.
Presenting and Selling Your Door Online
For woodworkers looking to sell plans or services, presentation and marketing are key.
Tips for promotion:
- Include step-by-step photos and diagrams. Buyers prefer detailed visual instructions.
- Optimize online content with local SEO keywords such as “craftsman door builder [city].”
- Offer downloadable plans in multiple tiers: standard vs. premium shop drawings.
- Social proof increases trust. Show customer photos, video walkthroughs, and reviews.
Real World Case Studies
- A hobbyist followed premium plans, creating a solid oak door with prairie glass grids. The result was precise joinery, professional finish, and two additional local commissions.
- A small woodworking shop built a double craftsman door with insulated composite cores for humid climates. The doors were durable, stable, and highly appreciated by the client.
These examples demonstrate the value of detailed plans, attention to materials, and professional finishing techniques.
Conclusion
A craftsman entry door combines beauty, craftsmanship, and functional performance. For woodworking enthusiasts, it represents the perfect project to demonstrate skill, precision, and design sense. By using detailed plans, choosing quality materials, following step-by-step construction, and finishing professionally, you can create a door that enhances curb appeal and lasts for decades.
Whether for personal use or for selling plans and commissions, attention to detail, energy efficiency, and presentation are crucial. Properly documented projects, local SEO, and visual proof can also increase credibility and visibility online. Building a craftsman door is not just a woodworking project; it’s a demonstration of skill, artistry, and lasting value.
Frequently Asked Questions
How thick should a craftsman style front door be?
Most exterior solid wood doors are 1-3/4 inches thick. Double doors or insulated variants can be thicker.
Can reclaimed wood be used?
Yes, but check for voids, nails, and rot. Proper preparation and stabilization are essential.
Are craftsman doors energy efficient?
With insulated cores, proper weatherstripping, and IGUs, these doors can meet modern energy efficiency standards.
Where can I get premium plans?
Premium plans are available through vendors like Woodsmith and Woodpeck, providing step-by-step assembly instructions, diagrams, and materials lists.
What makes a craftsman front entry door durable?
Using high-quality hardwood, exterior-grade finishes, stabilized cores, and proper installation ensures longevity and low maintenance.


