Key Takeaways
- Building your own garage cabinets allows full control over design, cost, and storage efficiency
- Careful planning and precise measurements ensure a perfect fit and long-lasting structure
- Plywood and strong joinery techniques deliver professional-quality results on a budget.
- Step by step guidance helps even beginners build garage cabinets that are organized, durable, and built to last.
- Safety gear, quality tools, and accurate mounting are essential for success.
Why Building Your Own Garage Cabinets Is Worth It
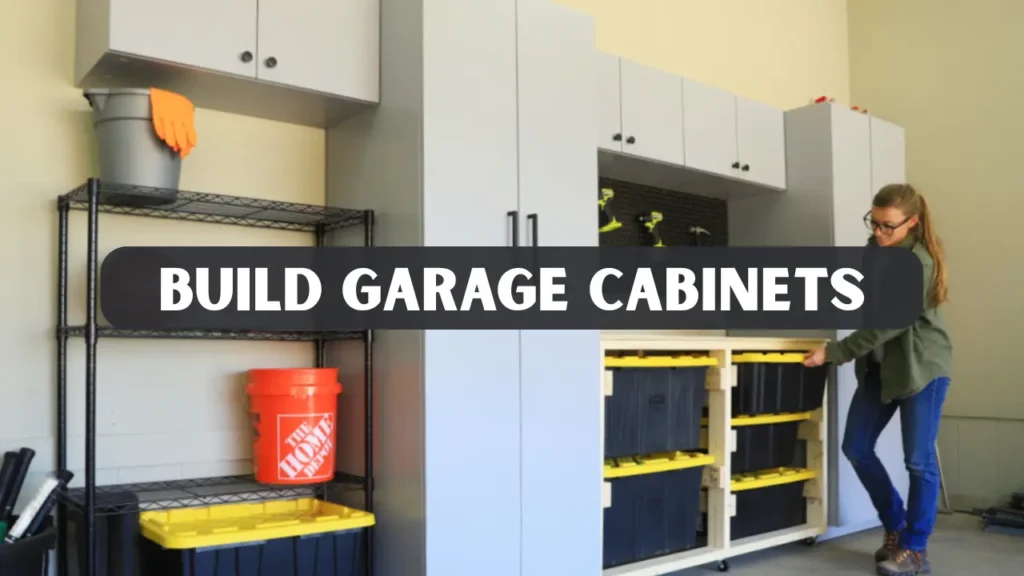
If you enjoy woodworking or simply want to organize your workspace, learning how to build garage cabinets is one of the most rewarding projects you can take on. Garage cabinets improve storage, reduce clutter, and create a professional-looking workshop at a fraction of retail cost. This guide walks you through every step from planning and materials to assembly, finishing, and maintenance.
Whether you are a beginner or a seasoned woodworker, this detailed guide offers practical knowledge, cost breakdowns, and expert tips based on proven carpentry principles. The goal is to help you create functional, long-lasting cabinets that suit your space perfectly.
Benefits of Building Garage Storage Cabinets
When you build garage cabinets instead of buying pre-made ones, you gain flexibility and quality. Store-bought cabinets often come with size limitations, cheap particleboard materials, and weak hardware.
By building your own, you can:
- Choose durable materials that handle humidity and heavy loads.
- Customize cabinet size and layout for your exact wall space.
- Save money while improving skills through hands-on craftsmanship.
- Add personalized finishes that match your workshop or garage theme.
A DIY build also creates a sense of ownership and accomplishment that store-bought furniture cannot match.
Planning Before You Start
Planning is the foundation of every successful woodworking project. Before cutting any wood, spend time sketching your cabinet layout, measuring space, and deciding on functionality.
Here is your planning checklist:
- Measure wall width, ceiling height, and floor clearance.
- Decide between wall-mounted or base cabinets.
- Choose door type: slab, shaker, or framed.
- Determine the number of shelves and drawers.
- Locate wall studs for mounting.
- Create a materials and cut list to reduce waste.
Proper planning ensures accurate cuts and smooth assembly, saving time and money later.
Materials and Tools You Will Need
Selecting quality materials determines how well your cabinets perform. For garage storage, plywood is the top choice because of its strength and stability.
Recommended materials:
- ¾ inch plywood for cabinet boxes and shelves.
- ½ inch plywood or MDF for back panels.
- 1×2 lumber for face frames.
- Screws, wood glue, and hinges for assembly.
- Handles or pulls for doors.
- Paint, primer, or stain for finishing.
Essential tools:
- Table saw or circular saw with guide.
- Drill and driver set.
- Pocket hole jig or dowel jig.
- Clamps, measuring tape, and square.
- Sander and finishing brushes.
- Level and stud finder.
Gather everything before starting to ensure an efficient workflow.
Design Choices That Matter
Cabinet design affects appearance, cost, and ease of construction. Choose a design that complements your skills and available tools.
Main options to consider:
- Wall Cabinets: Ideal for small spaces. Must be securely anchored to studs.
- Base Cabinets: Provide countertop workspace and heavy-load support.
- Tall Cabinets: Perfect for storing long tools and large items.
Frame styles:
- Frameless (European): Simple and modern. Great for quick assembly.
- Face Frame: Classic look and strong structure. Hides plywood edges.
Door choices:
- Shaker: Balanced, attractive, and easy to build.
- Slab: Clean and modern with minimal detailing.
Select based on function, aesthetics, and personal preference.
Step by Step Guide to Build Garage Cabinets
This section covers the complete process for building garage cabinets efficiently and safely.
Step 1: Cutting Panels
Cut plywood sheets based on your design dimensions. Label each piece immediately after cutting to avoid confusion.
Tip: Plan cuts carefully to minimize waste and maintain consistent grain direction.
Step 2: Building the Cabinet Box
- Attach the top and bottom panels between side panels using screws or pocket holes.
- Check for square alignment using a framing square.
- Apply wood glue along the edges before fastening.
- Reinforce corners for extra stability.
Step 3: Attaching the Back Panel
Secure the ½ inch plywood back to the cabinet box using screws and glue. This adds rigidity and ensures the cabinet remains square.
Step 4: Adding Shelves
Install fixed or adjustable shelves using shelf pins or cleats. Keep spacing consistent for a balanced appearance.
Step 5: Building and Installing Doors
Cut doors to fit your openings with a small gap for smooth closing.
- Attach hinges evenly on both sides.
- Test door swing and alignment before final tightening.
- Install handles or knobs at convenient height.
Step 6: Finishing
Sand all surfaces smoothly. Apply primer, then two coats of paint or stain with a protective sealant. Choose light colors to brighten your workspace.
Step 7: Mounting the Cabinets
For wall cabinets, locate studs and mark drilling points. Use heavy-duty screws at the top and bottom into studs for secure anchoring. For base cabinets, ensure level alignment using shims before securing.
Safety Tips During Construction
Safety must always come first. Even experienced builders can make simple mistakes that cause injuries.
Essential safety reminders:
- Wear goggles, gloves, and a dust mask.
- Secure loose clothing and tie back long hair.
- Always unplug tools before blade adjustments.
- Work on a stable surface and keep your workspace organized.
Proper safety habits not only protect you but also help maintain focus and precision throughout the project.
Finishing Options for Durability
Your finishing choices influence both appearance and longevity.
Common finishing methods:
- Paint: Perfect for a clean, modern look. Use durable enamel or acrylic.
- Stain and Polyurethane: Shows wood grain while providing moisture protection.
- Laminate Sheets: Add scratch resistance and easy cleaning.
For garage environments where humidity may fluctuate, always seal wood edges to prevent swelling or warping.
Cost Breakdown and Estimated Time
Understanding costs helps you plan better and avoid overspending.
Approximate cost for a medium-sized setup (10–12 ft):
- Plywood sheets: $150–$250
- Hardware (screws, hinges, handles): $50–$100
- Paint or finish: $40–$80
- Miscellaneous tools and supplies: $30–$60
Total Estimated Cost: $270–$490
Time required:
- Cutting and assembly: 1 weekend
- Finishing and mounting: 1 additional weekend
This makes building garage cabinets a great project to complete within two weekends while learning valuable woodworking techniques.
Common Mistakes to Avoid
Avoiding errors ensures a sturdy and professional final result.
- Skipping measurements: Always double-check dimensions before cutting.
- Ignoring wall studs: Cabinets may fall if not anchored properly.
- Using low-quality materials: Invest in solid plywood instead of particleboard.
- Forgetting edge sealing: Unsealed plywood edges absorb moisture.
Attention to detail prevents structural issues and extends cabinet life.
Maintenance and Longevity
Well-built garage cabinets can last for decades if properly maintained.
Maintenance checklist:
- Wipe surfaces monthly to remove dust and oil.
- Repaint or re-stain every few years for protection.
- Tighten loose screws and hinges when needed.
- Avoid overloading shelves with heavy tools.
A few minutes of care keeps your cabinets looking and performing like new.
Real-World Experience
A small workshop owner built a 12-foot row of base and wall cabinets using ¾ inch plywood, pocket holes, and durable enamel paint. The entire build took two weekends and cost about $450. The cabinets stored power tools, fasteners, and paint supplies while keeping the workspace organized.
The builder noticed a 30 percent improvement in efficiency after completing the project because tools were easy to locate, and clutter was reduced. This example demonstrates that practical results come from careful planning and steady workmanship, even without professional equipment.
Expert Tips for Success
- Always start with accurate measurements and double-check cuts.
- Build one cabinet first as a prototype before making multiples.
- Label all parts before assembly.
- Use clamps generously to ensure tight joints.
- Test-fit shelves and doors before applying finish.
Following these habits increases precision and speeds up future builds.
Conclusion
Learning how to build garage cabinets is a skill that transforms both your workspace and your confidence as a builder. By planning carefully, selecting the right materials, and following step-by-step guidance, anyone can create custom cabinets that combine strength and beauty.
These cabinets not only improve organization but also add long-term value to your home or workshop. With patience, precision, and creativity, your next weekend project could deliver years of satisfaction and utility.
If you are ready to enhance your garage with reliable, professional-quality storage, start sketching your design, prepare your tools, and take the first step toward building garage cabinets that truly fit your needs.
Frequently Asked Questions
What is the best wood for garage cabinets?
Plywood is the best choice because it resists warping and holds screws well. MDF is smooth for painting but heavier and less moisture resistant. Choose according to your budget and environment.
Can beginners successfully build garage cabinets?
Yes, beginners can build garage cabin with basic tools and patience. Start with a small cabinet and follow step-by-step instructions.
How should heavy cabinets be mounted?
Locate wall studs and use long screws for anchoring. If studs are uneven, use a French cleat or backer board for secure, level support.
Are homemade garage cabinets cheaper than buying them?
Generally yes. DIY cabinets cost less and can be customized with better materials than most store-bought options.
What finish lasts longest in a garage environment?
Acrylic enamel paint with a polyurethane topcoat provides strong moisture and scratch protection, perfect for garages and workshops.


