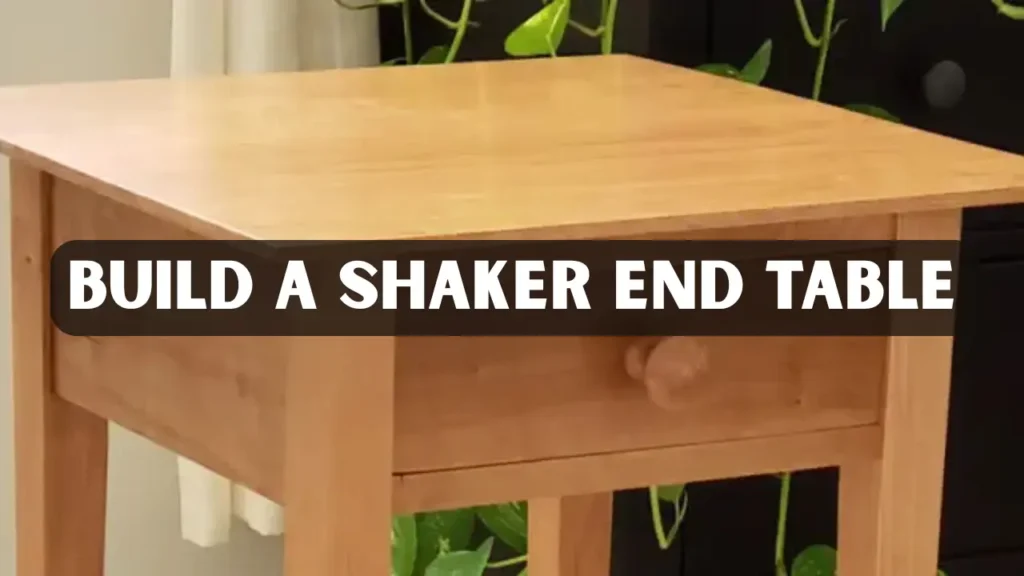
A Shaker end table embodies the beauty of simplicity and timeless craftsmanship. Rooted in a tradition that values balance, harmony, and honesty in woodworking, it reflects both practicality and elegance. The clean lines and graceful proportions make it a fitting addition to any interior, from rustic cottages to modern homes. By building one, you develop essential skills such as cutting precise joints, shaping tapered legs, and applying smooth finishes, creating a piece meant to endure for generations.
Why Choose a Shaker End Table
Among woodworking enthusiasts, the Shaker end table holds a special place because it exemplifies the principle that beauty lies in function. The Shaker design was born from a philosophy that valued utility and craftsmanship above ornamentation. Every curve, joint, and edge serves a purpose. For this reason, the project is rewarding for both beginners and seasoned woodworkers.
Its minimalist design teaches you how to focus on accuracy and balance rather than decoration. The square legs, unembellished apron, and sturdy tabletop represent simplicity at its finest. By building one, you gain experience in measuring, cutting, gluing, and assembling wood in a way that emphasizes precision over complexity. The finished piece, with its fine lines and subtle tapers, fits effortlessly into both contemporary and traditional interiors. Whether placed beside a bed, sofa, or reading chair, it provides functionality while maintaining understated elegance..
Tools and Materials You’ll Need
Before beginning, it’s crucial to prepare everything you need in advance. You’ll require basic woodworking tools, including a saw for cutting boards to size, a router for shaping edges, and chisels for creating joinery. Clamps will be essential for holding parts in place while glue dries, and an orbital sander will help smooth the surface before finishing. A reliable measuring tape and combination square ensure your dimensions remain accurate throughout the project.
When it comes to materials, hardwood boards such as cherry, maple, or oak are excellent choices. Each type provides strength and distinct grain patterns that enhance the traditional style. Sandpaper in various grits helps refine surfaces smoothly, while quality wood glue and finishing products like oil or varnish complete your toolkit. Choosing high-grade materials ensures your finished table not only looks elegant but also stays strong and durable for years to come.
Step by Step Guide
Step 1: Create the Design Plan
Every successful woodworking project starts with a clear plan. Sketch your design or print a reference layout that includes the tabletop, apron, legs, and optional drawer. Traditional Shaker end tables are around twenty-four inches high, twenty inches wide, and eighteen inches deep. However, you can adjust these measurements depending on your space and preference.
Before making any cuts, double-check all dimensions. Even minor measurement errors can affect symmetry and alignment. Laying out the design also allows you to visualize proportions, ensuring that each component contributes to the table’s overall balance and visual appeal.
Step 2: Cut the Tabletop
Once your plan is ready, begin by cutting the tabletop. Use a table saw to achieve clean, straight edges. The top should be slightly larger than the base to allow for a subtle overhang on all sides. This overhang not only enhances the design but also provides visual balance.
After cutting, smooth the surface using progressively finer sandpaper, starting from 120 grit and moving up to 220 grit. Sanding with the grain is crucial to maintaining a consistent finish. This step defines the tactile quality of your table, smooth to the touch and visually polished.
Step 3: Build the Apron
The apron connects the legs and supports the tabletop, forming the structural frame of the table. Cut four apron pieces from your hardwood board. Precision is key here; each piece must align perfectly to avoid gaps or uneven joints later.
For joinery, traditional mortise-and-tenon connections offer both strength and authenticity to the Shaker style. Alternatively, you can use dowel joints for simplicity. Dry-fit the parts before gluing to check alignment and ensure everything fits snugly. Once satisfied, apply wood glue evenly and clamp the joints until they are secure. Allow sufficient drying time before proceeding to the next step.
Step 4: Shape and Taper the Legs
The tapered legs are what give the Shaker table its distinctive look. Cut four legs to your chosen height. On each leg, mark the inner faces where the taper will begin, usually starting a few inches below the apron. Using a taper jig or a bandsaw, gradually remove wood to achieve a gentle narrowing toward the bottom.
Sanding the legs afterward is crucial to achieving a refined look. The soft taper adds lightness and visual balance, ensuring the table doesn’t appear bulky. The process requires patience, as uneven shaping can affect stability and symmetry. Once sanded, set the legs aside for assembly.
Step 5: Assemble the Base
With the legs and apron ready, begin assembling the base by attaching each leg to the apron using the prepared joints. Apply glue to the tenons or dowels, insert them carefully, and secure the frame with clamps. Use a square to check that all corners are properly aligned before allowing the glue to dry completely. Patience at this stage ensures lasting precision and balance.
To strengthen the structure, add small wooden corner blocks inside the apron. These reinforcements improve stability and reduce the risk of wobbling over time. A carefully joined base forms the foundation for a durable and reliable piece of handcrafted furniture.
Step 6: Attach the Tabletop
Position the tabletop upside down and place the assembled base on top. Align it so the overhang is even on all sides. Fasten the tabletop using figure-eight fasteners or wooden buttons. This technique allows the wood to expand and contract naturally with humidity changes.
Avoid using glue directly between the base and tabletop, as this restricts movement and can lead to cracking. The use of fasteners ensures long-term stability while respecting the natural behavior of wood. Once secured, turn the table upright and admire how the clean geometry of the Shaker style begins to take shape.
Step 7: Add a Drawer (Optional)
For those who want additional functionality, a drawer can be incorporated into the apron. Measure the opening carefully, then cut the drawer sides, front, and back from matching wood. Dovetail joints are ideal for this step because they combine durability with traditional aesthetics.
Assemble the drawer using glue, and once dry, fit it into the opening. The movement should be smooth but snug. Add a simple wooden pull that complements the table’s understated look. This optional feature provides practicality without compromising the Shaker principle of simplicity.
Step 8: Sand and Finish
Sanding is one of the most crucial steps in creating a professional result. Begin with coarse sandpaper to remove any rough surfaces, then progress to finer grits until the wood feels smooth. Pay special attention to corners and joints, ensuring all surfaces are consistent.
After sanding, remove all dust before applying a finish. Shaker furniture traditionally uses natural oils or shellac, which highlight the wood’s grain and give a soft, warm glow. Apply multiple thin coats, letting each one dry fully before lightly sanding and reapplying. Finally, buff the surface with a soft cloth or wax to achieve a subtle sheen. The final finish not only enhances the look but also protects the wood from moisture and wear.
Maintaining the Beauty of Your Shaker Side Table
Once your handcrafted table is finished, proper maintenance will keep it beautiful for years. It’s best to position it away from direct sunlight or heating vents to prevent fading or warping. Regularly dust the surface with a soft, dry cloth to maintain its natural sheen. Reapplying a thin layer of wax every few months helps protect the finish and highlight the wood’s depth.
If minor scratches appear over time, gently buff the spot using fine steel wool. Afterward, apply a small amount of matching finish to restore consistency. These small but regular care steps ensure your handmade furniture continues to look refined and last for generations.
Modern Variations and Creative Finishes
While traditional Shaker designs emphasize uniformity, modern woodworkers often experiment with finishes and materials. You can modernize your Shaker end table by selecting darker woods such as walnut or by painting the base in muted tones like gray or white while leaving the top natural. This contrast keeps the original spirit intact while giving the piece a contemporary edge.
Adding subtle metal hardware or changing the wood grain direction on the tabletop can also personalize your creation. The goal is to stay faithful to the Shaker values of simplicity and functionality while expressing individual creativity.
Common Mistakes to Avoid
When building this traditional furniture piece, precision is key. One of the most common mistakes is skipping measurement checks, which often leads to uneven joinery. Neglecting a dry fit before applying glue can also cause misalignment between parts. Even small errors at this stage can affect the final balance and stability of the piece.
Over-sanding is another frequent issue. Excessive sanding on edges can round corners too much and distort the crisp geometry typical of Shaker-style furniture. It’s also vital to account for wood movement, as fastening the top too tightly can cause cracks over time. By taking your time at every stage, you ensure the final result reflects true craftsmanship and durability.
Cost and Time Estimate
On average, this woodworking project takes between eight and twelve hours to complete, spread over several days to allow proper drying and finishing. The total cost varies with the type of hardwood you select. Cherry and oak are popular choices, typically ranging from sixty to one hundred dollars for lumber. Hardware, glue, and finishing materials may add another fifty dollars to your budget.
Compared to purchasing a pre-made piece of similar craftsmanship, building your own offers far greater value. You gain firsthand experience working with natural materials and an appreciation for fine joinery. The process enhances your woodworking knowledge while building confidence with hand tools. Most importantly, you end up with a lasting piece of furniture made by your own han
Real-World Example
Consider the story of Sarah, a woodworking enthusiast from Vermont. Using only hand tools, she crafted her first Shaker-style table from locally sourced cherry wood. Despite working in a small workshop, she approached each step with patience, carefully fitting every joint and applying a natural oil finish by hand. Two years later, her table still stands firm, its surface enriched by a warm patina. Sarah’s experience highlights how craftsmanship, attention to detail, and quality materials can transform a simple traditional woodworking project into a piece that lasts for generations.
Expert Insights and Historical Context
Professional woodworkers often recommend Shaker-style furniture as an ideal project for developing foundational skills. The design challenges your precision while rewarding patience and focus. According to Wikipedia, Shaker furniture continues to influence modern minimalist design, proving that clean lines and functionality remain universally admired. The Shakers’ commitment to craftsmanship without extravagance serves as an enduring lesson for today’s makers.
The enduring appeal of this classic furniture design lies in its balance of utility and beauty. Each element of the project, from the tapered legs to the simple joinery, reflects centuries of refined traditional woodworking.
Conclusion
Building a Shaker End Table is not just a woodworking task; it’s a learning experience that connects you with a long-standing tradition of craftsmanship. The process encourages patience, precision, and respect for materials. From shaping the legs to applying the final coat of finish, each step deepens your understanding of form, proportion, and balance.
When completed, your table will serve as both a functional piece of furniture and a reflection of your woodworking journey. Its timeless design complements any interior, and most importantly, it carries your unique mark as a craftsman, something that mass-produced furniture can never replicate.
FAQs
What type of wood is best for this project?
Maple, cherry, and oak are ideal because they combine durability with aesthetic appeal. Each develops a rich patina over time, adding character to the finished piece.
Can it be built using hand tools?
Yes, although power tools speed up the process, hand tools can achieve equally precise results with care and patience.
How do I get a smooth finish?
Gradually sanding with finer grits, followed by several light coats of finish, will create a professional surface. Always sand in the direction of the grain.
Should I include a drawer?
A drawer adds functionality but requires more precision. For your first project, it’s optional, but mastering it later enhances your skill set.
How can I prevent wood from cracking?
Ensure you use seasoned lumber and attach the tabletop with fasteners that allow for natural movement rather than rigid glue joints.


