Key Takeaways
- DIY wood shutters provide a cost-effective way to enhance your home’s exterior while allowing full customization of design, size, and finish.
- Properly built shutters increase curb appeal, privacy, and protection from sunlight and elements.
- Step-by-step instructions make the process manageable even for beginners.
- Maintenance and finishing tips ensure long-lasting durability and aesthetics.
- Creative design options let you add personal touches to your home exterior.
Why DIY Wood Shutters Are Worth the Effort
DIY wood shutters are an excellent home improvement project that combines functionality, style, and personal satisfaction. Whether you are seeking to improve your home’s appearance, add privacy, or simply enjoy a rewarding woodworking project, building your own shutters is both practical and enjoyable.
Unlike pre-made alternatives, DIY shutters give you complete control over dimensions, wood type, and finish. You can adapt each shutter to perfectly complement your windows and overall exterior design. This guide will cover everything from selecting materials and tools to assembly, installation, and maintenance, ensuring your shutters look professional and last for years.
Benefits of Building Your Own Shutters
- Full Customization: Choose the perfect design, size, and finish to match your home.
- Cost Savings: Save significantly compared to buying pre-fabricated shutters.
- High-Quality Materials: Select durable, weather-resistant wood.
- Skill Development: Enhance your woodworking abilities with hands-on experience.
- Satisfaction and Pride: Completing a project yourself adds personal fulfillment.
Popular Shutter Styles
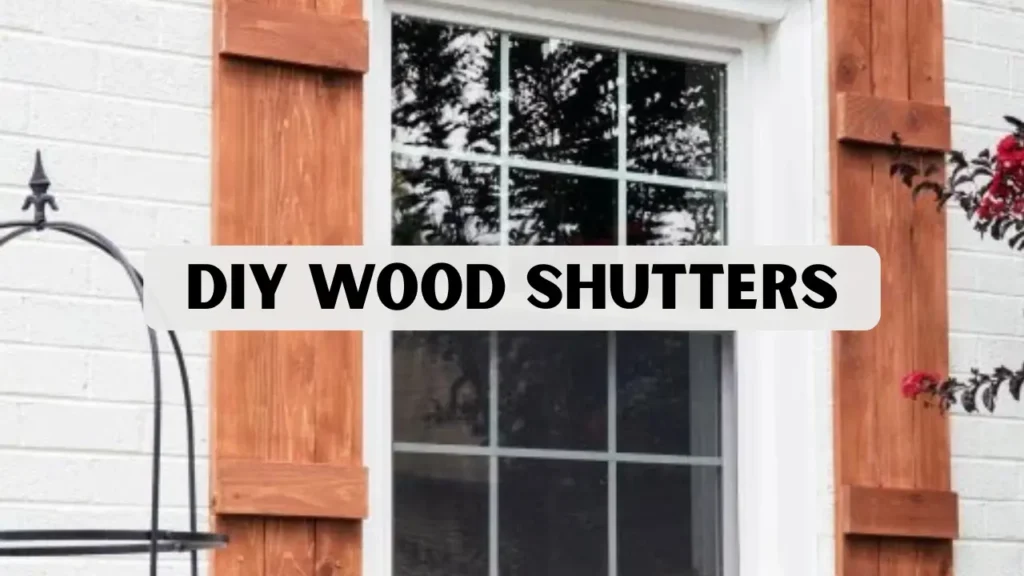
- Board and Batten: A rustic design with vertical boards. Horizontal battens hold them in place. Perfect for DIY wood shutters.
- Louvered: Slatted design that lets in air and light. Slats can be angled for control.
- Raised Panel: Classic and elegant. Decorative panels give a polished look.
- Plantation: Wide slats create a clean, modern appearance. Provides light control and privacy.
- Cafe Style: Covers only the lower half of the window. Offers privacy while letting in natural light.
Materials and Tools Required
Materials
- Wood: Cedar, pine, or redwood are recommended due to their durability and natural resistance to rot.
- Screws: Exterior-grade screws to prevent rusting.
- Hinges: Sturdy hinges capable of supporting the weight of the shutters.
- Paint or Stain: Exterior-grade paint or stain for protection and aesthetic appeal.
- Sealant: Waterproof sealant to prevent moisture damage and warping.
Tools
- Measuring Tape: Essential for accurate dimensions.
- Circular or Miter Saw: For cutting boards to size.
- Drill: To pre-drill holes and attach screws.
- Screwdriver: For driving screws securely.
- Sandpaper or Power Sander: To smooth edges and surfaces.
- Paintbrushes or Sprayer: For applying paint or stain evenly.
- Clamps: To hold boards in place during assembly.
Step by Step Guide
1: Measure Your Windows
Accurate measurements are the foundation of a successful project.
- Measure the width and height of each window precisely. Use a tape measure for accuracy.
- Subtract 1/4 inch from each dimension to account for expansion and contraction of the wood. This ensures a proper fit.
- Record all measurements carefully to ensure uniformity across multiple windows. Double-check before cutting.
2: Select and Cut Your Wood
- Choose high-quality boards free of knots and warping. This ensures durability and a clean finish.
- Cut the boards to the recorded dimensions using a circular or miter saw. Measure twice before cutting.
- Sand all edges to remove splinters and ensure a smooth finish. Check each edge carefully.
- For louvered shutters, cut slats at the desired width and angle. Keep angles consistent for a uniform look.
3: Assemble the Shutter Frame
- Arrange vertical boards on a flat surface. Make sure they are straight and even.
- Attach horizontal battens with wood glue and screws to form the frame. Press firmly for a tight fit.
- Ensure the frame is square and aligned. Use clamps to hold pieces while the glue dries.
- Double-check measurements to avoid misalignment during installation. Adjust if needed before moving on.
4: Install Slats or Panels
- For louvered shutters, insert the slats at a slight angle to allow light and airflow. Make sure each slat is evenly spaced.
- Board and batten shutters require securing battens across the boards evenly. Check that all battens are straight.
- Confirm all pieces are tightly secured and aligned for a professional appearance. Adjust if needed before the glue dries.
5: Sand and Finish
- Sand the entire surface of the shutter to remove any rough spots. Make sure it feels smooth.
- Apply a coat of primer for better paint or stain adhesion. Let it dry completely.
- Apply two coats of exterior-grade paint or stain, allowing adequate drying time between coats. This ensures full coverage and protection.
- Finish with a clear sealant to protect against moisture and UV damage. This helps shutters last longer and stay looking fresh.
6: Attach Hinges
- Attach hinges to the shutters using exterior-grade screws. Make sure screws are tight.
- Pre-drill screw holes in the window frame to prevent wood splitting. This protects the wood from cracking.
- Ensure hinges are evenly spaced to support the shutter’s weight and movement. Proper spacing keeps shutters balanced and easy to open.
7: Install Shutters on Windows
- Use a level to position the shutter correctly against the window frame. Make sure it is straight. This prevents misalignment.
- Secure the hinges to the wall or window trim. Tighten screws firmly. This keeps the shutter stable.
- Check for smooth operation and alignment with the window. Open and close the shutter. Adjust if needed.
- Add optional latches or magnetic catches for added stability. This keeps shutters closed during wind or bad weather.
Maintenance Tips for Longevity
- Dust and clean shutters regularly to prevent buildup. Regular cleaning helps maintain the appearance and prevents dirt from causing surface damage over time.
- Inspect hinges and screws annually for signs of wear and rust. Early detection of loose or corroded hardware ensures smooth operation and prevents structural damage.
- Reapply paint, stain, or sealant every two to three years to maintain protection. This protective layer preserves the wood from moisture, UV rays, and general wear, extending the shutters’ lifespan.
- Avoid exposing untreated wood to excessive moisture. Water can cause warping, cracking, and mold growth, so it’s essential to treat the wood properly or provide adequate shelter.
- Use a soft cloth or brush to clean delicate finishes and avoid scratching. Gentle cleaning preserves the finish and keeps your shutters looking fresh and well-maintained.
Creative Design Ideas
- Two-Tone Finish: Combine colors to create a unique look. Using contrasting or complementary shades can highlight architectural details and add depth to your shutters.
- Decorative Cutouts: Add patterns such as hearts, diamonds, or florals. These cutouts allow light and air to pass through while giving a personalized, charming touch.
- Planter Integration: Include small window boxes for flowers. This not only adds greenery but also creates a cohesive, inviting look for your home exterior.
- Seasonal Accents: Easily attach seasonal decorations without permanent changes. This flexibility lets you refresh your home’s appearance for holidays and special occasions effortlessly.
- Textured Finishes: Use distressing or sanding techniques for a rustic or antique look. Subtle textures can give shutters a handcrafted, timeless appeal that complements many architectural styles.
Common Mistakes to Avoid
- Skipping Measurements: Leads to shutters that do not fit correctly. Always double-check your dimensions before cutting to avoid costly mistakes.
- Using Softwood Without Sealant: Can cause warping and deterioration. Applying a protective sealant ensures the wood withstands moisture and weather over time.
- Neglecting Leveling: Misaligned shutters look unprofessional and can malfunction. Use a level during installation to guarantee perfect alignment and smooth operation.
- Overcomplicating Designs: Start with simple projects to ensure success. Complex designs can increase the risk of errors and may require advanced woodworking skills.
- Ignoring Maintenance: Regular upkeep prolongs lifespan and maintains appearance. Schedule periodic inspections to catch minor issues before they become major problems.
Conclusion
Creating your own DIY wood shutters is a satisfying way to enhance both the look and functionality of your home. Selecting the right wood and carefully planning the design allows you to personalize each shutter to match your style. Every step of the process, from measuring to assembly, helps you improve your woodworking skills. The hands-on experience also brings a sense of accomplishment as you see your project take shape.
Regular maintenance keeps your shutters looking beautiful and ensures long-lasting protection against weather. Finishing touches like paint or stain add both style and durability to your work. By paying attention to detail and taking your time, you can achieve a professional-looking result. Well-crafted DIY shutters not only boost curb appeal but also provide pride in a project completed with care.
Frequently Asked Questions
How long does it take to make DIY wood shutters?
A small set of shutters can typically be completed over a weekend, while larger or more intricate designs may take several days. Proper planning and preparation can reduce construction time.
Which wood is best for exterior shutters?
Cedar, redwood, and treated pine are preferred for outdoor shutters because of their durability, resistance to rot, and ability to withstand weather conditions.
Can DIY shutters be installed on brick or concrete walls?
Yes. Use masonry anchors or specialized screws designed for solid surfaces to secure hinges effectively.
How can I prevent my wood shutters from warping?
Apply a high-quality sealant or paint, allow wood to acclimate before installation, and avoid prolonged exposure to moisture. Proper maintenance also prevents warping.
Are DIY shutters cheaper than buying pre-made shutters?
Yes. While tools and materials may have upfront costs, building your own shutters is generally more cost-effective than purchasing custom options, especially for multiple windows.


