Key Takeaways
- Learn how to build a sturdy and stylish DIY wooden shoe rack with basic tools and affordable materials.
- This guide includes detailed dimensions, assembly instructions, finishing tips, and variations for different spaces.
- Gain insights from real-world woodworking experience, including tips to prevent common mistakes.
- Enhance your home organization while practicing woodworking skills.
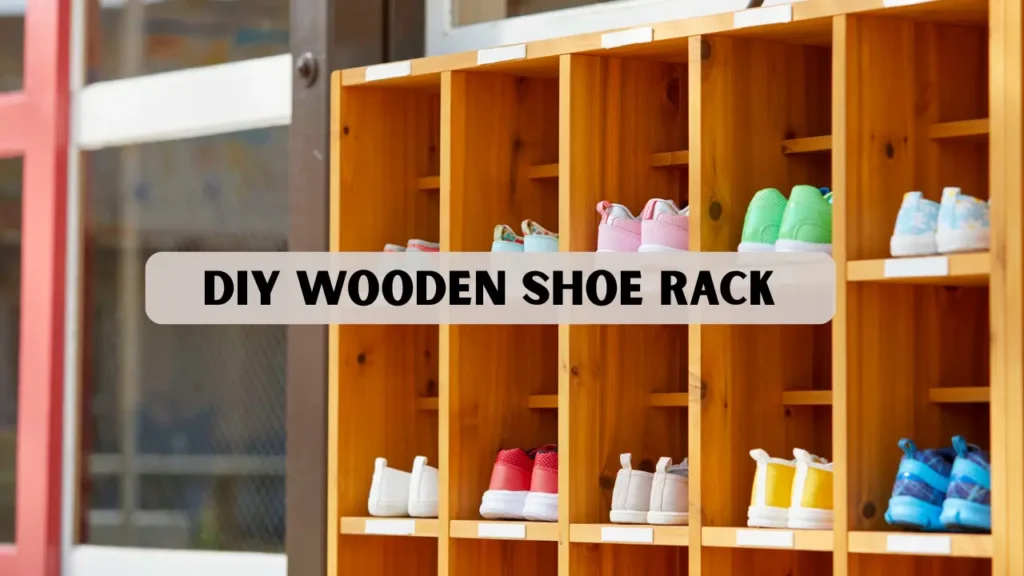
Why Build a DIY Wooden Shoe Rack
A cluttered entryway can be frustrating, and off-the-shelf shoe racks may not match your style or space requirements. A DIY wooden shoe rack allows you to design the perfect fit for your home. It is not only functional but also adds a personal touch to your decor. Whether you are a beginner or an experienced woodworker, this project provides a rewarding balance of utility and craftsmanship.
Creating a wooden shoe rack also teaches fundamental woodworking techniques such as measuring, cutting, sanding, and finishing. These skills are transferable to other home projects, making it a valuable learning experience. A carefully built rack can last for years, helping maintain an organized and visually appealing space.
Materials and Tools Needed
Materials:
- Pine boards 1×10 or 1×8 (for shelves)
- 1×2 pine or poplar (for cleats and support)
- Wood glue
- Wood screws (1¼” and 2″)
- Sandpaper (120, 180, 220 grit)
- Wood filler (optional)
- Stain, paint, or polyurethane for finishing
Tools:
- Tape measure and pencil
- Circular saw or miter saw
- Drill and driver with countersink bit
- Pocket hole jig (optional)
- Clamps (2–4)
- Orbital sander (optional but recommended)
Pro Tips:
- Always measure twice and cut once.
- Dry-fit all parts before final assembly.
- Pre-drill screw holes to avoid splitting.
- Use clamps during glue-up for precise alignment.
Design and Dimensions
For a standard 3-tier DIY wooden shoe rack, the recommended dimensions are:
- Width: 36 inches (adjustable). This provides ample space for multiple pairs of shoes while allowing flexibility to fit different entryways.
- Depth: 12 inches (fits most shoes). The depth accommodates a variety of shoe sizes, from flats to low boots, without shoes hanging over the edge.
- Height: 24 inches (three tiers with 8-inch spacing). The tier spacing ensures enough room for shoes of different heights while keeping the rack compact.
Shelf spacing:
-
8 inches between shelves allows space for sneakers, flats, and low boots. This spacing ensures shoes fit comfortably without crowding and makes them easy to access.
Materials cut list for 36-inch wide rack:
- Side panels: 24″ × 12″ (2 pieces). These form the main structure of the rack and provide support for all shelves.
- Shelves: 36″ × 10″ (3 pieces). They hold the shoes and need to be sturdy enough to support daily use.
- Cleats: 33″ × 1.5″ × ¾” (6 pieces). Cleats reinforce the shelves and ensure they stay level and secure.
- Back battens (optional): 36″ × 1.5″ (4 pieces). Battens add stability to the structure and prevent wobbling over time.
Why these dimensions matter:
- Depth ensures most shoes fit comfortably. This prevents shoes from sticking out and keeps the entryway neat.
- Shelf spacing accommodates a variety of shoe types. It allows both low shoes and short boots to fit without crowding.
- Cleats provide sturdy support while hiding fasteners for a clean look. They make assembly easier and improve the overall appearance of the rack.
Step by Step Assembly Instructions
1: Prepare and Cut Lumber
- Mark and cut all boards according to the plan, taking your time to ensure measurements are precise, as accurate cuts are the foundation of a sturdy shoe rack.
- Sand the edges lightly to remove splinters and imperfections, which also helps the finish adhere better and gives a more professional look.
2: Attach Cleats to Side Panels
- Clamp cleats inside the side panels at 8-inch spacing. Make sure they are perfectly level to provide strong, even support for the shelves.
- Mark screw locations every 6–8 inches. This careful placement helps prevent the wood from splitting during assembly.
- Use a pocket hole jig if you prefer hidden fasteners. It gives the rack a clean, professional look without visible screws.
3: Dry-Fit Shelves
- Place shelves on cleats without glue to check alignment. Make sure each shelf sits evenly and there are no gaps or wobbles.
- Adjust as needed to ensure shelves are flush and level. Take your time to correct any unevenness before moving on to the final assembly.
4: Glue and Screw Shelves
- Apply wood glue to cleat tops. Spread the glue evenly to ensure a strong and lasting bond between the shelf and the cleat.
- Set each shelf in place and clamp securely. Make sure the shelf is perfectly aligned before the glue begins to set.
- Pre-drill and drive screws through the side panels into cleats or use pocket screws from below. This prevents the wood from splitting and strengthens the overall structure.
5: Add Back Battens
- Attach battens across the rear for additional rigidity. Make sure they are level and securely fastened to prevent wobbling.
- Optional: attach a thin plywood back panel for square alignment and extra strength. This also helps keep the rack perfectly square and adds stability over time.
6: Sanding and Finishing
- Fill screw holes with wood filler, sand smooth. This ensures a clean, professional surface ready for finishing.
- Sand the entire unit from coarse to fine grit (120 → 180 → 220). Gradually sanding improves the smoothness and helps the finish adhere evenly.
- Apply stain, paint, or a clear polyurethane coat. Applying two coats of polyurethane enhances durability and provides long-lasting protection.
Pro Tips:
- Let glue and finishes cure completely before loading shoes. This ensures the rack reaches maximum strength and prevents damage to the finish.
- Test each shelf with weight before final placement. Doing so confirms stability and avoids unexpected sagging or failure later.
Variations and Customization
Small Hallway Version
- Width: 24–30 inches; depth: 10 inches. This smaller size is ideal for narrow hallways or tight spaces without compromising storage capacity.
- Angled shelves allow shoes to slide slightly forward for easy access. This design makes it simple to grab or return shoes quickly while keeping the rack organized.
Bench + Shoe Storage Combo
- Increase top depth to 14–16 inches for seating. This provides a comfortable surface to sit on while putting on or taking off shoes.
- Reinforce cleats or add 2×2 supports for strength. Additional support ensures the bench can safely hold weight without sagging or wobbling.
Stackable Modular Design
-
Build individual boxes with finger joints or dowels for expandable storage. This modular design allows you to stack or rearrange the units as needed to fit your space and storage requirements.
Decorative Options
- Add lattice panels for style. This enhances the visual appeal and gives the rack a more decorative, custom look.
- Contrast stain colors between shelves and sides. Using different shades highlights design features and adds depth to the overall appearance.
- Rubber feet protect flooring and reduce movement. They prevent scratches and keep the rack stable on smooth surfaces.
Real-World Experience and Case Study
At CraftWithLathes, we constructed a 36″ × 12″ three-tier DIY wooden shoe rack using reclaimed pine. Key observations:
- Timeline: planning & cuts – 1.5 hours; assembly – 2 hours; finish – 24 hours. Following this schedule ensures the project progresses smoothly and allows proper curing time for finishes.
- Capacity: held 9 pairs of shoes (sneakers, flats) without sagging. This demonstrates the durability and practical functionality of the DIY wooden shoe rack.
- Lesson: racks wider than 40 inches require a center cleat for additional support. Adding this reinforcement prevents sagging and ensures long-term stability.
This real-world application demonstrates both durability and aesthetic value while reinforcing woodworking best practices.
Finishing and Care
Finishing:
- Use solid polyurethane for heavy-use areas. This provides durable protection and ensures the rack withstands daily wear and tear.
- Oil finishes (tung or Danish) give a natural look and require yearly maintenance. They enhance the wood grain while keeping the surface nourished and long-lasting.
- Primer is recommended before painting to block stains. It ensures even coverage and improves the adhesion and durability of the topcoat.
Maintenance Tips:
- Wipe spills immediately. Prompt cleaning prevents stains and protects the wood from moisture damage.
- Tighten screws every six months. Regular checks maintain stability and prevent loosening over time.
- For outdoor or mudroom use, select exterior-grade plywood and finish. This ensures the rack resists moisture and lasts longer in harsh conditions.
Troubleshooting Common Issues
- Uneven shelves: Loosen clamps, adjust high side, and re-clamp. Carefully recheck the level to ensure all shelves are perfectly aligned before the glue sets.
- Visible screw heads: Fill with wood filler, sand, and refinish. This restores a smooth surface and maintains a professional appearance.
- Shelf sagging: Reinforce with a center cleat or support post. Adding this support prevents long-term sagging and keeps the rack stable under weight.
Conclusion
A DIY wooden shoe rack is both practical and a rewarding woodworking project. With careful planning, proper materials, and attention to detail, you can create a durable, stylish storage solution. By following this guide, you will gain woodworking experience, organize your entryway, and add a personal touch to your home.
Frequently Asked Questions
How many pairs of shoes does a 36-inch rack hold?
Typically 6–9 pairs depending on shoe width and arrangement.
Which wood is best for a DIY shoe rack?
Pine is economical and easy to work with. Oak, poplar, or birch provide greater durability.
Can I build this using only hand tools?
Yes, but it will take longer. Power tools make cutting, drilling, and sanding faster.
How can I prevent shelf sag?
Add a center cleat or a plywood strip underneath for reinforcement.
Should I use pocket holes or screws from the outside?
Pocket holes give a clean look; external screws are faster but require filler and finishing.


