Key Takeaways
- Building your own bed frame allows full customization and saves money compared to store-bought options.
- Following a step-by-step guide ensures a sturdy, functional, and stylish frame.
- Proper tools, materials, and finishing techniques help you build a bed frame that is durable and stylish.
- Safety precautions and regular maintenance prolong the life of your bed frame.
- Real-world case studies demonstrate successful DIY projects for inspiration.
Why Build a Bed Frame
Building a bed frame is a rewarding DIY project that combines creativity, practicality, and cost savings. Whether you want a queen-size bed for your master bedroom or a twin for a kid’s room, creating your own frame allows you to tailor every detail to your style and space.
This comprehensive guide will show you how to build a bed frame from start to finish, including planning, measuring, cutting, assembly, finishing, safety tips, and real-world case studies. By the end, even beginners will have the knowledge and confidence to craft a durable and attractive bed frame that will last for years.
Tools and Materials Needed
Before starting, gather all necessary tools and materials. Preparation is key to a smooth and efficient project.
Tools:
- Measuring tape
- Saw (circular or handsaw)
- Drill with screwdriver bits
- Clamps
- Sandpaper or electric sander
- Level
- Safety gear (gloves, goggles)
Materials:
- Hardwood or softwood boards (oak, pine, maple)
- Wood screws and brackets
- Wood glue
- Wood finish (stain, paint, or sealant)
- Optional decorative elements (headboard panels, under-bed storage)
Having everything ready ensures that the building process goes smoothly and prevents delays or mistakes.
Step by Step Process
1. Plan Your Bed Frame
- Determine Size: Measure your mattress to select the appropriate size (twin, full, queen, king). Allow extra space for bedding and any additional features like drawers or storage compartments.
- Design the Frame: Sketch your bed frame, including the headboard, footboard, side rails, and slats. Consider features like under-bed storage or decorative headboards. Visualize the final look to ensure the design complements your bedroom décor.
- Create a Cut List: List all pieces and dimensions needed for the project. This helps prevent mistakes and ensures you purchase the correct amount of wood and materials.
2. Gather Tools and Materials
3. Measure and Mark Wood Pieces
- Accurate Measurements: Measure each piece carefully to match your design. Double-check all measurements before cutting to avoid mistakes that could affect the frame’s stability.
- Mark Cutting Lines: Use a pencil and square to ensure straight, precise lines. Consider using masking tape along the cut line to prevent splintering and achieve a cleaner edge.
- Label Each Piece: Number or label pieces according to your cut list for easy assembly. Keep the labels visible throughout the building process to stay organized and avoid confusion.
4. Cut Wood to Size
- Cutting: Use a handsaw or circular saw to cut wood along the marked lines. Follow your measurements carefully to ensure each piece fits perfectly during assembly.
- Safety: Always wear safety goggles and gloves while cutting. Keep your workspace clear and maintain focus to prevent accidents.
- Smooth Edges: Sand all edges to remove splinters and rough areas. Pay special attention to corners and ends where the mattress or bedding may come into contact.
5. Assemble the Frame
- Attach Side Rails: Use screws and wood glue to attach side rails to the headboard and footboard. Ensure corners are square. Double-check alignment with a level to prevent uneven support or wobbling.
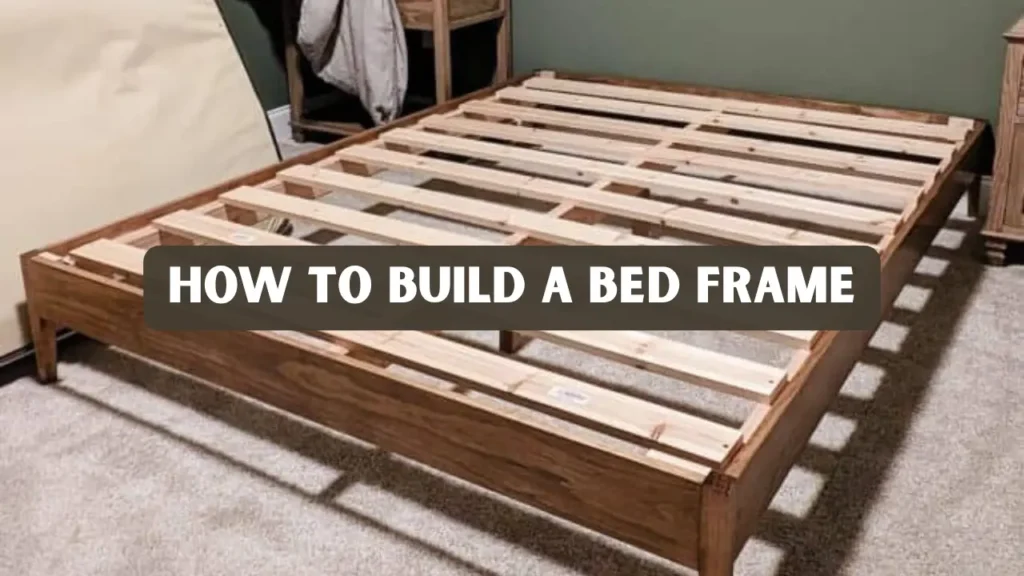
- Install Slats: Place slats evenly across the frame to support the mattress. Secure them with screws. Leave a small gap between slats for proper ventilation and mattress support.
- Add Center Support: For queen or king beds, add a center beam to prevent sagging. Make sure the beam is firmly secured to both the headboard and footboard for maximum stability.
6. Add Finishing Touches
- Sand Thoroughly: Sand the entire frame for a smooth finish. Focus on edges and corners to remove any rough spots or splinters that could cause injury.
- Apply Finish: Use stain, paint, or sealant to protect the wood and enhance aesthetics. Allow each coat to dry completely before applying the next to achieve a durable, even finish.
- Optional Decoration: Add carvings, panels, or built-in storage for a personalized touch. Consider matching the decoration style to your bedroom décor for a cohesive and attractive look.
7. Check Stability and Safety
- Inspect Joints: Ensure all screws are tight and secure. Double-check corners and connections to prevent any wobbling or instability over time.
- Test the Frame: Place the mattress on the bed and gently press to check stability. Walk around and apply pressure in different areas to confirm even support across the entire frame.
- Maintenance: Regularly check screws and tighten as needed to maintain strength and safety. Also, inspect the wood for cracks or wear and address any issues promptly to prolong the life of your bed frame.
Case Study: DIY Bed Frame Success Stories
- Jane built a custom queen-size wooden bed frame over a weekend, following precise measurements and using high-quality materials. The result was a sturdy, stylish, and cost-effective bed that perfectly matched her bedroom decor.
- Mark constructed a minimalist twin bed frame using pine wood and simple tools, completing it in just two days. The project allowed him to build a frame that was durable, functional, and added a modern touch to his small apartment bedroom.
These case studies demonstrate that even beginners can achieve professional-looking results by following proper steps, using quality materials, and taking time to plan the project carefully.
Safety and Maintenance Tips
- Use Safety Gear: Always wear gloves and goggles when cutting or drilling wood. Proper protective equipment helps prevent injuries and ensures a safer working environment.
- Work in a Ventilated Area: When applying stain, paint, or sealant, ensure good airflow to avoid fumes. Open windows or use fans to maintain fresh air while finishing your project.
- Regular Inspections: Check screws, joints, and slats periodically to maintain stability. Address any loose parts immediately to prevent accidents or damage.
- Cleaning: Dust and clean the frame regularly to preserve finish and prolong the wood’s life. Use a soft cloth and mild cleaner to avoid scratching or harming the finish.
- Weight Limit: Avoid placing excessive weight on the bed frame to prevent damage. Refer to the manufacturer’s mattress guidelines or the type of wood used to determine safe weight limits.
Conclusion
Building a bed frame is a fulfilling and cost-effective DIY project. With careful planning, precise measurements, and quality materials, you can create a piece that is both functional and stylish. Paying attention to safety throughout the process ensures a secure and durable structure. This project allows you to customize every detail to perfectly fit your bedroom.
By choosing the right design and following step-by-step instructions, you can build a bed frame that meets your exact needs. Real-world case studies show that both beginners and experienced DIYers achieve excellent results. The process is rewarding, offering satisfaction that store-bought options cannot provide. With proper maintenance, your bed frame will remain sturdy and attractive for years.
FAQs
What type of wood is best for a bed frame?
Hardwoods like oak and maple are durable and provide a high-quality finish. Softwoods like pine are easier to work with and more affordable.
How long does it take to build bed frame?
A simple bed frame can be completed in 1–2 days, while more complex designs may take longer.
Can I build a bed frame without advanced tools?
Yes, basic tools like a saw, drill, measuring tape, and clamps are sufficient. Power tools make the process faster but are not mandatory.
How do I ensure my bed frame is stable?
Use sturdy wood, tighten all screws and joints, and add a center support beam for larger beds.
Can I customize the design of my bed frame?
Absolutely. DIY bed frames allow you to personalize size, finish, headboard design, and even add storage solutions.


