Key Takeaways
- Learn how to build a crate using standard woodworking tools
- Understand materials, joinery options, and crate design choices
- Explore safety guidelines and expert recommendations
- Includes two real case studies with practical insights
Why Build A Crate
Wooden crates are highly versatile and durable storage solutions that fit perfectly into any workshop. They can be used as rustic decor pieces, practical storage boxes or sturdy shipping containers. When you know how to build a crate, you gain complete control over size, style and function. This flexibility saves money and helps you create pieces that match your exact needs.
Building crates also teaches valuable woodworking skills that improve your craftsmanship over time. You learn accurate cutting, strong assembly techniques and proper alignment for stable structures. The process also strengthens your ability to work safely with power tools and essential workshop equipment. These skills benefit every future woodworking project you take on.
Materials and Tools You Will Need
Materials
- Pine, cedar or plywood boards
- 1×3 or 1×4 planks for slats
- 1×2 boards for corner braces
- Wood glue
- 1 1/4 inch wood screws
- Optional: stain, varnish, paint
Tools
- Tape measure
- Carpenter’s square
- Miter saw or circular saw
- Drill and driver bits
- Clamps
- Sandpaper (80, 120 and 220 grit)
Using reliable tools makes the process smoother and safer. Beginners should take time to measure twice before cutting since accuracy improves the final fit and strength.
Step by Step Process
Step 1: Plan Your Crate Dimensions
Before you begin cutting wood, determine the exact size of your crate. Standard crate dimensions are 18 x 12 x 12 inches, but you can adjust based on what you plan to store.
A good rule is to keep the crate proportional so it stays balanced when lifted. Taller crates may require thicker corner bracing. Wider crates may require additional support slats.
This planning step ensures the crate can handle the weight of the items while remaining stable during movement.
Step 2: Cut the Panels and Slats
Cut the following pieces:
- Two side panels
- Two end panels
- One bottom panel
- Multiple slats for the upper sections
Cutting clean edges ensures tighter joints during assembly. If you are new, practice cutting a few scrap pieces to maintain straight cuts. You can use a miter saw for precision or a circular saw guided by a straight edge for longer boards.
Step 3: Build the Frame of the Crate
Assemble the main frame first. You will attach the corner braces (1×2 boards) vertically on all four inner corners. These braces add rigidity and greatly improve the strength of the crate.
Apply glue along the edges of each corner brace and hold them in place using clamps. Pre drill holes to avoid splitting and drive the screws carefully.
This structure forms the skeleton of your crate and ensures perfect alignment when adding panels and slats.
Step 4: Attach the Bottom Panel
Place the bottom panel on a flat surface. Position the frame on top of it and align all edges. Use screws spaced evenly across the bottom perimeter.
This step determines how well your crate will carry heavy loads. A crooked bottom panel can destabilize the entire structure. Using clamps helps secure the frame tightly while you fasten the screws.
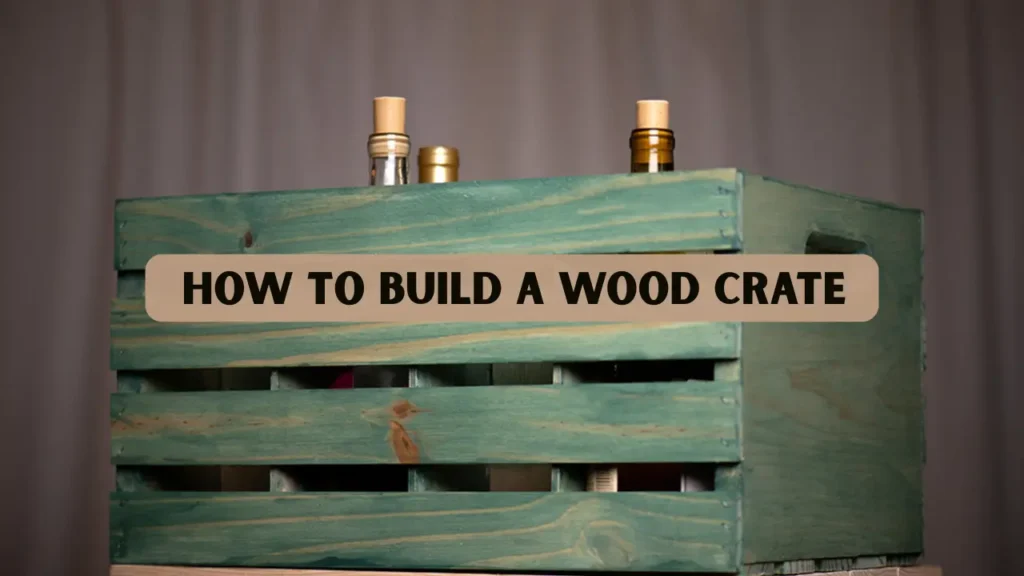
Step 5: Add the Side Slats for Ventilation and Strength
Most classic crates include multiple horizontal slats rather than full solid panels. This design allows air flow, reduces weight and provides a rustic look.
Attach the slats on the sides and ends with even spacing. Your spacing can vary based on aesthetic preference but make sure the gaps are consistent. A carpenter square helps maintain accuracy.
Step 6: Sand Every Surface Smooth
A good crate should not have rough edges or splinters. Sand the entire structure starting with 80 grit and progressively moving to 120 and 220 grit. Smooth sanding improves the finish and makes the crate safer to handle.
If the crate will be used indoors, you may want a softer feel. Outdoor crates may require wood protection such as varnish or exterior paint.
Step 7: Apply Finish or Protective Coating
Finishing enhances both appearance and durability. You can choose:
- Clear varnish for a natural wood look
- Rustic stain for darker character
- Paint for themed decor crates
Outdoor crates should be coated with weather resistant sealant. Indoor crates for decor may use matte finishes for a contemporary appearance.
Case Study
- A small workshop in Tennessee built forty crates for a local fruit farm. By switching from full panels to slatted sides, they reduced material usage by almost thirty percent while making the crates easier to lift. Customers reported increased ventilation that helped preserve produce longer.
- A home based craft seller created custom decorative crates for holiday markets. By sanding and staining each crate carefully, they achieved a premium look which increased sales significantly. Buyers appreciated the smooth finish, which showed attention to quality.
Expert Tips for Better Crate Building
- Always Pre Drill Holes: This prevents wood from splitting and helps screws sit flush. Pre-drilling also ensures cleaner assembly and improves the overall strength of each joint.
- Use Strong Glue + Screws: The combination ensures long-term durability and reduces wobble. This dual method creates a tighter bond that holds up well under repeated use.
- Check Alignment Every Few Steps: Even minor misalignment early on can affect the final look. Regular checks also make the build process smoother and reduce the need for rework later.
- Test Weight Capacity: Place a heavy item inside and gently lift the crate; if the joints feel loose, reinforce them before use. This quick test ensures your crate is reliable and safe for everyday handling.
Choosing the Right Wood for Crate Building
Different woods offer different benefits.
- Pine: Affordable and easy to cut, making it ideal for beginners. It also accepts paint and stain well, allowing you to customize the crate’s final look.
- Cedar: Naturally resistant to insects and moisture, making it suitable for outdoor crates. Its pleasant aroma and lightweight feel add extra value for decorative projects.
- Hardwood: Strong and long lasting but heavier and harder to cut, making it good for high-capacity crates. This wood type provides superior durability for crates that handle frequent or heavy use.
Regardless of the wood type you choose, ensure the boards are straight and free from large knots. High moisture wood can warp over time.
Common Mistakes Beginners Make
- Using Thin Screws: Thin screws strip easily and weaken the structure. Always choose thicker, high-quality wood screws to ensure strength and long-term durability.
- Skipping Sanding: Rough edges result in a poor finish and uncomfortable handling. Proper sanding makes the crate safer to use and gives it a polished, professional look.
- Incorrect Spacing of Slats: Uneven slats make the crate look unprofessional. Consistent spacing helps maintain visual balance and adds stability to the overall frame.
- Not Checking Square: A crate should be perfectly aligned, and you should measure diagonally across corners since both measurements must match. Ensuring the crate is square prevents wobbling and improves its load-bearing capacity.
Safety Guidelines
Safety is essential when working with power tools.
- Always wear safety glasses: Protect your eyes from wood chips, dust, and flying debris. This simple step prevents serious injuries in the workshop.
- Tie back long hair: Keep hair secured to avoid it getting caught in power tools. Loose hair can be extremely dangerous around rotating equipment.
- Keep fingers clear of blades: Maintain a safe distance from saws, drills, and other cutting tools. Using push sticks or guides further reduces the risk of injury.
- Work on a stable surface: Ensure your workbench or table does not wobble during cutting or assembly. A stable surface improves accuracy and prevents accidents.
- Unplug tools when changing blades: Always disconnect power before adjusting or replacing blades. This precaution stops accidental activation and keeps you safe.
These precautions help prevent accidents, especially for new woodworkers learning to build a crate.
Where a Wooden Crate Can Be Used
Wooden crates offer endless applications:
- Storage in workshops: Wooden crates are perfect for organizing tools, hardware, and materials efficiently. They keep your workspace tidy and accessible.
- Toy boxes: Crates make sturdy and safe toy boxes for children. They can be customized with paint or labels for easy organization.
- Bookshelves: Stacked crates can double as unique bookshelves. Their rustic look adds charm to any room while providing functional storage.
- Garden planters: Crates can be converted into planters for flowers, herbs, or vegetables. Proper drainage ensures healthy plant growth.
- Rustic decor pieces: Wooden crates enhance interior decor with a rustic or vintage style. They can serve as side tables, storage benches, or wall shelves.
- Retail product displays: Crates are ideal for displaying products in shops or markets. They create a visually appealing, organized presentation.
- Transporting goods: Sturdy crates provide a safe way to transport fragile or heavy items. Their solid construction prevents damage during movement.
- Organizing craft supplies: Crates help keep crafting materials neatly sorted. Labeling each crate improves efficiency and accessibility.
Because of their strength and charm, crates are one of the most adaptable woodworking projects for any skill level.
Adding Personalization to Your Crate
You can customize your crate with engraving, stencils, colors or decorative rope handles. Personalization helps your work stand out and increases the resale value if you sell handcrafted items.
Conclusion
Learning how to build a crate is a rewarding woodworking project that enhances your craftsmanship, builds confidence and offers endless storage and decor possibilities. Whether you are making crates for shipping, craft markets, farms or home storage, following the detailed steps in this guide will help you create crates that are strong, stylish and long lasting.
Continue refining your technique, experiment with different finishes and always prioritize safety. With practice, you can turn crate building into a profitable skill or a reliable weekend hobby.
FAQs
What is the best wood to use when I build a crate?
Softwoods like pine are affordable and easy to work with; hardwoods (oak, maple) are stronger and better for decorative/retail crates.
Can I build a diy crate from pallet wood?
Yes but inspect pallets carefully for chemical treatments. Use a magnet to find nails and plan for extra sanding/planing.
How many screws should I use per board?
Use two screws per side board (one near each end), plus glue. For heavy-duty crates, add interior corner blocks and extra screws.
Should I use glue or nails?
Glue + screws are recommended for long-term strength and the ability to disassemble later if needed. Nails are quicker but less durable.
How long will it take to build a wooden crate?
A basic crate can be built in 1–3 hours with a miter/circular saw and drill; add time for finishing and decorative lathe work.


