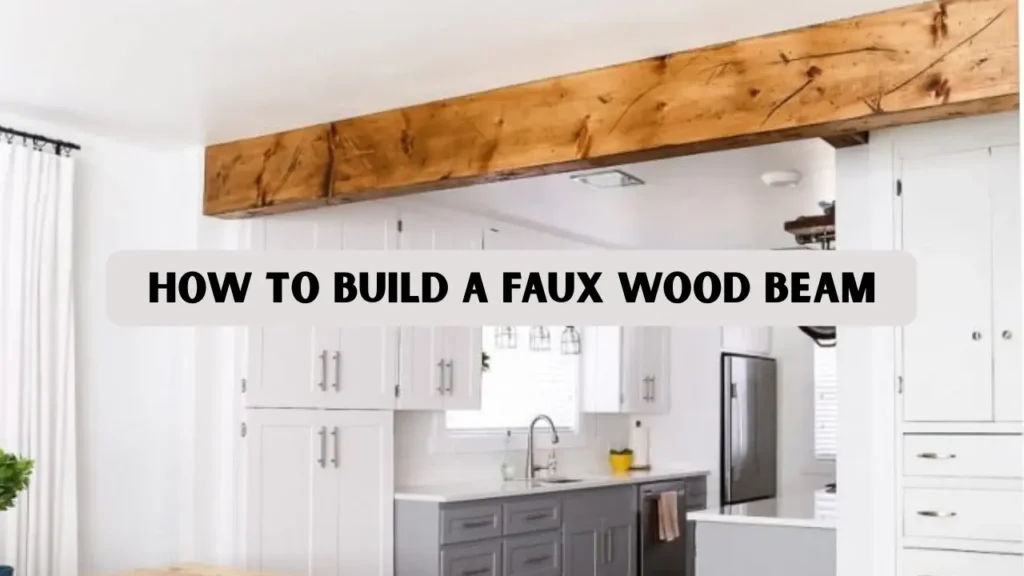
Faux wood beams have become a popular choice among homeowners and interior designers seeking to add architectural interest to their spaces without the hefty price tag of solid wood. These lightweight alternatives mimic the appearance of traditional wooden beams while being much easier to handle. They can be customized to suit various design aesthetics, from rustic farmhouse charm to modern industrial style. This flexibility makes them ideal for almost any room in your home.
Whether you’re looking to update your living room, kitchen, or any other area, learning how to build a faux wood beam can be a rewarding DIY project. It allows you to achieve a professional-looking finish without hiring expensive contractors. With the right materials, tools, and guidance, even beginners can create beams that look realistic. The result is a transformed space with added warmth, character, and architectural appeal.
Key Takeaways
- Learn how to build a faux wood beam to achieve the look of real wood without the weight or cost.
- Proper planning and measurement are crucial for a seamless installation.
- DIY faux beams can significantly enhance the ambiance of any room.
- Utilizing quality materials ensures durability and a professional finish.
- Incorporating design elements like distressing or staining can add character to your beams.
Why Build Faux Wood Beams
Faux wood beams are more than just decorative elements; learning how to build a faux wood beam offers several practical and aesthetic advantages:
- Cost-Effective: Unlike solid wood beams, faux beams are lightweight and affordable, saving you both money and labor costs. They are a budget-friendly way to achieve the look of real wood without expensive structural work.
- Lightweight and Easy to Install: They don’t require structural support, making them perfect for DIY projects. This allows homeowners to complete the installation quickly and with minimal help.
- Customizable: Faux beams can be cut, painted, or stained to match any décor style, from rustic farmhouse to modern minimalism. You can also add textures or distressing to create a unique, personalized look.
- Low Maintenance: Unlike real wood, they are resistant to warping, cracking, and insect damage. Routine dusting and occasional cleaning are all that’s needed to keep them looking great.
- Aesthetic Appeal: Faux beams instantly add warmth, character, and architectural interest to a room, increasing its visual appeal. They can dramatically transform a plain ceiling into a focal point in your home.
Materials and Tools Needed
Materials:
- 1×6 or 1×8 boards for the sides
- 1×4 boards for the top and bottom
- Wood glue
- Finishing nails or screws
- Wood filler
- Wood stain or paint
- Polyurethane sealant
Tools:
- Measuring tape
- Miter saw or circular saw
- Drill with screwdriver bits
- Clamps
- Sandpaper (medium and fine grit)
- Paintbrush or rag for staining
How to Build a Faux Wood Beam: Step by Step Process
Step 1: Planning and Measuring
Before you begin, it’s essential to plan the design and placement of your faux wood beams:
- Determine Placement: Decide where you want to install the beams. Common locations include across the ceiling in living rooms, kitchens, or hallways.
- Measure Dimensions: Measure the length and width of the area to ensure your beams fit appropriately. Double-check all measurements to avoid mistakes during cutting and installation.
- Design Style: Choose a design that complements your existing décor. For a rustic look, consider using reclaimed wood or applying a distressed finish.
Step 2: Cutting the Wood
With your measurements in hand, proceed to cut the wood:
- Side Panels: Cut two pieces of the 1×6 or 1×8 boards to the desired length of your beam. These will form the sides. Double-check the measurements to ensure both panels are identical for a balanced beam.
- Top and Bottom Panels: Cut two pieces of the 1×4 boards to match the width of the side panels. These will serve as the top and bottom of the beam. Sand the edges lightly to remove splinters and ensure a smooth fit.
- Assembly: Dry fit the pieces together to ensure they align correctly before securing them. Make any necessary adjustments to guarantee a tight, gap-free assembly.
Step 3: Assembling the Beam
Assemble the beam structure:
- Apply Wood Glue: Apply a thin layer of wood glue along the edges where the side panels meet the top and bottom panels. Make sure the glue is spread evenly to create a strong, seamless bond.
- Secure with Nails or Screws: Use finishing nails or screws to attach the panels, ensuring they are flush and square. Check alignment frequently to prevent gaps or misalignment during assembly.
- Clamp and Dry: Clamp the assembled beam and allow the glue to dry according to the manufacturer’s instructions. Leave the clamps in place long enough to ensure maximum adhesion and stability.
Step 4: Sanding and Finishing
Achieve a smooth and polished appearance:
- Sand the Beam: Once the glue has dried, sand the entire beam using medium-grit sandpaper, followed by fine-grit sandpaper for a smooth finish.
- Apply Stain or Paint: Choose a wood stain or paint that matches your desired aesthetic. Apply evenly and allow it to dry completely.
- Seal the Beam: Apply a coat of polyurethane sealant to protect the finish and enhance durability. Allow the sealant to dry completely before installing the beam to ensure a long-lasting, smooth finish.
Step 5: Installing the Faux Wood Beam
Install the beam securely:
- Locate Ceiling Joists: Use a stud finder to locate the ceiling joists where the beam will be mounted. This ensures the beam is securely attached to a solid structure, preventing sagging or movement.
- Mark Placement: Mark the desired location of the beam on the ceiling. Double-check measurements to ensure the beam aligns properly with other beams or room features.
- Attach the Beam: Using screws or brackets, attach the beam to the ceiling joists, ensuring it is level and securely fastened. Have a helper hold the beam in place while securing it for safety and precision.
Case Study
- In Austin, Texas, the Smith family updated their living room ceiling by installing two 12-foot hollow faux wood beams using 1×6 pine boards stained in dark walnut, completing the project over a weekend for under $300 and achieving a professional, high-quality look.
- Similarly, in Seattle, Washington, the Johnson family transformed their kitchen by learning how to build a faux wood beam, adding three 10-foot hollow beams with 1×8 boards and a medium oak stain. The DIY project took two weekends for around $400, resulting in a cozy, rustic ceiling that dramatically enhanced the space.
Design Ideas for Faux Wood Beams
Enhance your space with creative beam designs:
- Coffered Ceiling: Install multiple beams in a grid pattern for a coffered ceiling effect. This creates depth and dimension, giving the room a luxurious, architectural appeal.
- Accent Beams: Place a single beam over a focal point, such as a fireplace or dining area. It draws attention to the area and adds a sense of balance to the space.
- Contrasting Colors: Use beams in a contrasting color to the ceiling for a striking visual impact. This technique highlights the beams and makes the ceiling a design feature rather than just a background element.
- Decorative Brackets: Add corbels or brackets at the ends of the beams for added detail. These accents enhance the authenticity of the beam and complement the overall décor style.
Conclusion
Building and installing faux wood beams is a rewarding DIY project that can completely transform the look and feel of your space. By choosing the right materials and carefully planning your design, you ensure a smooth and enjoyable construction process. Faux beams are versatile and can complement a variety of interior styles, from rustic farmhouse to modern minimalism. This makes learning how to build a faux wood beam a practical choice for any DIY enthusiast.
Following the step-by-step process outlined above allows you to achieve a professional-looking result with lasting impact. Proper assembly, finishing, and installation create a polished appearance that adds warmth and character to your home. Faux wood beams also offer a cost-effective alternative to real wood while maintaining a high-end aesthetic. With attention to detail, your DIY faux beams will become a striking focal point in any room.
FAQs
Q1: Are faux wood beams durable?
Yes, when constructed with quality materials and properly sealed, faux wood beams are durable and long-lasting.
Q2: Can faux wood beams be used outdoors?
Most faux wood beams are designed for indoor use. For outdoor applications, ensure the materials are weather-resistant or treated for exterior use.
Q3: How do I maintain faux wood beams?
Regular dusting and occasional cleaning with a damp cloth are sufficient. Avoid harsh chemicals that may damage the finish.
Q4: Can I install faux wood beams myself?
Yes, with basic carpentry skills and the right tools, installing faux wood beams is a manageable DIY project.
Q5: Do faux wood beams add value to my home?
While they don’t add structural value, faux wood beams can enhance the aesthetic appeal of your home, potentially increasing its marketability.


