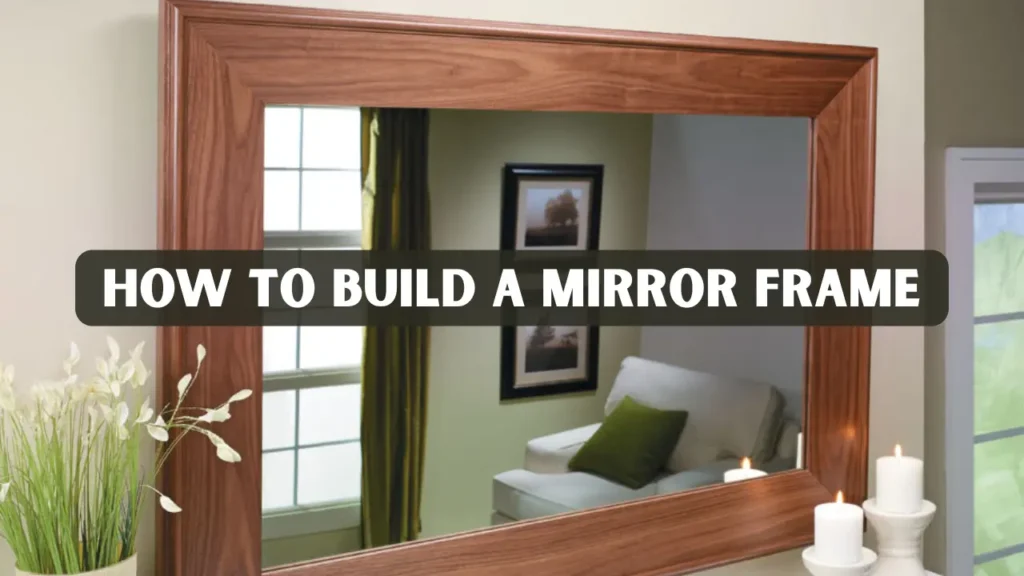
Learning how to build a mirror frame is one of the most rewarding woodworking projects for homeowners and DIY enthusiasts. It adds beauty, durability, and a touch of craftsmanship to any room. Whether your goal is to frame a plain bathroom mirror or build a decorative wall piece from scratch, the process is achievable with the right planning and tools.
This detailed guide walks you through every stage, from selecting materials to finishing your frame with precision. Drawing from real-world woodworking experience, you will learn professional tips that make your frame strong, stylish, and long-lasting.
Key Takeaways
- Building a mirror frame enhances your space with both style and craftsmanship.
- You can frame an existing wall mirror or build a framed mirror entirely from scratch.
- Choose the right materials such as pine, oak, or reclaimed wood for your desired aesthetic.
- Use accurate measurements and apply high-quality finishes for professional-looking results.
- This guide combines expert tips, real woodworking experience, and case studies to help you learn how to build a mirror frame effectively.
Why Build a Mirror Frame?
Before diving into the technical steps, it’s worth asking why build a mirror frame yourself instead of buying one?
- Customization: Store-bought mirrors often come in limited styles. Building your own frame lets you match the size, wood type, and color to your exact room decor.
- Cost Efficiency: High-quality framed mirrors can be expensive. With basic tools and lumber, you can create a professional-looking frame for a fraction of the price.
- Skill Building: The process teaches valuable woodworking skills; measuring, cutting, sanding, and finishing that can be applied to many future projects.
- Sustainability: Using reclaimed wood or leftover materials reduces waste and adds rustic charm.
- Personal Satisfaction: Completing a handmade frame delivers a sense of accomplishment and pride.
Building a mirror frame combines creativity with practicality, it’s an ideal project for anyone passionate about woodworking and home design.
Materials and Tools Checklist
Before starting, gather all the necessary materials and tools. Preparation ensures a smooth and safe building process.
Materials
- Mirror (existing or new)
- Wood boards (pine, poplar, oak, or reclaimed wood)
- Wood glue or construction adhesive
- Finishing nails or screws
- Sandpaper (120 and 220 grit)
- Paint or stain with sealant
- Mounting hardware (D-rings, French cleat, or anchors)
- Optional trim or molding for decoration
Tools
- Tape measure
- Miter saw or miter box with saw
- Clamps
- Pencil and square
- Paintbrush or staining rag
- Level and safety equipment (gloves and goggles)
Planning the Design and Measurements
Every great woodworking project starts with accurate planning. A mirror frame’s proportions determine its final appearance and durability.
- Measure Carefully: Record the mirror’s exact height and width. Double-check your measurements before cutting to ensure the frame fits perfectly without gaps.
- Decide Frame Width: Choose between 2–4 inches wide depending on design preference. Wider frames create a bold statement, while narrower ones keep the look minimal and modern.
- Select Joint Type: Mitered corners provide a clean edge, while butt joints are beginner-friendly. Pick a style that matches your skill level and complements the mirror’s overall shape.
- Account for Mirror Clips: Mark clip positions to notch later if needed. This prevents the frame from sitting unevenly and ensures the mirror stays securely in place once mounted.
These planning steps ensure perfect alignment and a professional outcome.
Step-by-Step: How to Build a Mirror Frame (Framing an Existing Wall Mirror)
Step 1: Measure and Cut the Frame Pieces
The first step in how to build a mirror frame is precise cutting. Measure twice and mark your wood clearly. Set your saw to 45 degrees for miter joints and cut two long and two short pieces. Test fit the corners before gluing to ensure a clean, even look.
Step 2: Check Fit and Notch for Mirror Clips
Lay your frame pieces around the mirror to test the fit. If wall clips prevent a flush fit, mark their locations and use a chisel to create small notches. This ensures your frame sits flat against the surface.
Step 3: Assemble the Frame
Apply wood glue to the mitered ends, align carefully, and clamp the frame. Let it dry overnight. For strength, add brad nails or corner brackets on the back. Check alignment again once dry.
Step 4: Finish the Wood
Sand the surface with 120-grit and then 220-grit sandpaper for smoothness. Apply stain or paint depending on your design choice. Seal with polyurethane for moisture resistance especially in bathrooms.
Step 5: Attach the Frame
Apply construction adhesive to the backside edges, avoiding the visible surface. Press the frame gently against the mirror, tape it in place, and let it dry. Remove the tape once the adhesive cures completely.
Building a Framed Mirror from Scratch
For those creating a new mirror entirely, follow these steps.
Step 1: Create a Backing Board
Cut an MDF or plywood sheet matching your mirror’s dimensions. Center the mirror, trace its outline, and apply silicone adhesive. Let it set according to the instructions.
Step 2: Build and Attach the Frame
Assemble your frame using mitered or butt joints. Once solid, position it over the mirror and attach it to the backing with screws or finishing nails. Make sure the mirror remains centered.
Step 3: Add Mounting Hardware
Install D-ring hooks or a French cleat system for safe hanging. For heavier mirrors, secure the hardware into wall studs or use strong anchors.
Choosing the Right Wood for Your Mirror Frame
Your wood choice affects the look, durability, and finish.
- Pine or Poplar: Affordable and easy to paint. These woods are ideal for beginners because they’re lightweight and simple to cut or shape.
- Oak or Maple: Durable and excellent for staining. Their rich grain patterns make them perfect for classic or high-end mirror frame designs.
- Reclaimed Wood: Rustic appeal with sustainability. Using salvaged wood adds character and reduces waste, giving your project an eco-friendly touch.
- MDF or Plywood: Great for painted, modern styles. These materials offer a smooth finish and are budget-friendly options for contemporary décor.
Select wood that complements your decor and withstands the environment it’s placed in.
Expert Tips from Real-World Woodworking Experience
- Use corner clamps to keep joints tight during gluing. This ensures perfect alignment and prevents gaps that could weaken the frame’s structure.
- Test stains on scrap pieces before applying. Doing so helps you confirm the final color and finish before committing to the main frame.
- Sand between coats for a smooth, polished result. Light sanding removes dust particles and gives the surface a professional-grade texture.
- Apply sealant evenly to avoid drips. A steady hand or foam brush helps maintain a clean, uniform protective layer across the wood.
- Always check your level before adhesive dries. This ensures the mirror sits straight and balanced, avoiding future alignment issues.
These small details create a professional-looking finish.
Safety and Installation Guidelines
- Wear gloves and goggles for safety. They protect your hands from sharp glass edges and your eyes from wood dust or debris.
- Work on a padded, flat surface. This prevents scratches on the mirror and keeps it stable while you attach the frame.
- Avoid heavy pressure that might crack glass. Handle the mirror gently, especially when adjusting or aligning the frame.
- For large mirrors, get a partner to assist. Extra help reduces the risk of dropping or damaging both the frame and mirror.
- Always secure hardware into solid supports. This ensures the finished mirror stays firmly anchored to the wall without risk of falling
Finishing Techniques for a Professional Look
Staining Tips:
- Use pre-stain conditioner on porous woods. This helps prevent blotching and ensures the stain absorbs evenly across the entire surface.
- Wipe off excess after 10 minutes for even tone. Allowing the stain to sit briefly enhances the richness of color without dark patches.
- Seal with two coats of polyurethane. Multiple coats provide long-lasting protection and add a professional, glossy finish to your mirror frame.
Painting Tips:
- Prime before painting. A good primer improves paint adhesion and helps the color last longer without peeling or fading.
- Paint visible edges to avoid reflections. Covering every exposed edge ensures a neat appearance and prevents unwanted light glare.
- Choose satin or semi-gloss for easy cleaning. These finishes resist moisture and are simple to wipe down, keeping your mirror frame looking fresh.
Common Mistakes to Avoid
- Skipping dry fits before gluing. Always assemble the pieces without glue first to confirm alignment and ensure everything fits properly.
- Applying too much adhesive. Excess glue can squeeze out and stain the wood, so use a thin, even layer for cleaner joints.
- Not checking for level during installation. A tilted mirror frame can ruin the final look, so use a level before the adhesive sets.
- Forgetting to seal stained surfaces. Unsealed wood can absorb moisture or fade over time, so always protect it with a topcoat.
Avoiding these mistakes ensures durability and quality.
Case Study: Real Examples of DIY Mirror Frame Projects
- A homeowner upgraded a plain bathroom mirror using reclaimed oak boards, completing the frame in two days for under $40, giving the space a rustic and handcrafted look.
- Similarly, another DIY enthusiast built a modern black-painted frame for their hallway mirror, spending just one weekend and achieving a sleek, professional finish that perfectly matched their interior design.
Both examples show how to build a mirror frame that combines creativity, affordability, and personal style.
Conclusion
Now that you understand how to build a mirror frame, you can transform a simple mirror into an elegant, handmade piece that enhances any room. Whether your design leans rustic or modern, following proper measurement, assembly, and finishing steps ensures lasting beauty.
By applying care and precision, you’ll not only save money but also gain woodworking experience and satisfaction from crafting something with your own hands.
Measure carefully, work patiently, and enjoy seeing your reflection in a frame you built yourself.
FAQs
Can I frame a mirror without removing it from the wall?
Yes, apply adhesive directly to the frame and notch around existing clips.
Which finish is best for bathroom mirrors?
Polyurethane over paint or stain protects against moisture and extends lifespan.
How do I hang a heavy framed mirror?
Use a French cleat system or secure D-rings into wall studs for stability.
How long does it take to complete?
Most DIY mirror frames can be finished in one to two days.


