Key Takeaways
- A treehouse bunkbed is a perfect woodworking project for DIY lathe enthusiasts, combining creativity, craftsmanship, and functional design.
- This guide includes step-by-step instructions, materials, lathe-turned components, joinery techniques, and safety tips to help you build a durable, child-friendly treehouse-style bunk bed.
- Following this guide will help woodworkers produce a standout furniture piece while demonstrating lathe skills and woodworking expertise.
Why a Treehouse Bunkbed is a Great DIY Project
Building a treehouse bunkbed is more than constructing a piece of furniture. It is a way to showcase woodworking skills, particularly lathe work, while creating a unique, interactive space for children. Here are several reasons why this project is appealing for DIY woodworking enthusiasts:
- It allows the use of decorative turned posts, finials, and spindles, which demonstrate advanced lathe skills.
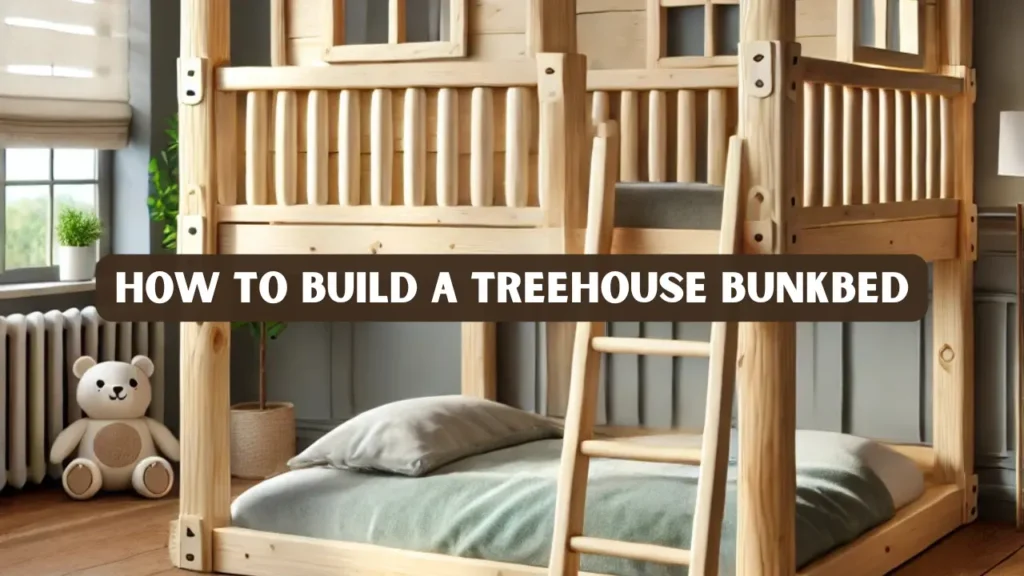
- The bed combines functionality with creativity, providing both sleeping areas and a playful, treehouse-inspired aesthetic.
- This project has a high shareability factor. Images and videos of treehouse bunk beds are popular on social media, including Pinterest and DIY woodworking communities.
- It provides an opportunity to teach children the importance of woodworking craftsmanship, safety, and creativity.
The combination of function, design, and hands-on woodworking makes this a standout DIY project that is both practical and visually impressive.
Planning Your Bunkbed
A well-planned project saves time, reduces errors, and ensures safety. Planning your treehouse bunkbed involves designing, measuring, and selecting materials carefully.
Design Goals
- Stability: Secure sleeping surfaces for two children, with a strong upper bunk and reinforced lower bunk.
- Aesthetic appeal: Treehouse-style façade with decorative lathe-turned posts, spindles, and finials.
- Playful features: Optional ladder, slide, or reading nook can be integrated into the design.
- Safety: Guardrails, wall anchors, and child-friendly spacing between spindles.
Recommended Dimensions
- Twin mattresses: 38 inches by 75 inches (standard)
- Bed footprint: approximately 42 inches wide by 80 inches long by 80 inches high
- Upper guardrail height: minimum 5 to 6 inches above the mattress
- Ladder rung spacing: 8 to 10 inches apart
Adjust dimensions to suit your specific mattress sizes and room layout. Always leave sufficient headroom for the top bunk and play features.
Materials Needed
Lumber
- Primary frame: 4×4 posts of hardwood such as oak, maple, or kiln-dried pine
- Rails and slats: 2×6 or 2×8 boards
- Panels: 3/4-inch plywood for treehouse façade and decorative features
- Slat support: 1×4 boards for mattress support
Lathe Materials
- 3–4 inch diameter hardwood blanks for turned posts and finials
- 1–1.25 inch diameter blanks for ladder rungs and guardrail spindles
Hardware and Fasteners
- 3-inch and 2-inch wood screws
- Lag bolts and washers for securing posts and frames
- Construction adhesive or wood glue (exterior grade optional)
- Mattress anchors or straps for safety
Finishing Supplies
- Sandpaper (80, 120, 220 grit)
- Child-safe water-based polyurethane
- Non-toxic paint for decorative finishes
- Anti-tip wall anchors
Tools Required
- Wood lathe with chisels (skew, gouge, parting tool)
- Table saw or circular saw
- Miter saw
- Jigsaw for cutouts in plywood panels
- Drill with countersink bit set
- Router for decorative edges and mortises
- Clamps, measuring tape, speed square, bench vise
- Safety gear: face shield, dust mask, hearing protection
Step by Step Guide
1: Plan Your Build
- Sketch front, side, and top views of the bunkbed, including mattress sizes, ladder location, guardrail placement, and decorative lathe posts. Make sure your sketch is proportionate so measurements are easy to follow during cutting and assembly.
- Determine the final dimensions, making sure the upper bunk has at least 36–40 inches of headroom and the lower bunk is comfortable. Verify that the overall height will fit safely in the intended room.
- Create a cut list for all lumber, plywood panels, and lathe blanks. Organize it clearly to make material preparation and shopping easier.
2: Turn Posts and Decorative Components
- Mount hardwood blanks (3–4 inches in diameter) on your lathe. Make sure the blanks are securely centered to avoid wobbling during turning, which could affect both safety and precision.
- Turn the posts to the desired height, adding decorative features such as tapered sections or finials. Take your time to check symmetry frequently, and use calipers if needed to ensure uniformity across all posts.
- Turn ladder rungs and guardrail spindles from 1–1.25 inch blanks. Keep consistent spacing and thickness so they fit perfectly into the ladder and guardrail assemblies without gaps or looseness.
- Sand all turned components to 220 grit and seal lightly with thin shellac or CA glue to prevent tearout during assembly. Wipe off any dust between sanding steps and ensure the surface is smooth for a safe and polished finish that is child-friendly.
3: Build the Bed Frames
- Construct two rectangular frames (one for the upper bunk and one for the lower) from 2×6 or 2×8 lumber. Double-check all cuts to ensure the frames are square and match your planned dimensions.
- Join the corners using pocket screws, mortise and tenon joints, or wood glue and clamps. Make sure all joints are tight and secure before moving on to the next step.
- Install ledger strips inside the frame to support slats or 3/4-inch plywood mattress platforms. Position them evenly to prevent sagging and provide stable support for the mattresses.
- Reinforce corners with brackets if needed. This will add extra strength and durability, especially for the upper bunk.
4: Attach Turned Posts
- Fit the lathe-turned posts into the frame corners using mortise and tenon joints or lag bolts. Make sure the posts are fully seated to provide maximum stability.
- Ensure all posts are vertical and the frames are square before fully tightening. Adjust as needed to prevent leaning or uneven corners.
- Use a level to check alignment. Double-check both vertical and horizontal alignment to ensure a precise and safe assembly.
5: Install Treehouse Façade
- Cut plywood panels into a house-like shape with window cutouts. Measure twice before cutting to ensure all panels fit perfectly onto the frame.
- Attach panels to the bed frame using screws from the inside for a smooth exterior. Countersink screws slightly and fill holes if needed for a clean, polished look.
- Optional: create decorative rooflines or siding patterns using shiplap boards. This adds a realistic treehouse effect and enhances the visual appeal of the bunkbed.
6: Build and Install Ladder
- Attach lathe-turned rungs to two vertical 2×2 rails to make a sturdy ladder. Make sure each rung is level and evenly aligned for safe climbing.
- Secure the ladder to the side of the bed using screws and brackets for stability. Check that the ladder does not wobble and is firmly anchored before use.
- Ensure rung spacing is even (8–10 inches) and rounded to prevent injury. Smooth all edges and corners with sandpaper for extra child safety.
7: Install Guardrails and Safety Features
- Add upper bunk guardrails with lathe-turned spindles spaced no more than 3.5 inches apart. Ensure the guardrails are securely fastened to prevent any gaps or movement.
- Round all edges of guardrails, posts, and ladder rungs for safety. Smooth sanding will reduce the risk of splinters and accidental injuries.
- Attach anti-tip straps or anchor the bed to the wall to prevent tipping. Verify that all anchors are tight and the bed remains stable when pressure is applied.
8: Sanding, Finishing, and Painting
- Sand all surfaces (including turned components) to 220 grit. Wipe off all dust with a tack cloth to ensure a smooth finish before applying any coating.
- Apply child-safe, water-based polyurethane for a clear finish or paint decorative areas. Use multiple thin coats rather than one thick coat for better durability and an even appearance.
- Allow finishes to cure completely before installing mattresses or allowing children to use the bed. Follow the manufacturer’s recommended curing time to ensure the finish is fully hardened and safe.
9: Final Safety Check
- Ensure guardrails are secure and high enough above the mattress. Measure the height from the mattress surface to the top of the guardrail to confirm it meets safety standards.
- Verify all fasteners are tight, no screws protrude, and all edges are rounded. Recheck all joints after assembly to prevent loosening over time.
- Check the bed for stability by gently rocking and inspecting joints. Make adjustments or reinforce connections if any movement or wobbling is detected.
Lathe-Turned Details and Decorative Tips
- Turned posts should balance style and strength; avoid overly thin areas in load-bearing sections. Check each post for structural integrity before assembly to ensure safety.
- Finials and spindles add visual appeal and demonstrate advanced woodworking skills. Plan their placement carefully so they complement the overall design without interfering with functionality.
- Consider alternating plain and decorative spindles to create an engaging visual pattern. This technique adds depth and interest while showcasing your lathe skills.
- Seal turned parts early to prevent tearout and ensure a smooth final finish. Early sealing also makes sanding and finishing easier after assembly.
Finishing and Painting
- Apply water-based, low VOC polyurethane for a clear finish. This provides a durable protective layer while remaining safe for children.
- Sand between coats for a smooth result. Light sanding ensures each layer adheres properly and prevents uneven surfaces.
- Apply non-toxic paint for decorative accents. Choose colors that complement the room while keeping safety in mind.
- Add non-slip tread to ladder rungs for safety. This reduces the risk of slipping and enhances overall child safety.
Safety Checklist
- Ensure the upper bunk has adequate guardrail height. Measure carefully to meet recommended safety standards for children’s beds.
- Spindle spacing should be 3.5 inches or less. This prevents small children from slipping through or getting stuck.
- Anchor bed to the wall to prevent tipping. Use strong hardware and check periodically to maintain stability over time.
- Use non-toxic finishes and allow full curing before use. Proper curing ensures the finish is safe for children to touch and sleep around.
- Label bed with age recommendations, keeping upper bunk for children six years and older. Include clear signage to guide caregivers and prevent misuse.
Cost and Time Estimate
- Materials cost: $300–$900 depending on hardwood, decorative features, and hardware. Prices may vary based on quality of lumber and specialty lathe-turned components.
- Timeframe: 20–40 hours for experienced woodworkers; beginners should plan for longer. Allow extra time for measuring, turning posts, and finishing for best results.
- Skill level: Intermediate; requires comfort with power tools and lathe turning. Novice woodworkers may want to practice turning techniques on scrap wood first.
Example Case Study
- Kiln-dried maple for posts and pine for rails.
- Four turned posts and twelve lathe-turned spindles for ladder.
- Outcome: Safe, visually appealing treehouse bunkbed with strong structural integrity.
- Key takeaway: Hardwood posts give a premium look while using softwood for rails keeps costs manageable.
Conclusion
A treehouse bunkbed is an exceptional DIY woodworking project that combines skill, creativity, and functionality. By following this guide, you can build a safe, durable, and visually stunning treehouse-style bunkbed while demonstrating lathe craftsmanship. Careful planning, attention to safety, and precise woodworking techniques will ensure a project that children will enjoy and that showcases your woodworking expertise.
FAQs
What mattress size is recommended?
Twin mattresses (38 by 75 inches) are ideal. Full mattresses require reinforced rails.
Can I use a small hobby lathe?
Yes, a benchtop lathe can handle 3–4 inch blanks for posts if swing capacity allows.
Is a bunkbed safe for toddlers?
Upper bunks are not recommended for children under six. Design lower bunk areas for younger children.
Should the bed be bolted to the wall?
Yes, to prevent tipping, especially with tall treehouse façades.
How do I child-proof lathe-turned parts?
Round all edges, sand thoroughly, and seal with a child-safe finish. Ensure spindle gaps do not exceed safety limits.


