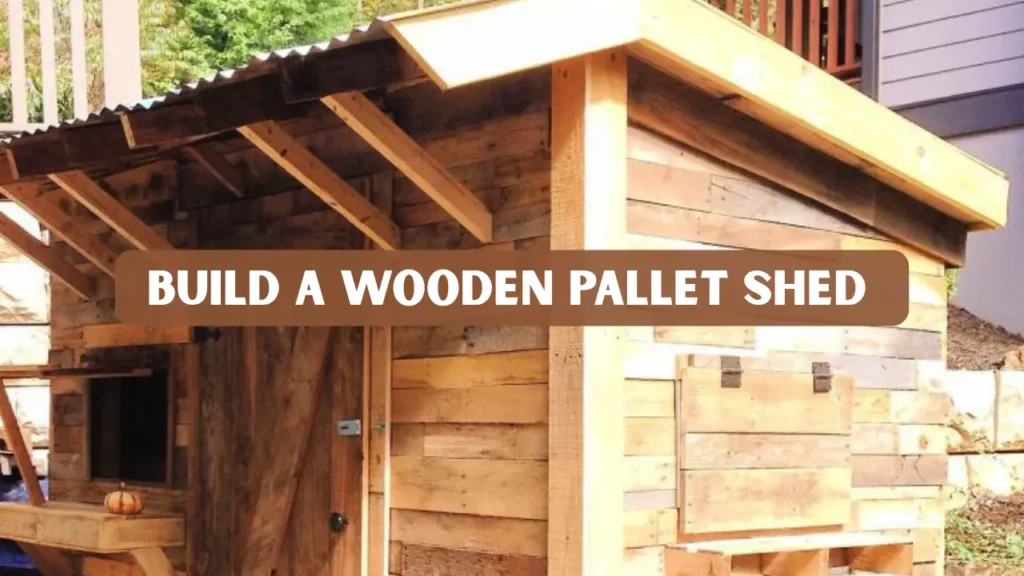
A wooden pallet shed is a creative and affordable way to add extra storage to your backyard. Whether you need space for garden tools, firewood, or DIY materials, pallet sheds offer both function and rustic charm. Reclaimed pallets are easy to find and simple to assemble, making them ideal for beginners and experienced woodworkers alike.
This project is not just about saving money. It’s about sustainability, craftsmanship, and turning discarded wood into something useful. By following this guide, you will learn how to plan, build, and finish a sturdy pallet shed that fits perfectly in your yard.
Key Takeaways
- Building a wooden pallet shed saves over 70% compared to store-bought sheds.
- Pallets are recyclable, durable, and easy to work with for DIY projects.
- Proper preparation, sealing, and design ensure long-term strength and weather resistance.
- You can customize the design to store garden tools, bikes, or outdoor furniture.
Why Choose a Wooden Pallet Shed
There are many reasons homeowners are turning to pallet sheds instead of traditional prefabricated ones.
1. Cost-Effective Solution
Building a pallet shed can cost as little as $135 to $175, while prefabricated sheds often range from $600 to $1000. You save money on materials while learning valuable DIY skills.
2. Eco-Friendly and Sustainable
Using recycled pallets helps reduce waste and environmental impact. Instead of letting wood rot in landfills, you can repurpose it into a functional structure that lasts for years.
3. Customizable Design
A pallet shed allows complete creative freedom. You can adjust the size, add shelves, paint it, or even install windows and a slanted roof for better drainage.
4. DIY Satisfaction
There’s a special sense of accomplishment that comes from building something with your own hands. A pallet shed combines woodworking, creativity, and utility in one rewarding project.
Planning Your DIY Pallet Shed
Before starting construction, it’s important to plan every detail carefully.
Choose the Location
Pick a flat, well-drained area with easy access. Avoid spots near large trees or low ground that may collect rainwater.
Determine Shed Size
Measure the space and decide how large your shed should be. A common starting size is 6×4 feet, but you can scale up or down depending on your needs.
Gather Materials and Tools
To build a basic wooden pallet shed, you’ll need:
- 12 to 14 wooden pallets (in good condition)
- Nails, screws, and hinges
- Hammer, drill, and saw
- Roof sheets or shingles
- Paint or sealant
- Measuring tape and level
Make sure your pallets are free of rot and stamped with “HT” (heat treated), which means they’re safe for use in outdoor projects.
Step-by-Step Guide
Step 1: Preparing the Pallets
Proper preparation determines the shed’s durability.
- Inspect each pallet for cracks, loose boards, or nails.
- Sand surfaces to remove splinters and rough edges.
- Apply an outdoor wood sealant to protect against moisture.
- Remove nails that could damage tools or cause injury.
A well-prepared pallet is the foundation of a sturdy shed.
Step 2: Constructing the Base
The base supports the structure and prevents moisture from seeping into the floor.
- Level the ground using gravel or concrete blocks.
- Place pallets tightly together to create a strong platform.
- Screw or nail them securely for stability.
- Add an additional wooden frame if extra reinforcement is needed.
Step 3: Building the Walls
Once the base is ready, build the frame for your shed.
- Stand pallets upright to form the walls.
- Make sure all pallets are level and flush.
- Reinforce corners using brackets or additional planks.
- Leave gaps for doors and windows.
This step forms the main body of the shed and defines its layout.
Step 4: Installing the Roof
The roof protects the shed from weather damage and must be well-constructed.
- Use roofing sheets, metal panels, or asphalt shingles.
- Ensure the roof has a slope for water runoff.
- Attach panels securely and seal edges with waterproof adhesive.
- Consider adding a small overhang for additional rain protection.
Step 5: Adding Doors and Windows
Doors and windows add functionality and ventilation to your shed.
- Cut wood panels or extra pallet sections for doors.
- Attach with heavy-duty hinges.
- Install a window or vent for airflow.
- Paint or stain the doors to match your design theme.
Adding a window allows natural light, reducing the need for electricity inside.
Step 6: Finishing Touches
Final details make your shed visually appealing and long-lasting.
- Apply outdoor paint or stain to protect against moisture.
- Install shelves, hooks, or racks inside for organization.
- Decorate the exterior with hanging plants or signage.
- Conduct regular inspections to tighten screws and maintain integrity.
These touches enhance both durability and aesthetics.
Tips for Long-Lasting Results
- Weatherproof Regularly: Reseal wood annually to prevent rot. Consistent maintenance helps the shed withstand moisture and seasonal weather changes.
- Pest Control: Inspect for termites and treat with eco-safe repellents. Keeping the area clean and dry further discourages insects from nesting in the wood.
- Clean Interior: Keep the floor dry and clutter-free. This prevents mold buildup and ensures your tools and supplies stay in good condition.
- Structural Check: Reinforce loose joints or corners after heavy rain or wind. Tightening screws and replacing weak boards helps maintain long-term stability.
Maintaining your shed ensures it lasts for many years with minimal repairs.
Case Studies
- Jessica from Ohio built a 6×4 ft wooden pallet shed using 12 reclaimed pallets for $135. She completed it in two days and gained a weather-resistant storage area for garden tools.
- Mark, a hobby woodworker from Texas, repurposed shipping pallets to construct a compact tool shed with a metal roof and sealant. His total cost was 60 percent less than buying a prebuilt shed.
These real projects show that with patience, planning, and a few tools, anyone can build a strong and sustainable pallet shed at home.
Design Variations for Inspiration
If you want your shed to stand out, here are some creative design ideas:
- Rustic Garden Shed: Keep the natural pallet finish and add flower boxes for a vintage look.
- Modern Storage Shed: Paint with bold outdoor colors and add metal trims.
- Tool Workshop: Add workbenches and shelves for an organized workspace.
- Mini Greenhouse: Replace one wall with transparent panels for sunlight.
- Kids’ Playhouse: Add bright paint, small windows, and a porch-style entryway.
These designs let you personalize your project while maintaining functionality.
Cost Breakdown
Building a pallet shed is significantly cheaper than buying a prefabricated one. On average, you’ll spend between $135 and $175 on the entire project.
Here’s the cost breakdown:
- Wooden pallets (12–14): Free to around $40, depending on local availability or donations. Always inspect pallets for cracks or moisture damage before using them.
- Nails, screws, and hinges: Around $20; investing in quality hardware ensures long-term stability. Stainless steel or galvanized options resist rust and improve durability.
- Roof material: Between $50 and $70 if you use corrugated metal sheets or shingles. Choose materials suited for your climate to prevent leaks and weather wear.
- Paint or sealant: Approximately $25 for weatherproofing and UV protection. Applying two coats enhances protection and extends the shed’s lifespan.
- Tools and accessories: Roughly $40 if you don’t already own them. Keep essential tools organized for efficiency and safety during construction.
When compared to store-bought sheds that typically range from $600 to $1000, a DIY pallet shed can save you over 70% of the total cost while allowing you to design it exactly as you wish.
Safety and Environmental Considerations
- Always wear gloves and goggles during construction. This protects your hands and eyes from splinters, dust, and flying debris while cutting or drilling wood.
- Work in a ventilated area when painting or sealing. Proper airflow prevents inhaling harmful fumes and ensures faster drying of paint or sealant.
- Use only pallets marked “HT” for safety. Heat-treated pallets are free from chemicals and ideal for outdoor projects where durability and health safety matter.
- Dispose of unused wood responsibly. Recycle leftover pieces or donate them to local DIY or craft centers instead of burning them.
Building with pallets encourages recycling and supports eco-friendly craftsmanship.
Common Mistakes to Avoid
- Skipping wood treatment, which leads to rot and insects. Always apply a quality sealant or wood preservative to ensure your shed remains durable and pest-free for years.
- Not leveling the foundation properly. An uneven base can cause structural instability, so take time to measure and adjust before securing your pallets.
- Using chemically treated pallets. These can release harmful fumes and damage your tools; always look for pallets stamped with “HT” for heat-treated and safe wood.
- Forgetting roof slope for water drainage. A flat roof traps water, so design a slight angle to prevent leaks and extend your shed’s lifespan.
Avoiding these errors ensures structural strength and long-term reliability.
Conclusion
A wooden pallet shed is the perfect DIY project for homeowners seeking affordable and sustainable storage solutions. With careful material selection, simple tools, and proper weatherproofing, you can build a shed that serves practical needs while enhancing outdoor beauty.
By following expert recommendations and using safe materials, your shed will remain durable for years. Building one also contributes to environmental conservation by reusing resources instead of discarding them.
FAQs
Are pallet sheds safe to use?
Yes, they are safe if built with heat-treated wood and sealed for weather protection. Always inspect materials before use.
How long does it take to build a pallet shed?
For beginners, it typically takes one weekend to complete a medium-sized shed.
Can I make a pallet shed waterproof?
Yes, by applying quality sealants, using metal roofing, and ensuring proper drainage.
What tools are required?
Essential tools include a hammer, drill, saw, measuring tape, and level.
Can the shed be expanded later?
Absolutely. The modular nature of pallets allows you to add new sections easily.


