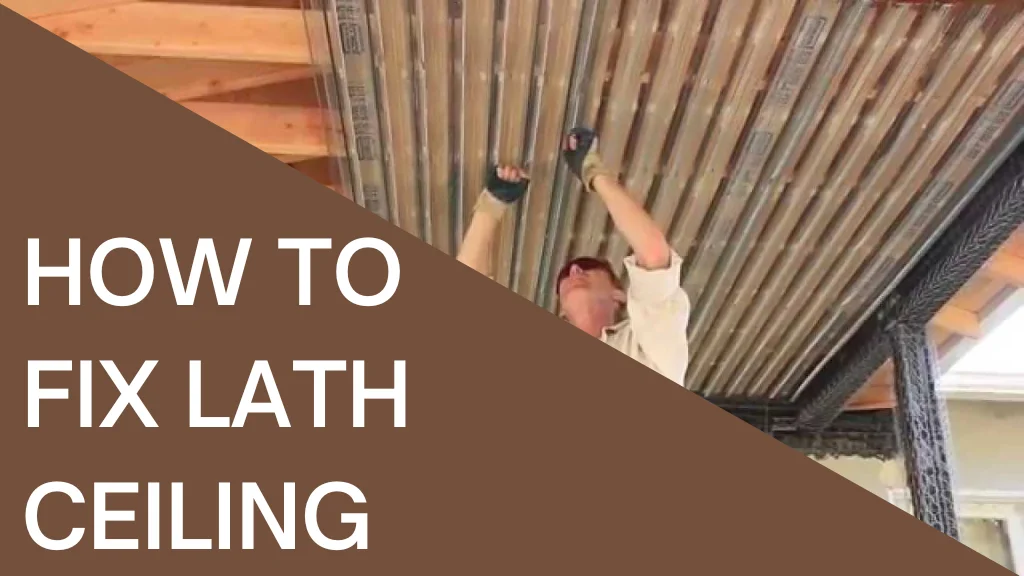
How to fix lath ceiling and restore it to its former glory. Read on to learn how to attack common issues and ensure a sturdy and beautiful ceiling. They allow for a range of cataplasm textures and home stretches to achieve asked aesthetics.
What’s lathe ceiling
A lath ceiling, also known as a cataplasm and lath ceiling, is a type of architectural ceiling construction generally set up in aged structures and homes, particularly those constructed before the mid-20th century. It consists of a frame of rustic strips called” laths” that are fastened to the ceiling’s structural factors, similar to joists or shafts. Over the laths, multiple layers of cataplasm are applied to produce a smooth and frequently ornate ceiling face.
A lath ceiling can bring a touch of quaint charm to your home, but over time, it may bear repairs and restoration due to wear and tear and gash.
How to Fix Lath Ceiling: Step-By-Step Guide
Whether you are dealing with sagging, cracked cataplasm, or loose laths, this companion will walk you through the way how to fix lath ceiling and restore it to its former glory. Read on to learn how to attack common issues and ensure a sturdy and beautiful ceiling.
Step 1: Gather Your Tools and Accoutrements
- Before you begin, gather the necessary tools and accoutrements. You will generally need
- Safety goggles and a dust mask
- Graduation or altar for ceiling access
- Cataplasm and drywall tools( trowel, common emulsion, putty cutter)
- Cataplasm blend or doctoring cataplasm
- Mesh tape recording
- Screws and washers
- Drill with a screwdriver bit
- Sandpaper
- manual and makeup
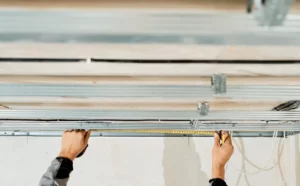
Step 2: Assess the Damage
Inspect your lath ceiling to identify areas that need repair. Look for cracks, loose plaster, or sagging sections. Understanding the extent of the damage is essential before starting any repair work. Mark the damaged areas clearly to guide your repairs. Use a flashlight or level to help detect subtle sags or hidden flaws in the surface.
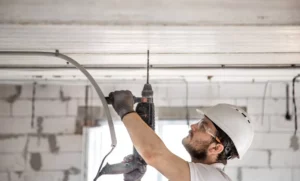
Step 3: Secure Loose Laths
Start by securing the loose laths to the ceiling joists. Use screws and washers to fasten them firmly in place, ensuring they sit flush with the face of the ceiling. Check for any gaps or uneven areas and adjust the laths as needed. Once everything is aligned, test the stability by gently pressing on each lath to make sure it’s securely fastened. This step helps create a solid and even base for any additional ceiling work.
Step 4: Racks and Holes
Clean the damaged area of the lath ceiling thoroughly and remove any loose debris from cracks and holes. Apply a plaster mix or patching plaster to fill the gaps. Use a putty knife to smooth the surface, ensuring a flat and even finish. Allow the patch to dry completely before proceeding. After drying, sand the surface lightly to remove any rough edges. Wipe away dust with a damp cloth to prepare the area for painting or finishing.
Step 5: Support with Mesh Tape
For larger cracks or areas with a history of recreating cracks, support the form with mesh tape recording. Apply a subcaste of common emulsion or cataplasm over the damaged area, so press the mesh tape recording into it, and also add another subcaste of emulsion or cataplasm over the tape recording. Feather the edges for a flawless finish.
Step 6: Beach and Finish
Once the renovated areas are dry, use sandpaper to smooth the face. Feather the edges of the repaired sections to blend them into the girding ceiling. Then you must Wipe down the all dust with a damp cloth.
Step 7: Prime and Paint
To finish the form, apply a manual to the entire ceiling. After it dries, paint the ceiling to match your asked finish.
Step 8: Regular conservation
To help unborn issues with your lath ceiling, perform regular examinations and address any cracks or damage instantly. Proper conservation will help save the integrity and beauty of your ceiling.
Why do we use the Lathe ceiling?
Lath ceilings are used for several reasons:
- Timeless Charm They offer a classic and continuing aesthetic that complements colorful architectural styles. Continuity lath ceilings are known for their life and can last for generations when duly maintained. sequestration Their layered construction provides natural sequestration, regulating inner temperatures and reducing energy costs. Soundproofing Lath ceilings have excellent soundproofing parcels, making them ideal for noise control in colorful apartments.
- Customization They allow for a range of cataplasm textures and home stretches to achieve asked aesthetics. literal Significance Installing one can add character and a sense of history to a space. So Ease of Repair Despite their continuity, they’re fairly easy to repair and restore. Sustainability Lath ceilings can be an eco-friendly choice due to their long lifetime, reducing construction waste and environmental impact.
Conclusion
How Fix Lath Ceiling requires some time and trouble, but with the right tools and accouterments, you can restore it to its original condition. By following these ways and conducting routine conservation, you can enjoy your lath ceiling for times to come, adding a dateless and elegant touch to your home.
FAQs
What’s a lath ceiling, and how is it constructed?
A lath ceiling is a traditional construction system where thin rustic strips( laths) are nailed to ceiling joists to produce a base for cataplasm or other finish accouterments. These laths give a stable face for applying cataplasm, creating a textured or smooth ceiling.
How can I maintain and save a lath ceiling?
To maintain a lath ceiling, periodically check it for cracks, sagging, or water damage. Address any issues instantly to help further damage. So You can save the ceiling’s major charm by using applicable restoration ways, like doctoring with traditional cataplasm accoutrements and home stretches.
Can I install lighting institutions or ceiling suckers in a lath ceiling?
Yes, you can install lighting institutions and ceiling suckers in a lath ceiling. ensure you detect the ceiling joists for secure attachment. So it may bear some redundant work to support the area around the institution’s mounting point. However, consult an electrician or contractor to ensure a safe and proper installation, If you are uncertain about the process.