For woodworking enthusiasts and professional chefs alike, wooden end grain cutting board designs represent the pinnacle of functionality and artistry in kitchen accessories. Unlike face grain boards, end grain boards showcase the wood fibers vertically, offering superior durability and a gentler surface for knives. Whether you are a seasoned woodworker or just starting, mastering end grain designs can elevate both your craftsmanship and the visual appeal of your kitchen.
This guide will cover everything you need to know about end grain cutting boards, including design inspiration, wood selection, DIY construction techniques, and care tips that prolong their lifespan. By the end of this article, you will be able to create a cutting board that is both stunning and long-lasting.
Key Takeaways
- Wooden End grain cutting board are durable, knife-friendly, and visually appealing.
- Choosing the right wood and design is critical for longevity and aesthetics.
- DIY projects can range from simple checkerboard patterns to complex geometric designs.
- Proper care and maintenance extend the life of your cutting board.
- Real-world examples show the effectiveness and craftsmanship of these boards.
Why Choose End Grain Cutting Boards?
End grain boards are visually striking and offer practical advantages that make them a preferred choice for professionals and hobbyists.
- Durability: End grain construction absorbs knife impact better, preventing cuts and scratches. This makes the board ideal for heavy daily use in both home and professional kitchens.
- Knife-friendly: Knives stay sharper longer as the board fibers close back after each cut. This reduces the need for frequent sharpening and prolongs the life of your blades.
- Aesthetic versatility: Patterns like checkerboard, brick, and herringbone allow creativity. You can customize the design to match any kitchen style, from traditional to modern.
- Longevity: Properly maintained end grain boards can last decades, unlike face grain boards that wear faster. Regular care ensures the wood remains strong and visually appealing for years.
- Professional Recognition: Many chefs and artisans prefer end grain boards for their strength and functionality. Using such boards demonstrates a commitment to quality and attention to detail in culinary work.
Pro Tip: Always use hardwoods such as maple, walnut, or cherry for optimal strength and beauty.
Popular Wooden End Grain Cutting Board Designs
Design is where creativity meets craftsmanship. Here are the most popular cutting board designs.
1. Checkerboard Pattern
- Alternating blocks of light and dark wood create a classic symmetrical aesthetic. This pattern highlights the contrast between different wood types, making the board visually striking.
- Beginner-friendly and easy to plan and assemble. It is a great project for those new to woodworking and allows for quick, satisfying results.
2. Herringbone Pattern
- Angled pieces arranged in a V-shaped pattern add sophistication and visual interest. This pattern creates a dynamic effect that draws attention to the craftsmanship of the board.
- Requires precise cutting and alignment for a professional look. Careful measurement and planning ensure the pieces fit together seamlessly without gaps.
3. Brick Pattern
- Rectangular blocks arranged like bricks offer a robust traditional look. This design provides a sturdy surface that can withstand heavy chopping and daily kitchen use.
- Easy to scale for both large and small boards. It allows woodworkers to create boards that fit any countertop space or kitchen need.
4. Random Mixed Wood
- Combines different wood types and colors, making each board unique. This approach allows woodworkers to experiment creatively and produce one-of-a-kind pieces.
- Ideal for custom, artistic designs and showcasing natural wood variations. It highlights the natural beauty of the wood grain and adds a personal touch to every board.
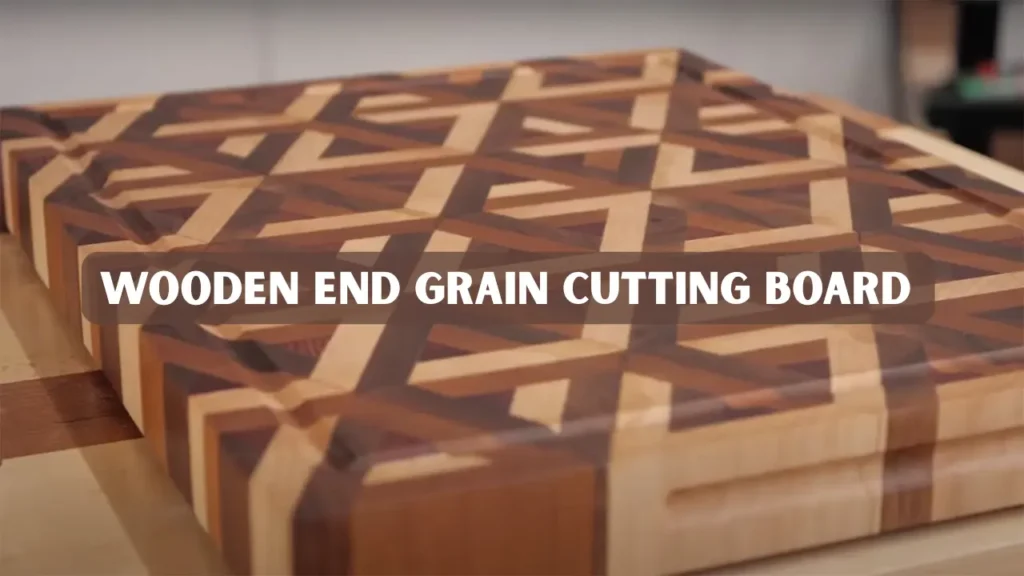
5. Geometric and Diamond Designs
- Uses triangles, parallelograms, or diamonds for a modern appearance. This pattern creates a striking visual effect that enhances any contemporary kitchen.
- Advanced level that requires careful layout planning. Precision in cutting and arranging each piece ensures a seamless and professional-looking board.
Tip: Sketch your design on paper or use software to visualize before cutting. This ensures accurate measurements and prevents mistakes during assembly.
Choosing the Right Wood for End Grain Boards
Wood selection impacts both durability and appearance. Here are key considerations.
- Hardwoods Only: Maple, walnut, cherry, and beech are ideal choices. These hardwoods provide strength, durability, and a smooth surface that is gentle on knives.
- Avoid Softwoods: Pine and cedar are prone to dents and scratches, making them unsuitable for long-lasting boards. Softwoods wear quickly and can compromise the structural integrity of the cutting board.
- Wood Grain Color: Contrasting wood types make patterns stand out and add visual appeal. Choosing woods with distinct colors enhances the overall design and makes patterns more striking.
- Wood Stability: Ensure the wood is properly dried to prevent warping over time. Properly seasoned wood also reduces the risk of cracks developing with seasonal humidity changes.
- Food Safety: Only use untreated, non-toxic woods for kitchen use to maintain health standards. Avoid woods that have been chemically treated or contain dyes to ensure safe food contact.
Expert Insight: Many professional woodworkers recommend quarter-sawn boards for the best end grain stability and minimal movement with changing humidity levels.
Tools Needed
- Table saw or band saw for accurate cuts
- Clamps to hold the boards firmly during glue-up
- Food-safe wood glue
- Planer or hand plane for smoothing the surface
- Sandpaper in various grits
- Food-safe mineral oil or beeswax finish
Step by Step Process
1. Select and Prepare Wood
Cut wood into strips or blocks according to your design. Ensure dimensions match for a precise fit. Choose hardwoods like maple, walnut, or cherry for durability and knife-friendliness.
2. Dry Fit the Pieces
Arrange them on a flat surface to check alignment. This allows adjustments before gluing. Make sure the pattern flows smoothly and matches your original design plan.
3. Glue-Up
Apply food-safe wood glue and clamp tightly. Ensure even pressure across the surface for a uniform board. Leave the glue to cure for at least 24 hours to achieve maximum strength.
4. Flatten and Sand
Use a planer or sander to achieve a perfectly smooth surface, removing glue residue and minor imperfections. Start with coarse sandpaper and gradually move to finer grits for a silky finish.
5. Apply Finish
Coat with mineral oil or beeswax to protect the wood and enhance its natural color. Reapply periodically to maintain the board’s water resistance and rich appearance.
Pro Tip: Let the glue cure for at least 24 hours before sanding. Rushing this step can cause warping or gaps in the design.
Case Studies and Real-World Examples
- A chef in Portland commissioned a custom wooden end grain cutting board with a checkerboard pattern of maple and walnut. The board withstood daily heavy chopping for over three years without significant wear, demonstrating the durability and knife-friendly benefits of end grain construction.
- A woodworking enthusiast in Austin created a geometric diamond end grain board as a weekend project. By carefully planning the layout and using food-safe mineral oil, the finished board became a functional kitchen tool and a centerpiece for entertaining guests, showing how DIY end grain designs can be both practical and visually stunning.
- A hobbyist in Chicago crafted an designs using a mixed-wood pattern as a wedding gift. Its high-quality craftsmanship and durable design impressed the recipients, proving that end grain boards can be both functional and sentimental gifts.
Maintaining Your End Grain Wood Cutting Board
Proper care ensures your wooden end grain cutting board remains functional and beautiful for years.
- Regular Cleaning: Wash with warm water and mild soap. Avoid soaking the board as excessive moisture can damage wood fibers.
- Oil Regularly: Apply mineral oil monthly or whenever the board looks dry. This protects the wood from cracking.
- Avoid Heat and Moisture: Do not place the board in the dishwasher or near heat sources. Extreme temperatures can cause the wood to warp or split over time.
- Sanitize Naturally: Use vinegar or lemon to disinfect without chemicals. This method keeps the board safe for food while maintaining its natural finish.
- Repair Minor Cuts: Light sanding removes minor scratches and restores smoothness. Occasional sanding also helps maintain an even surface and prolongs the board’s lifespan.
Bonus Tip: Rotate your board during use to ensure even wear across the surface.
Conclusion
Wooden End grain cutting boards combine functionality, durability, and visual appeal in a single kitchen accessory. By selecting the right wood, choosing a design that suits your skill level, and following proper care practices, you can create a board that lasts decades while enhancing your kitchen aesthetics.
Real-world examples and case studies show that both professional chefs and hobbyists benefit from using these boards. Whether you are a beginner or an experienced woodworker, exploring cutting board designs is a rewarding venture that merges craftsmanship with artistry.
Ready to craft your own masterpiece? Gather your tools, pick your design, and start building a cutting board that is both functional and visually stunning.
FAQs
What is the difference between end grain and face grain cutting boards?
End grain boards have fibers running vertically, making them durable and knife-friendly. Face grain boards have fibers running horizontally, which is less forgiving on knives.
Can I use softwood for end grain boards?
Softwoods like pine dent easily and are not recommended. Stick to hardwoods such as maple, walnut, and cherry for durability and longevity.
How long does it take to build an end grain wood cutting board?
A simple checkerboard board can take 4 to 6 hours, while complex geometric patterns may take 1 to 2 days, including glue curing.
How often should I oil my board?
Monthly or whenever the wood looks dry. Mineral oil is food-safe and preserves the board’s integrity.
Are cutting boards safe for food?
Yes, when made from untreated hardwoods and finished with food-safe oils, cutting boards are completely safe for kitchen use.


