Woodworking is a craft that demands precision, patience, and the right tools. Every piece of furniture, cabinet, or frame relies on strong joints, which are only as good as the accuracy of the mortises that hold them together. A router mortising jig provides a practical solution to these challenges. Cutting mortises by hand can be time-consuming and often requires multiple adjustments to achieve a uniform fit.
This tool allows woodworkers to achieve precise, consistent mortises quickly and efficiently, reducing the likelihood of mistakes and improving overall quality. Whether building furniture for personal use or as part of a professional project, understanding its proper use can significantly elevate craftsmanship. This guide explores its benefits, usage, DIY construction, maintenance tips, and practical project ideas. By integrating the jig into your workflow, even beginners can confidently tackle advanced woodworking projects.
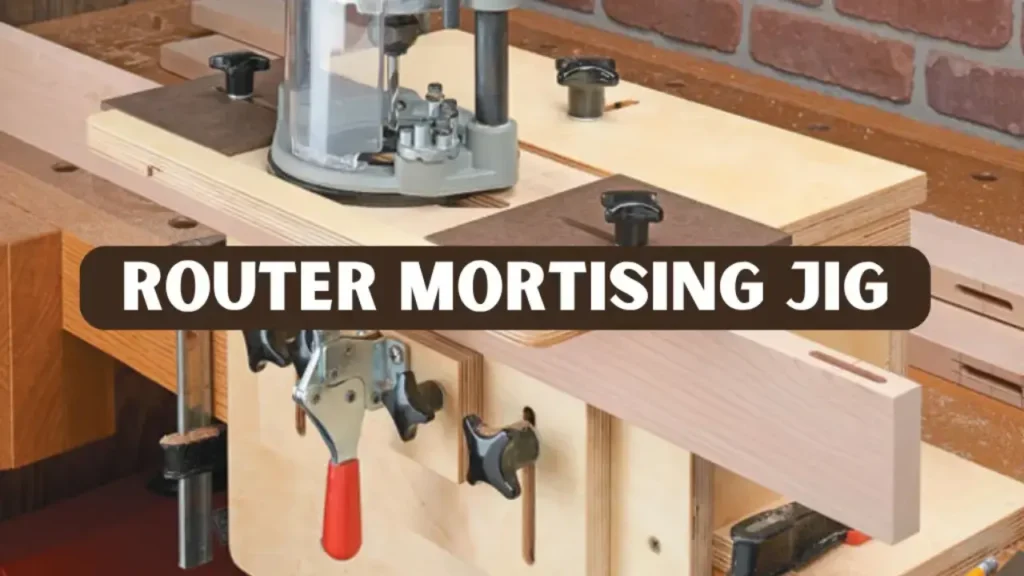
What Is a Router Mortising Jig?
A router mortising jig is a specialized tool designed to guide a plunge router when cutting rectangular mortises into wood. Mortises are essential components of many woodworking joints, particularly mortise-and-tenon connections, which are widely used for their strength and durability. Without a jig, cutting mortises requires careful measurements, hand chiseling, and significant skill. Often, this process results in inconsistent results that can compromise the final project.
The jig works by securing the router and guiding its movement along the desired path, ensuring each mortise is uniform in depth and width. These consistent cuts are crucial for fitting tenons precisely. Jigs can be purchased as complete kits or constructed as DIY tools, allowing woodworkers to customize them according to their specific needs. By incorporating this tool into the workflow, both amateur and professional woodworkers can achieve high-quality joints with minimal effort.
Benefits of Using a Mortising Jig
Using this tool offers numerous advantages for woodworkers seeking both efficiency and accuracy. One of the most significant benefits is the precision it provides. Mortises cut with a jig are consistently the same size, ensuring that the corresponding tenons fit perfectly. This uniformity is particularly valuable in projects that require multiple joints, such as cabinet doors or furniture frames.
In addition to precision, the jig increases efficiency. Manual chiseling of mortises is time-intensive, especially when creating multiple joints of the same dimensions. With a guide, woodworkers can make repeatable cuts in a fraction of the time, which is beneficial for both hobbyists managing personal projects and professionals working on larger-scale productions. It also reduces the likelihood of errors, minimizing the need for corrective adjustments and preventing material waste.
Another important advantage is versatility. The tool can be used on a variety of woodworking projects, from simple frame construction to complex furniture assemblies. It adapts to different wood types and thicknesses, allowing for customized mortise sizes to meet project requirements. Once set up correctly, it produces consistent results across multiple pieces, giving woodworkers confidence that every joint will fit as intended.
Tools and Materials Needed
To make the most of a router mortising jig, woodworkers need the right tools and materials. A plunge router is essential because it allows controlled vertical movement, which is critical for cutting precise mortises. The jig itself can be a commercial product or a DIY creation. Clamps are necessary to secure both the jig and the workpiece, ensuring that nothing shifts during the cutting process.
Accurate measurements are also vital. Rulers, squares, or calipers help confirm the dimensions of mortises and ensure alignment with tenons. Safety gear is equally important, including goggles, hearing protection, and dust masks, to protect against potential hazards. For practice and testing, scrap wood pieces are recommended before working on final project materials. Using these tools and materials correctly ensures safe, effective, and precise woodworking outcomes.
Step by Step Guide to Using a Mortising Jig
The first step in using a router mortising jig is preparing your workpiece. Accurate marking of the mortise location is essential, and using a square can help maintain perpendicular lines. Clear, precise markings form the foundation of a well-fitted joint, allowing proper alignment with the corresponding tenons. Taking the time to measure carefully ensures the final joint will be strong and reliable.
Once the workpiece is prepared, the jig must be set up. Secure the plunge router to the jig and adjust the fence and stops to match the intended mortise dimensions. A properly configured setup guarantees straight and consistent cuts every time. After setting up, the workpiece should be clamped firmly to the base, preventing movement that could compromise accuracy or damage the wood.
With the setup complete, routing the mortise can begin. Set the router to the desired depth and guide it along the marked lines slowly and steadily. Making multiple shallow passes helps avoid overloading the router and ensures clean edges. Once the mortise is complete, inspect the fit with the corresponding tenon, making minor adjustments with a chisel or sanding block if necessary.
Case Study Building Matching Mortises for Cabinet Doors
During a recent home workshop project, I needed to build a set of four solid-wood cabinet doors with perfectly aligned mortise-and-tenon joints. In the past, I had cut these joints by hand using chisels and marking gauges, but small errors often caused gaps or uneven fits. To improve consistency, I decided to use a mortising jig for this project.
The setup took about twenty minutes, including fence alignment and stop adjustments for repeatable cuts. Once dialed in, I was able to cut sixteen identical mortises in less than an hour, all with clean edges and precise depth. Each tenon fit snugly without sanding or trimming, saving nearly half the time compared to manual chiseling.
What stood out most was the uniformity across all door frames. Every joint seated perfectly, which made the final assembly quick and accurate. The completed doors not only looked professional but also felt solid and well-balanced. This experience reinforced the value of using a mortising jig for projects that require multiple, matching joints with minimal variation.
DIY Mortising Jig Plans
Woodworkers who enjoy creating their own tools may prefer a DIY approach to constructing a mortising jig. This method allows customization to fit specific project requirements and router models. Typically, materials such as plywood or MDF are used for the base, while hardwood is used for fences. Bolts, wing nuts, and guide rods are included to facilitate precise movement.
The construction process begins with cutting the base to the desired size, followed by attaching the fence and stops. Guide rods are installed to maintain smooth vertical motion without wobbling. Careful assembly is critical, as any instability can lead to inaccurate mortises. By building a custom jig, woodworkers gain both a practical tool and a deeper understanding of mortise-making techniques.
Common Mistakes and How to Avoid Them
One common mistake is setting an incorrect depth. Double-checking depth adjustments before routing ensures that mortises fit the corresponding tenons correctly. Another frequent issue is insufficient clamping. If the workpiece or jig moves during routing, the resulting mortise may be misaligned or uneven. Performing a test cut on scrap wood is an effective strategy to confirm settings and prevent errors on the actual project piece.
Dull router bits are another source of mistakes. Using sharp, well-maintained bits results in cleaner cuts and reduces the effort required. Skipping safety measures, such as wearing protective gear, can lead to accidents, so proper precautions are essential. Being aware of these potential pitfalls and addressing them proactively ensures successful and precise woodworking results.
Projects You Can Make Using a Mortising Jig
The versatility of this tool enables a wide range of woodworking projects. Cabinet doors benefit from accurately cut mortises for hinges and panels, allowing for seamless assembly. Furniture frames, including tables, chairs, and bookcases, rely on strong mortise-and-tenon joints for structural integrity. Shelving units also benefit from precise mortises, ensuring that shelves are securely attached.
By mastering the use of a mortising jig, woodworkers can confidently take on more complex projects. The ability to create consistent, strong joints opens opportunities for advanced designs and professional-quality craftsmanship. This skill transforms both hobby and commercial woodworking endeavors. It allows woodworkers to achieve precision, durability, and efficiency in every project.
Maintenance and Safety Tips
Proper maintenance extends the life of both the router and the jig. Regular cleaning to remove dust and debris prevents buildup that can affect precision and movement. Routinely checking and replacing dull bits ensures clean, efficient cuts. Securing the workpiece and jig with clamps before routing maintains accuracy and safety. Wearing protective gear, such as goggles, hearing protection, and dust masks, is essential for preventing injury and maintaining a safe working environment.
Conclusion
A router mortising jig is an essential tool for woodworkers seeking accuracy, efficiency, and professional results. By understanding its benefits, properly setting up the jig, and following correct usage techniques, woodworkers can significantly improve the quality of their joints. Whether opting for a commercial jig or a DIY project, integrating this tool into your workshop allows for more complex and durable woodworking creations.
FAQs
Can I use any router with a mortising jig?
Not all routers are compatible. Plunge routers with adjustable depth settings provide the best control for precise mortises. Using an incompatible router can result in inaccurate cuts and potential safety hazards.
Is a DIY mortising jig as accurate as a commercial one?
A well-constructed DIY jig can match the performance of a commercial product. Careful measurements, sturdy materials, and proper assembly are key to achieving consistent results.
What are the best wood types for practicing mortises?
Softwoods such as pine or poplar are ideal for beginners, allowing easy adjustments and less wear on router bits. Hardwoods like maple or oak are better suited for final projects after sufficient practice.
How do I prevent tear-out during routing?
Making multiple shallow passes, using sharp bits, and securing the workpiece firmly all help reduce the likelihood of tear-out, resulting in clean and professional mortises.


