The Shaker peg shelf is a timeless woodworking project combining simplicity, functionality, and elegant design. Originating from the Shaker community in the 18th century, these shelves are celebrated for their minimalism and practical use.
For DIY enthusiasts and homeowners, building a Shaker peg is not only a rewarding woodworking project but also a way to enhance organization and style in any room. This guide will provide everything needed to successfully craft your own shelf including materials, tools, step-by-step instructions, real-world examples, and styling tips.
Shaker shelves are ideal for kitchens, entryways, living rooms, and bathrooms. They help keep spaces organized while adding subtle sophistication. With proper planning and execution, your shelf will remain functional and beautiful for years to come.
Key Takeaways
- Learn what a Shaker peg shelf is and why it remains a classic in woodworking.
- Step-by-step DIY instructions for building a durable shelf.
- Tips on materials, tools, finishes, and installation.
- Creative ideas for styling peg shelves in different rooms.
- Real-life case studies showing the practical benefits of peg shelves.
What is a Shaker Peg Shelf
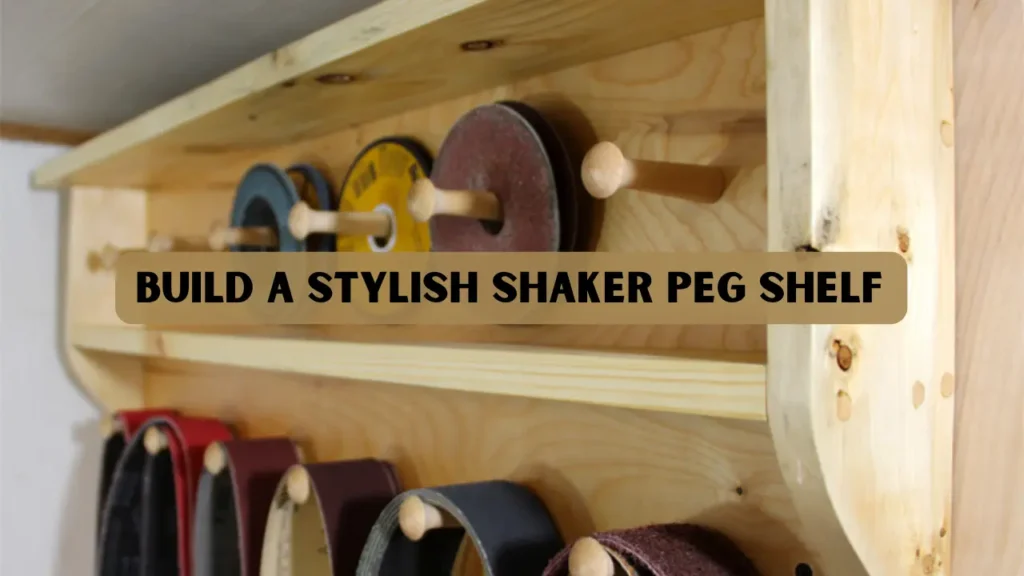
A Shaker peg shelf is a wall-mounted shelf designed for both storage and decoration. Its design reflects the Shaker philosophy of simplicity, craftsmanship, and utility.
Key Features
- Wooden backboard for secure mounting. Provides a strong foundation and keeps the shelf firmly attached to the wall.
- Wooden pegs or dowels for hanging items. Ideal for mugs, hats, coats, or small decorative items.
- Optional top shelf for additional storage. Adds extra space for plants, books, or kitchen essentials.
- Smooth, natural finish that highlights wood grain. Enhances the beauty of the wood and protects it from moisture and wear.
The combination of practicality and aesthetic appeal makes it a versatile choice for home organization. Peg shelves are widely used to hang mugs, hats, coats, or even small decorative items.
Materials and Tools Needed
Materials
- Hardwood board (oak, maple, or cherry recommended)
- Wooden dowels or pegs, 1-inch diameter
- Wood screws or nails
- Wood glue
- Sandpaper, 120–220 grit
- Wood finish (natural oil, wax, or clear lacquer)
Tools
- Measuring tape and square
- Drill with bits matching peg size
- Saw (table saw or handsaw)
- Clamps
- Chisel and mallet (optional for decorative details)
- Brush or cloth for finishing
Pro Tip: Hardwood ensures long-lasting durability, resistance to warping, and a smooth finish. Softwood may dent or warp over time, especially in humid environments.
Step by Step Guide
1: Measure and Cut Your Wood
- Measure the intended wall space for your shelf. Double-check your measurements to ensure the shelf fits perfectly and aligns with other furniture or wall features.
- Cut the backboard and top shelf accurately. Use a straightedge or guide to make precise cuts and avoid uneven edges.
- Mark positions for the pegs evenly along the backboard for balance and symmetry. Consider the items you plan to hang to determine the most functional peg spacing.
2: Drill Holes for Pegs
- Use a drill bit matching the diameter of your wooden dowels. This ensures the pegs fit securely and remain stable over time.
- Drill the holes carefully at marked positions, keeping them level and aligned. Using a level or guide helps prevent crooked pegs and maintains the shelf’s visual appeal.
- Test-fit the pegs to ensure a snug fit without forcing. Adjust any tight spots with sandpaper or a slightly larger drill bit to avoid splitting the wood.
3: Assemble the Shelf
- Attach the top shelf to the backboard using wood glue and screws. Ensure the shelf is perfectly aligned with the backboard before tightening the screws to maintain a clean, professional look.
- Insert the pegs into the drilled holes; apply glue if extra hold is needed. Press each peg firmly and wipe away any excess glue to keep the surface neat.
- Clamp the assembly until the glue has dried according to the manufacturer’s instructions. Double-check that the shelf remains level during clamping to avoid any misalignment.
4: Sand and Finish
- Sand all surfaces starting with 120 grit and finishing with 220 grit for smoothness. Sanding in the direction of the wood grain helps prevent scratches and ensures a flawless surface.
- Apply a natural oil, wax, or clear lacquer finish to protect the wood and enhance the grain. Allow each coat to dry fully and lightly sand between coats for an even, professional finish.
- Optional: add decorative accents or hooks for added functionality. Choose accents that complement your home décor and serve a practical purpose without overcrowding the shelf.
5: Mount the Shelf
- Locate studs in your wall or use wall anchors for secure mounting. Using a stud finder ensures the shelf is anchored safely and can support heavier items without risk.
- Ensure the shelf is level before screwing it into place. Double-check with a spirit level to prevent items from sliding off or the shelf looking crooked.
- Hang mugs, coats, or display items to test the load and adjust if necessary. Start with lighter items first and gradually add weight to ensure the shelf is stable and secure.
Pro Tip: A well-installed Shaker peg can hold heavy items if anchored properly, making it practical for kitchens, bathrooms, and entryways.
Creative Ways to Use a Shaker Peg Rail with Shelf
A Shaker Peg Rail with Shelf is highly versatile and can enhance both organization and décor:
- Kitchen: Hang mugs, utensils, spice jars, or small pots. This keeps frequently used items within easy reach while freeing up countertop space.
- Entryway: Keep keys, hats, coats, and scarves organized. A peg shelf in the entryway creates a neat, welcoming first impression for guests.
- Living Room: Display small plants, books, or collectibles. It adds visual interest to your walls while providing practical storage for décor items.
- Bathroom: Hold towels, toiletries, or decorative jars. This helps maintain a clutter-free space and keeps essentials accessible and organized.
Design Tips:
- Match the shelf stain or paint to your interior décor for a cohesive look. This creates a harmonious visual flow and enhances the overall style of the room.
- Experiment with peg sizes and spacing to accommodate various items. Adjusting peg placement ensures both functionality and an aesthetically pleasing arrangement.
- Place small baskets on the top shelf for additional storage. Baskets can hold smaller items like keys, mail, or kitchen gadgets, keeping the space tidy.
- Consider customizing the shelf length to fit unique wall spaces. A tailored shelf maximizes storage without overcrowding the wall or disrupting room balance.
Case Studies
- Sarah from Ohio installed a Shaker peg shelf in her kitchen to declutter countertops. After 12 months, the oak shelf remained sturdy, functional, and visually appealing, making the kitchen more organized and inviting.
- Mark, a DIY enthusiast in Texas, built a multi-tier peg shelf in his entryway. The shelf provided space for coats and other items while adding classic Shaker charm, demonstrating that even small wall-mounted shelves can transform home organization and style.
Common Mistakes to Avoid
- Skipping accurate measurements can result in uneven peg placement. Always double-check measurements and mark carefully to maintain symmetry and balance.
- Using softwood may cause warping or sagging over time. Opt for hardwood like oak or maple to ensure long-lasting strength and stability.
- Overloading the shelf beyond recommended weight can damage the pegs or mounting. Distribute weight evenly and avoid hanging excessively heavy items.
- Neglecting sanding and finishing reduces durability and may make the wood prone to moisture damage. Proper sanding and finishing protect the wood and enhance its natural beauty.
- Not securing the shelf properly to wall studs can compromise safety. Use a stud finder or appropriate wall anchors to guarantee a secure and stable installation.
Conclusion
The Shaker peg shelf is a timeless woodworking project that combines elegance, utility, and simplicity. It provides practical storage solutions for kitchens, entryways, living rooms, and bathrooms while enhancing the visual appeal of your home.
By following this guide, you can build a durable, stylish shelf that meets your organizational needs and adds a touch of classic Shaker charm. Real-life case studies demonstrate how functional and transformative these shelves can be, proving their value in everyday life.
Start your DIY project today to enjoy a handcrafted, functional, and beautiful addition to your home.
FAQs
Can I use softwood for a Shaker peg?
Softwood is workable but not recommended for long-term durability. Hardwood like oak, maple, or cherry ensures the shelf remains sturdy for years.
What is the ideal spacing for pegs?
A spacing of 6–8 inches between pegs works well, but adjust according to the items you plan to hang.
Can I make a multi-tier Shaker peg with shelf?
Yes, multiple levels can be stacked to provide more storage and visual appeal while maintaining stability.
How do I finish the wood for a Shaker peg rack?
Use natural oils, wax, or clear lacquer to protect the wood and highlight its grain, giving a smooth and durable finish.
Can I customize the shelf size?
Absolutely. The peg shelf can be tailored to fit small or large wall spaces, depending on your design preferences and functional needs.


