A handcrafted wooden clock is more than just a timekeeping device. Using wooden clock plans to guide your project allows you to combine creativity, skill, and patience with precise woodworking and aesthetic design. Building one yourself results in a functional and decorative piece that can enhance the beauty of your home or workshop. Each step of the process encourages careful planning and attention to detail, making the final product both practical and visually appealing.
Whether you are a beginner tackling your first serious project or an experienced craftsperson seeking a new challenge, following plans offers clear guidance and inspiration. This comprehensive approach teaches you how to select the right materials, use the proper tools, and follow step-by-step instructions to construct, finish, and display a beautiful clock. By investing time in every stage, you develop valuable skills in measuring, cutting, sanding, and finishing, making the project both educational and deeply rewarding.
Why Build a Wooden Clock?
Building a wooden clock offers much more than just the ability to tell time. It allows you to refine your woodworking skills and create a piece that reflects your personal style. Woodworking projects like clocks encourage attention to detail, patience, and problem-solving, which are essential traits for any craftsperson.
The satisfaction derived from watching your creation function perfectly provides a sense of accomplishment that few other projects can match. Moreover, crafting a clock allows for endless customization. You can choose the type of wood, the finish, and the overall design, giving your creation a unique identity that cannot be replicated by store-bought clocks. In addition, using natural materials and traditional techniques promotes sustainability and supports environmentally conscious craftsmanship.
Experienced woodworkers have noted that building a clock serves as a bridge between simple woodworking projects and more advanced, gear-driven endeavors. It offers the opportunity to develop both aesthetic sense and technical skills, providing a foundation for more complex projects in the future.
How to Choose the Best Wooden Clock Plans
Before starting, selecting the right plan is essential for a successful project. A well-structured plan helps ensure all components fit together precisely and allows you to work efficiently. Plans vary in complexity, design, and required tools, so it is important to choose one that matches your skill level and workshop setup. Careful selection reduces frustration and keeps the project on track.
Consider your experience when choosing a plan. Beginners may prefer simple wall or desk clocks with straightforward assembly, while experienced woodworkers might explore mechanical clocks with intricate wooden gears. The type of clock, wall, mantle, or desk, also influences the project, affecting size, weight, and mounting requirements. Quartz movements are easier to install, whereas mechanical gears offer a more traditional and challenging approach.
Size and layout are important for workspace planning and smooth assembly. Designs can range from small, minimalist desk clocks to large, ornate wall clocks. A carefully chosen plan lets you focus on craftsmanship rather than troubleshooting errors or adjusting dimensions. Popular options include classic wall clocks with Roman numerals, gear-driven clocks made entirely of wood, decorative mantle clocks, and minimalist designs with clean lines, each offering opportunities for skill development and personalization.
Tools and Materials You’ll Need
Building a wooden clock requires precise tools and quality materials to achieve a smooth and durable final product. Using the right equipment ensures accurate cuts, clean finishes, and proper assembly. Essential tools include a table saw or scroll saw, a lathe for shaping rounded frames, a drill press, and clamps to hold parts securely. Sandpaper, wood glue, files, and brushes are also needed for detailed work and finishing.
Choosing the right materials is equally important. Hardwoods such as maple, cherry, walnut, or oak provide stability, durability, and a beautiful appearance. A quality clock movement kit, including hands, motor, and mounting hardware, ensures accurate timekeeping. Finishes like Danish oil, shellac, or polyurethane protect the wood and enhance its natural beauty, while decorative accents can add a personal touch when following plans.
Proper preparation of materials helps prevent problems during assembly. Allow the wood to acclimate in your workshop to reduce the risk of warping and ensure stability. Inspect boards for cracks or imperfections and sand surfaces thoroughly before building. Taking these steps early creates a solid foundation for a polished and professional wooden clock.
Step by Step Guide to Building a Wooden Clock
This step-by-step guide provides a detailed approach to creating a beautiful wooden clock using professional wooden clock plans.
Prepare the Wood
Begin by selecting straight, crack-free boards and cutting each piece according to the dimensions specified in your plan. Label each component carefully to avoid confusion during assembly, and sand all surfaces thoroughly to remove rough spots, knots, and imperfections. Proper preparation at this stage ensures a smooth, professional finish and makes later steps much easier.
For projects that involve a lathe, it is essential to check the balance of the wood blank before turning. Well-balanced blanks spin evenly, allowing for consistent shaping and reducing the risk of mistakes or uneven surfaces. This attention to detail helps achieve a precise and high-quality final clock.
Create the Clock Face
Start by marking the exact center of the clock face with a ruler and compass. Drill the shaft hole carefully, ensuring it is perfectly centered for proper movement alignment. Add numerals, markings, or decorative engravings according to your plan. You may use carving tools, engraving, or decals, depending on your preferred aesthetic.
Before securing the movement, test the alignment to make sure the hands rotate freely without touching each other. Minimalist designs may forego numerals to highlight the natural wood grain, while traditional designs often incorporate Roman numerals or decorative motifs to enhance visual appeal.
Shape Decorative Elements
Shaping decorative components adds character and sophistication. For rounded frames or bezels, a lathe is ideal, while bandsaws can produce clean lines for rectangular pieces. Beveling edges and sanding progressively with finer grits creates a polished, professional appearance.
Using contrasting woods such as walnut and maple can create depth and highlight the design, especially for clock faces or outer frames. Decorative elements may include carved inlays, resin accents, or layered wood sections for added visual interest. Thoughtful shaping and detailing elevate your clock from a simple functional object to a work of art.
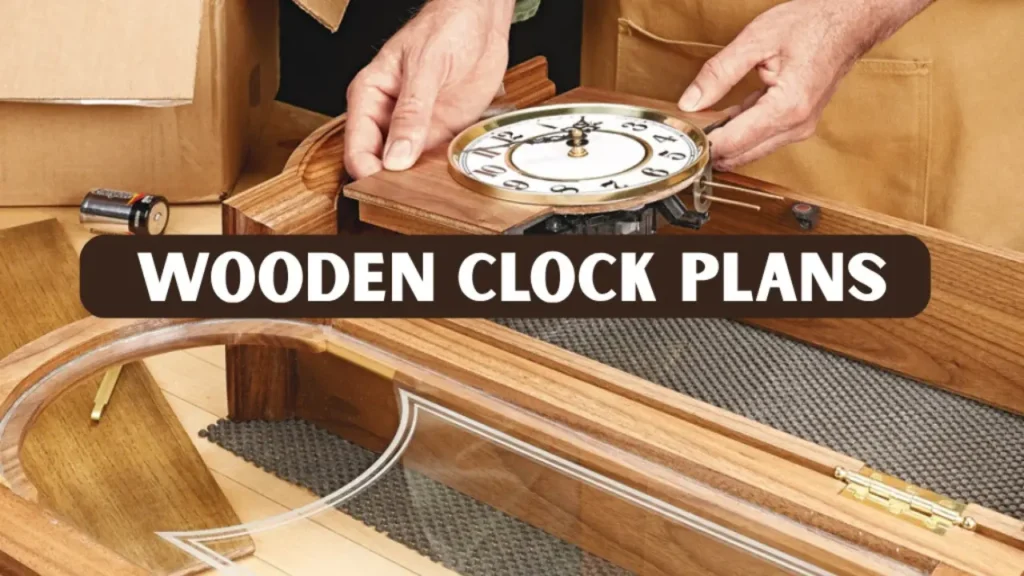
Assemble the Clock Movement
Insert the clock movement into the drilled hole, securing it with the included washers and nuts, and then attach the hour, minute, and second hands. Make sure that all hands rotate freely without touching each other or the clock face, as even slight contact can affect accuracy. For mechanical movements, precise alignment of the gears is crucial to prevent operational issues and ensure smooth performance.
Testing the movement for several hours before final installation is important to confirm that it runs consistently and keeps accurate time. Paying close attention to these details during assembly helps guarantee that your clock will function reliably and minimizes the need for adjustments later, resulting in a polished and professional timepiece.
Sand, Finish, and Polish
Sanding and finishing bring out the natural beauty of the wood while protecting it from wear and damage. Begin by sanding all surfaces with 400-grit paper for a smooth texture. Remove dust using a tack cloth, then apply your chosen finish, such as Danish oil, shellac, or polyurethane. Apply thin, even coats and allow each to dry thoroughly before adding the next.
For an extra touch, you may buff the finished surface with soft wax, which creates a gentle sheen and enhances the overall appearance. Working in a dust-free environment and exercising patience during this stage ensures a professional-quality result.
Mount and Display
Once the clock is complete, consider its placement. Wall clocks can be mounted using keyhole slots or hooks, while desk or mantle clocks may require a stand for stability. Personalized engravings or plaques can add sentimental value, especially if the clock is intended as a gift.
Avoid placing your clock in direct sunlight or near heat sources, as this can negatively affect both the finish and the accuracy of the movement. A well-placed wooden clock becomes a focal point, showcasing your craftsmanship for years to come.
Design Variations and Creative Ideas
Wooden clock plans allow for endless creative variations. Classic clocks feature curved bezels, Roman numerals, and ornate detailing, while rustic designs often utilize reclaimed wood for a naturally aged look. Minimalist clocks focus on clean lines, smooth surfaces, and the natural beauty of the wood grain.
More advanced designs include wooden gear clocks, which rely entirely on precision-cut wooden gears to function. These require meticulous attention to detail but offer an impressive result for those willing to invest the time. Experimenting with natural edges, resin inlays, and layered wood accents allows for a signature style that reflects your personal aesthetic.
Common Mistakes and How to Avoid Them
Common mistakes in clock building often include misaligned center holes, hands touching each other, rough finishes, and improperly aligned gears. Following detailed wooden clock plans can help prevent these issues by providing precise measurements and step-by-step guidance. Careful preparation and adherence to the plan ensure both the appearance and functionality of the clock are maintained.
To avoid these problems, measure twice before drilling, adjust hand positioning gently, sand surfaces thoroughly, and dry-fit gears before gluing. Maintaining consistency, patience, and attention to detail throughout the project is essential for creating a polished, professional, and fully functional wooden clock.
Tips from Experienced Woodworkers
Experienced woodworkers recommend dry-fitting all parts before applying glue to ensure proper alignment and avoid mistakes. Using contrasting woods adds visual depth and enhances the overall design, while pre-drilling holes helps prevent splitting during assembly. These small but crucial steps contribute to a smoother construction process and a professional finish.
Investing in high-quality clock movements ensures accurate and reliable timekeeping, making the final piece both functional and durable. Additionally, documenting each step allows woodworkers to track progress, refine techniques, and create a valuable reference for future projects, fostering continuous improvement and skill development.
Conclusion
Creating a wooden clock using wooden clock plans brings together art, precision, and patience. Each stage, from selecting the right lumber to sanding and finishing, builds essential woodworking skills. As you assemble the movement and fine-tune the details, you create a piece that is both functional and visually striking. The process allows you to experience the satisfaction of crafting something with your own hands.
Handmade clocks also tell a story of dedication and attention to detail. Beginning with simple projects and gradually moving to more complex designs helps you continuously improve your expertise. A handcrafted clock serves not just as a practical timepiece, but also as a lasting testament to your skill. It reflects creativity, care, and a personal touch that store-bought clocks cannot match.
FAQs
What is the best wood for a wooden clock?
Hardwoods like maple, cherry, or walnut provide durability and a fine finish.
Can I build a wooden clock without a lathe?
Yes. Many designs can be completed with saws, sanders, and hand tools alone.
How long does a typical project take?
A basic wall clock can take around ten hours. Complex gear clocks require multiple days for cutting, assembly, and testing.
Are wooden gears durable?
Properly cut hardwood gears, maintained with dry graphite or similar lubrication, last for years.
Where can I buy reliable clock movement kits?
Clock kits are available from woodworking supply stores and reputable online craft retailers.


