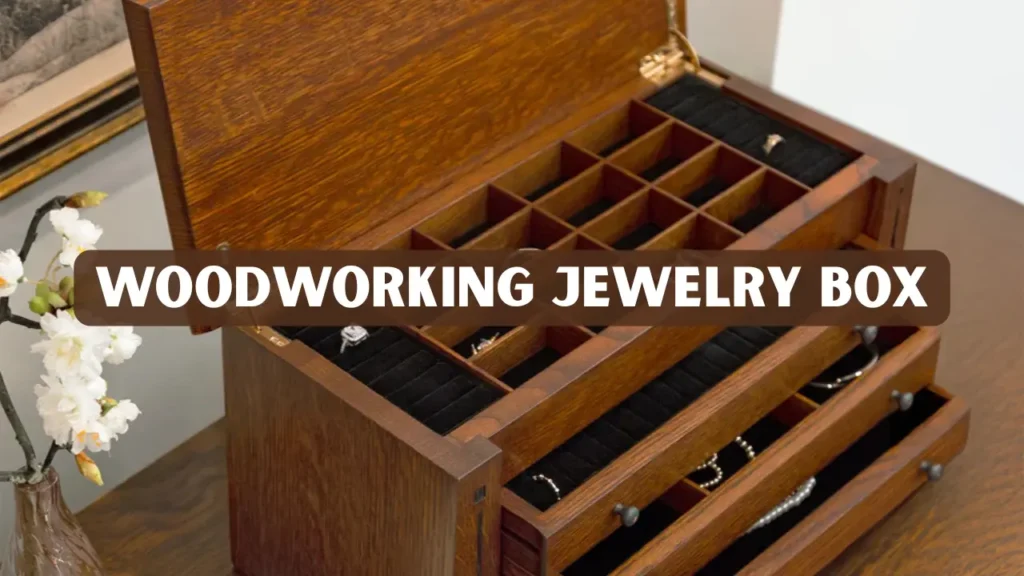
If you enjoy woodworking and want a rewarding project that blends turning, joinery, and fine finishing, crafting a woodworking jewelry box is an excellent choice. It’s not just a decorative piece but also a showcase of your skill and attention to detail. This project lets you experiment with various woodworking techniques while creating something elegant and functional.
Key Takeaways
- A woodworking jewelry box is an ideal beginner to intermediate lathe and woodworking project that teaches joinery, finishing, and precision work.
- Choose stable hardwoods like walnut, cherry, or maple and plan for hardware, hinges, and interior lining early in the design phase.
- Break the build into clear steps: design and materials, turning and joinery, lid and hinge installation, finishing, and lining.
- Follow safety and finishing tips to get professional results.
Why Make a Wooden Jewelry Box
A woodworking jewelry box is compact, useful, and showcases a range of skills:
- Skill building: Encourages practice in joinery, small hardware installation, and finishing. It helps woodworkers improve precision and attention to detail needed for larger furniture projects.
- Low material cost: Uses small pieces of wood ideal for experimenting with hardwoods. This makes it a budget-friendly project where you can test different finishes and techniques without wasting expensive materials.
- Perfect for gifting: A well-made box is a high-margin product for craft fairs or online shops. Its elegant look and functional design make it a meaningful handmade gift that appeals to a wide audience.
Design, Intent, and Materials
Decide the purpose and style
- Personal use, gift, or product to sell: Ideal for keeping your accessories organized, giving as a thoughtful handmade present, or adding to your craft business collection. It’s a versatile project that suits both hobbyists and small business owners.
- Style: Choose from a classic box with a hinged lid, lift-off lid, or drawer design depending on your skill level and preference. Each style offers unique challenges and aesthetic appeal, allowing you to showcase your creativity.
- Common dimensions: Typically 8 x 5 x 4 inches, but you can easily adjust the size for rings, necklaces, or watches. Customizing the dimensions lets you create personalized storage suited to different jewelry types.
Choose the wood
- Hardwoods: Walnut, cherry, maple, and mahogany are excellent choices for their strength, grain, and timeless beauty. These woods not only enhance durability but also give your project a premium finish.
- Budget options: Poplar or birch are affordable alternatives that are easy to work with and still offer a clean look. They’re perfect for beginners practicing cutting, sanding, and finishing techniques before moving to expensive hardwoods.
- Always use kiln-dried wood: This prevents warping, cracking, or shrinkage over time, ensuring your box maintains its shape and alignment. Properly seasoned wood also accepts glue and finish more effectively, improving the overall build quality.
Tip: Use contrasting wood for inlay or accents on the lid.
Tools and Hardware Checklist
- Table saw or band saw for cutting
- Router for grooves and shaping
- Lathe for knobs or feet
- Chisels, block plane, smoothing plane
- Drill press or handheld drill
- Sandpaper (120 to 400 grit)
- Brass hinges, clasp, or drawer pulls
- Wood glue and clamps
- Velvet or felt for lining
Step by Step Process to Build Your DIY Wooden Jewelry Box
1. Plan and cut panels
2. Make the lid
Choose from these lid types:
- Lift-off lid: Create a small lip so it fits snugly inside the box, ensuring a smooth lift and secure closure.
- Hinged lid: Requires precise mortising for the hinges to sit flush and operate smoothly without binding.
- Sliding top: An advanced design that demands accurately cut grooves for a tight yet functional sliding motion.
Optional: turn a decorative knob on the lathe.
3. Joinery and assembly
- Use butt joints reinforced with splines or box joints for added strength and stability.
- Dovetail joints bring both elegance and lasting durability to the overall structure.
- Always dry fit before gluing, apply adhesive sparingly, and clamp firmly to ensure perfect alignment.
4. Install hardware
- Pre-drill all screw holes to prevent the wood from splitting during installation.
- Carefully align the hinges and clasp to ensure smooth, even movement and a professional finish.
5. Sanding, finishing, and lining
- Sand all surfaces gradually from 120 up to 400 grit for a smooth, flawless texture.
- Apply a sanding sealer to prepare the wood, then finish with polyurethane, oil, or lacquer for lasting protection and shine.
- Line the interior with soft felt using spray adhesive to add a refined touch and protect delicate jewelry pieces.
Finish tip: Lightly buff the surface with 0000 steel wool and wax for a satin sheen.
Advanced Customization Ideas
- Add inlays or banding with contrasting veneer: This creates eye-catching detail that highlights your craftsmanship. It also allows you to experiment with patterns and colors for a truly unique look.
- Build hidden compartments or secret drawers: These add both functionality and intrigue, perfect for storing special items. They also showcase your precision and creativity in small-scale joinery.
- Turn small feet using a lathe for an elegant base: This elevates the box and gives it a refined, balanced appearance. You can customize the shape to match the overall design style.
- Add locks or decorative clasps: These enhance both security and aesthetic appeal, giving the box a finished, high-quality touch. Choose brass or antique-style hardware for added character.
Troubleshooting Common Problems
Cost and Time Estimates
Real World Experience
- An experienced woodworker shared that their first jewelry box made from walnut and maple took about eight hours, including sanding and finishing. The box sold locally for $65, earning praise for its craftsmanship and teaching valuable lessons in hinge alignment.
- Another maker crafted a jewelry box from cherry wood with a velvet-lined interior, completing it in around ten hours. The piece, featuring dovetail joints and a French-polished finish, sold for $80 at a local craft fair and attracted new custom orders.
Professional Tips from Experts
- Always pre-finish interior parts before assembly to prevent glue marks and uneven finish lines later.
- Use a marking knife instead of a pencil for crisp, accurate layout lines that improve precision.
- Finish hinges with a light coat of wax to prevent tarnish and ensure smooth, long-lasting operation.
- Store leftover felt or lining material flat to avoid creases and maintain a neat, professional appearance for future projects.
Conclusion
Building a woodworking jewelry box is a rewarding blend of creativity and precision. It helps refine your craftsmanship, improves your attention to detail, and enhances your understanding of fine joinery. The process teaches patience and discipline, allowing you to appreciate the art behind each cut and finish. Every step adds value, from choosing wood to adding the final polish.
Whether you make it as a personal keepsake, a thoughtful gift, or a product to sell, the outcome is always satisfying. The project allows you to express artistry while creating something functional and lasting. Each box becomes a reflection of your skill and dedication to woodworking. With care and consistency, your handmade creation will surely leave a lasting impression.
FAQs
How long does it take to build a woodworking jewelry box?
It usually takes 6 to 12 hours depending on skill level and tools available.
What is the best finish for jewelry boxes?
Oil finishes bring out natural color, while lacquer gives a glossy, protective coat.
Can I build a jewelry box with only hand tools?
Yes, but it requires patience and precision. Sharp tools and careful measuring are key.
What wood should beginners choose?
Maple or cherry is beginner friendly, easy to cut, and finishes beautifully.
Is a lathe necessary?
No, but it adds creative options like turned knobs and legs.


