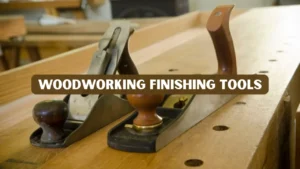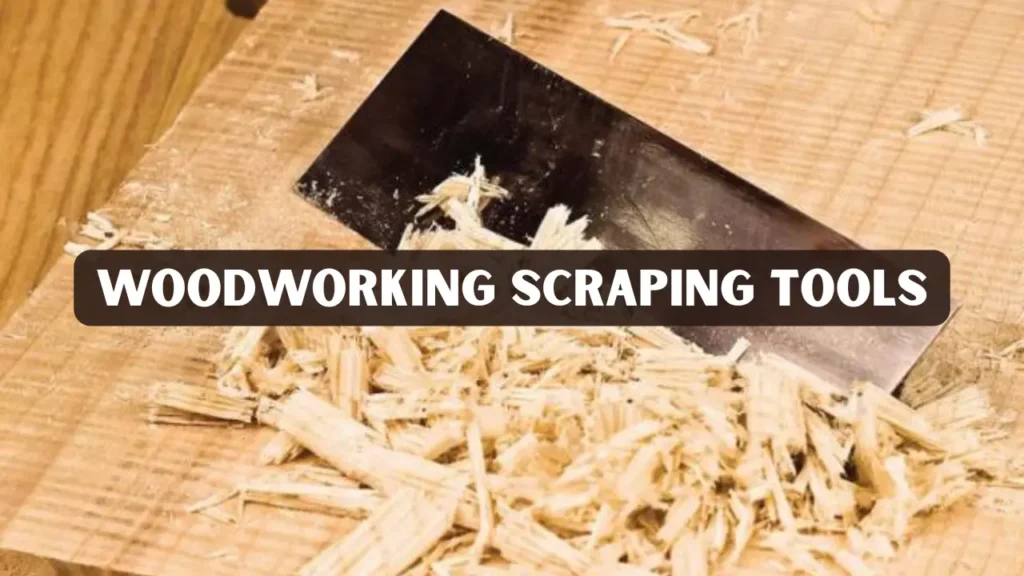
Every woodworker understands that the final surface finish determines the beauty and professionalism of any woodworking project. Among the essential hand tools, woodworking scraping tools stand out for their precision, control, and smooth finishing ability. Unlike sanding, scraping cuts the wood fibers cleanly instead of tearing them, leaving a glassy surface ready for finishing.
This guide dives deep into the types, uses, and sharpening methods of scraping tools. It also explains how experienced craftsmen use them for detailed furniture restoration, veneer work, and finishing. Whether you are a hobbyist or a seasoned professional, mastering the art of scraping can elevate the quality of your craftsmanship.
Key Takeaways
- Woodworking scraping tools are essential for achieving smooth, detailed finishes on wood surfaces.
- They offer greater control and finesse than sandpaper or planers for fine furniture and restoration work.
- Knowing how to sharpen, handle, and select the right scraper dramatically improves your woodworking results.
- This guide covers different types, sharpening techniques, and expert tips to make the most of these tools.
What Are Scraping Tools?
Woodworking scraping tools are hand instruments used to finely smooth wooden surfaces by shaving off thin layers. They are usually made of hardened steel and come in various shapes for different purposes. Unlike sandpaper, they remove wood fibers rather than abrade them, making them ideal for achieving a polished surface without scratches.
Scraping tools are typically used after planing and before finishing. Many furniture makers and restorers rely on them to remove tool marks, glue residue, or uneven finishes. Their simplicity makes them versatile and long-lasting additions to any woodworking setup.
Why Use Scraping Tools in Woodworking?
Scraping tools provide several benefits over sanding or planing. Here’s why professionals prefer them:
- Superior Finish: They produce a smooth, reflective surface without scratches. This makes them ideal for high-end furniture and visible surfaces where every detail counts.
- No Dust: Scraping generates fine shavings instead of dust, keeping your workspace cleaner. This also reduces the need for protective masks and makes cleanup faster.
- Preserves Grain: The scraper cuts across the wood fibers, highlighting natural grain patterns. It enhances the wood’s natural beauty and allows finishes to penetrate evenly.
- Cost-Effective: With minimal maintenance, a scraper lasts for years. Investing in a quality scraper can save money over time compared to repeatedly buying sandpaper.
- Quiet Operation: Ideal for those who prefer silent, meditative woodworking sessions. The gentle scraping sound also allows craftsmen to better focus on precision and technique.
These advantages make scraping tools invaluable for high-end furniture makers and restorers who care about detail and quality.
Types of Woodworking Scraping Tools
Each type of scraper has unique characteristics suited for specific woodworking tasks. Here are the most common varieties:
1. Cabinet Scraper
A flat steel blade with square edges, perfect for smoothing large flat surfaces such as tabletops or cabinet doors. It is often used in combination with hand planes to remove fine tool marks and achieve a flawless finish.
2. Card Scraper
Thin, flexible steel sheets used to smooth fine details, curves, and edges. Card scrapers can also reach areas where larger tools cannot, making them essential for intricate work.
3. Gooseneck Scraper
Its curved shape makes it perfect for scraping concave surfaces and decorative carvings on furniture. The design allows woodworkers to maintain consistent contact with irregular curves.
4. Bowl Scraper (Lathe Scraper)
Used in woodturning for refining the interior of bowls and curved vessels. The curved edge removes fine tool marks left by gouges and shapes smooth transitions.
5. Round-Nose Scraper
A lathe tool with a semicircular tip. Excellent for cleaning up the inside curves of bowls or spindle coves where gouges might chatter.
6. Square-End Scraper
Has a straight cutting edge, ideal for cleaning shoulders, facing workpieces on the lathe, and flattening tenons. It’s a versatile tool for beginners.
7. Profile Scraper (Moulding Scraper)
Custom-shaped scraper used to match decorative moulding patterns. Often made by shaping a blank to the desired contour common in furniture restoration.
8. Hollow Scraper
Features a concave shape for working on rounded exteriors or dowel-like surfaces. Useful for smoothing turned legs or spindles.
9. Concave Scraper
Used for rounded or turned surfaces, especially on bowls or cylindrical wood projects. It allows precise material removal without damaging delicate edges.
10. Convex Scraper
Designed to scrape convex or outward-curved surfaces, complementing the concave type. It helps create smooth, flowing contours in turned pieces.
11. Triangular Scraper
Great for reaching corners, tight spaces, and intricate carvings. Its shape ensures that even angled recesses can be refined with minimal effort.
12. Cabinetmaker’s Scraper Plane
A scraper mounted in a plane body, combining the stability of a hand plane with the precision of a scraper. This allows for longer, even strokes over panels with better control.
13. Curved Edge Scraper
Used for blending irregular contours, often in musical instrument making and detailed furniture restoration. The curved profile ensures consistent contact along complex surfaces.
14. Heavy-Duty Scraper
Thicker steel construction for removing tough finishes or leveling uneven boards. Its robust design allows it to handle harder woods and dense grain with ease.
15. Custom-Shaped Scrapers
Craftsmen often shape scrapers to match unique profiles or molding details, especially in restoration work. This customization ensures precise replication of original design features on antique or specialized pieces.
How to Use Scraping Tools Effectively
To achieve professional results, technique is crucial. Follow these steps for optimal scraping performance:
- Prepare the Edge: Burnish the scraper’s edge to form a fine burr using a steel rod. A well-prepared edge ensures consistent shavings and prevents tearing the wood fibers.
- Hold at the Right Angle: Tilt the scraper about 5–15 degrees to the surface. Maintaining this angle throughout each stroke reduces chatter and creates a smoother finish.
- Apply Firm Pressure: Push or pull consistently, keeping strokes even. Avoid excessive force, which can gouge the wood or damage the scraper edge.
- Check the Surface: Feel the wood for smoothness and adjust your angle as needed. Stopping periodically allows you to identify uneven spots before they become harder to correct.
- Work with the Grain: Always scrape along or diagonally to the grain for a refined finish. Scraping against the grain can cause tear-out and rough patches that will require extra sanding.
A properly sharpened scraper will produce thin shavings, not dust. If you see powder instead, it’s time to resharpen.
How to Sharpen Scraping Tools
A sharp scraper performs better and lasts longer. Here’s a quick guide:
- Step 1: Clamp the scraper in a vise.
Ensure the scraper is held firmly and level so it does not move while filing. A secure grip helps maintain an even edge and prevents accidents. - Step 2: File the edge flat to remove any old burrs.
File carefully along the edge until it is straight and smooth. This creates a clean base for forming a new burr and improves cutting efficiency. - Step 3: Polish both faces on a sharpening stone.
Use a fine-grit stone to remove scratches and smooth the steel surface. Polishing ensures a sharper edge and reduces friction during use. - Step 4: Use a burnisher to roll a new burr along the edge.
Apply consistent pressure while sliding the burnisher along the edge to raise a fine hook. A properly formed burr is critical for producing thin, clean shavings. - Step 5: Test it on scrap wood until it produces clean shavings.
Scrape a small piece of scrap wood to check the sharpness and burr quality. Adjust the bu