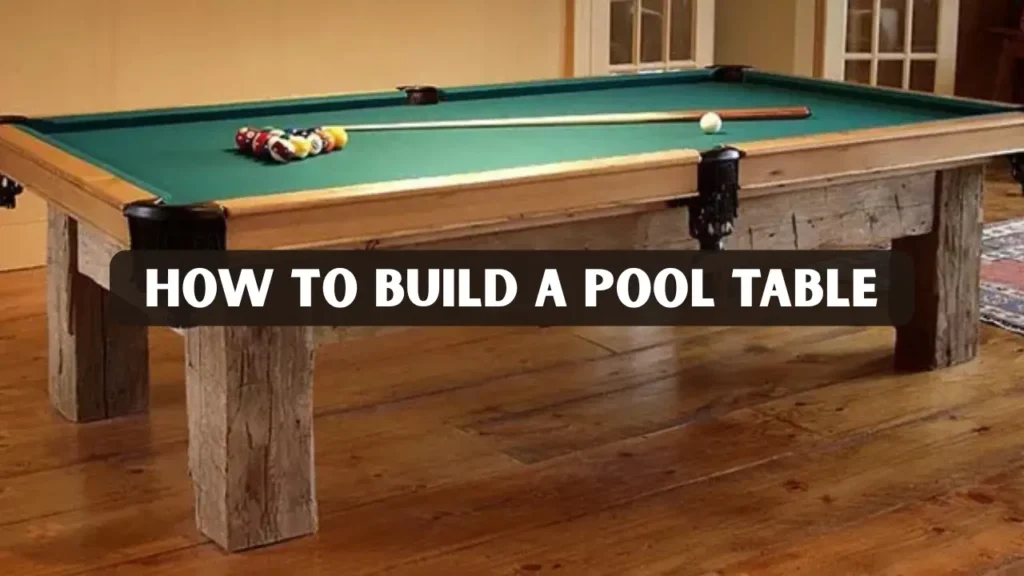
Building a pool table is one of the most rewarding woodworking projects you can take on. It combines craftsmanship, precision, and creativity resulting in a stunning centerpiece that offers both entertainment and pride. Whether you’re a hobbyist looking for your next challenge or a skilled craftsman aiming to add a timeless piece to your home, learning how to build a pool table allows you to apply your skills in design, joinery, and finishing.
In this guide, you’ll discover step-by-step instructions, essential tools, materials, and helpful tips for creating your very own pool table. The process requires patience, attention to detail, and a strong understanding of woodworking fundamentals but the result is well worth the effort.
Key Takeaways
- Building a pool table combines woodworking precision and patience, making it a rewarding challenge for skilled DIYers.
- A successful build requires accurate leveling, high-quality felt, and proper materials.
- With the right tools and measurements, you can create a professional-quality pool table that lasts for years.
- This guide covers design, tools, construction steps, and expert maintenance tips to help you build your own pool table from scratch.
Why Build a Pool Table?
Choosing to build a pool table rather than buy one off the shelf provides several unique benefits. First, you gain complete control over materials, design, and quality. You can select fine hardwoods, customize felt colors, and create a table that fits perfectly into your home décor.
Second, it’s a chance to strengthen your woodworking expertise. From crafting the frame to fitting the slate, each stage refines your measuring, cutting, and finishing skills. Lastly, the satisfaction of playing on a table you built yourself is incomparable—it’s a true reflection of craftsmanship and dedication.
Tools and Materials Needed
Before you start, gather the following tools and materials to ensure smooth progress:
Tools:
- Table saw or circular saw
- Router with edge guide
- Drill and bit set
- Orbital sander
- Level and measuring tape
- Clamps and square
- Lathe (for shaping table legs)
Materials:
- Hardwood boards (oak, maple, or walnut)
- Slate or MDF sheets for the table bed
- Pool table felt (available in various colors)
- Rubber cushions for the rails
- Pockets and netting
- Wood glue, screws, and finishing stain
Step by Step Guide
Creating your own pool table requires attention to each component, especially frame stability and surface accuracy.
Step 1: Planning and Measuring
Every successful project begins with detailed planning. Before you start cutting or assembling, create a blueprint for your pool table. A standard 8-foot pool table measures 88 inches by 44 inches of playing surface. However, you can adjust dimensions to fit your available space.
Take precise measurements for your frame, legs, and rails. The accuracy of your layout directly affects the final alignment of the table. Sketch each section on graph paper or use digital design software to visualize the complete structure.
Step 2: Building the Frame
The frame serves as the foundation of your table. It must be strong enough to support the heavy slate or MDF surface. Use thick hardwood beams and ensure perfect joints. Assemble the frame using screws and wood glue for added stability.
Cross-bracing is essential to prevent warping or sagging over time. Use a level during every step to make sure the structure remains even. Remember, a strong frame ensures a smooth and consistent playing surface.
Step 3: Constructing the Legs
This step is where you can let your creativity shine. Using a wood lathe, shape each leg with unique contours or traditional straight designs. The legs not only support the table but also add a decorative touch.
Attach metal brackets or corner supports to secure the legs firmly to the frame. Double-check the height before final assembly; the standard pool table height is around 31 inches.
Step 4: Installing the Slate or MDF Surface
Professional pool tables use a three-piece slate surface, but MDF is a cost-effective alternative for home projects. Position the slabs carefully and ensure they are level across all sides. Even a slight unevenness can affect gameplay.
Fill any gaps between slate sections with beeswax or specialized filler, then sand the surface smooth. Use a straightedge and level to confirm perfect alignment.
Step 5: Adding the Rails and Cushions
Rails play a critical role in how balls bounce across the table. Cut wooden rails to size and attach rubber cushions using contact adhesive. Make sure the angles are accurate for consistent rebounds.
Once the cushions are in place, fasten the rails to the frame using bolts from the underside. Smooth any rough edges with fine-grit sandpaper for a professional finish.
Step 6: Applying the Felt
Stretching and applying the felt is one of the most delicate stages. Choose high-quality billiard felt and align it carefully over the surface. Start stapling from the center and move outward to avoid wrinkles.
Trim excess fabric with a sharp utility knife. Smooth, tight felt ensures precise ball movement and enhances the table’s overall appearance.
Step 7: Attaching the Pockets
There are various pocket styles leather drop pockets or modern net-style ones. Attach each pocket under the rail corners using screws or metal brackets. Check that all are evenly positioned and securely fixed.
Step 8: Finishing Touches
Sand the entire table lightly, then apply your chosen finish; stain, lacquer, or varnish. This not only enhances the beauty of the wood but also protects it from wear and moisture.
Add a nameplate or custom engraving for a personal touch. Your project is now complete, and it’s time to enjoy the game on your very own handcrafted masterpiece.
Case Studies
- John built a full-size maple pool table in five weekends for under $1,000, using a lathe for the legs and achieving professional accuracy through careful leveling. His project became a centerpiece of his family’s recreation room and earned admiration from local woodworkers.
- Sarah, a hobbyist, created a 7-foot table from reclaimed oak with blue felt and leather pockets. Her eco-friendly design blended rustic aesthetics with smooth playability, proving that even beginners can successfully build a pool table at home.
Finishing Touches and Maintenance Tips
A well-built pool table deserves long-lasting care.
- Keep the felt clean using a soft brush. Regular brushing prevents chalk and dust buildup, ensuring smooth ball roll and consistent gameplay.
- Avoid placing heavy objects on the surface. Excess weight can damage the slate or warp the frame, shortening the table’s lifespan.
- Maintain consistent humidity to protect wood from warping. Extreme moisture or dryness can cause cracks or uneven surfaces, so using a humidifier or dehumidifier helps.
- Check level every few months, adjust if needed. Even minor shifts in floor or frame alignment can affect ball trajectory, so regular leveling keeps play accurate.
- Reapply finish or wax annually to preserve wood sheen. A fresh coat also protects against scratches and moisture, maintaining the table’s aesthetic and durability.
Tips for Better Results
- Work in a clean, ventilated workspace. Proper lighting and airflow reduce accidents and help you see measurements and cuts clearly.
- Test-fit each component before final assembly. This ensures everything aligns correctly and prevents mistakes that are difficult to fix later.
- Label all parts during cutting for easy reference. Organized labeling saves time during assembly and reduces confusion.
- Watch instructional videos or refer to expert guides when needed. Learning from experienced woodworkers can help you avoid common errors.
- Don’t hesitate to make minor design tweaks to match your style. Personalizing your table can enhance both aesthetics and functionality without compromising quality.
Building a Pool Table: A Rewarding Woodworking Project
When you build a pool table, you’re not just creating furniture, you’re crafting an experience. The process teaches patience, precision, and design thinking. Each cut, joint, and finish represents a step toward mastering your craft.
This project may take several weekends, but every hour spent brings you closer to an heirloom-quality creation. Whether it’s for your home, workshop, or as a gift, a handmade pool table stands as proof of your woodworking skill and dedication.
Conclusion
Learning how to build a pool table combines engineering precision with artistic expression. With the right tools, materials, and patience, anyone can turn this complex project into a successful DIY accomplishment.
From planning and assembly to finishing and maintenance, each step adds valuable experience to your woodworking journey. Take inspiration from other makers, rely on accurate measurements, and let craftsmanship guide your hands.
Your pool table will not just be a game surface, it will be a statement of creativity, skill, and timeless artistry.
FAQs
How long does it take to make a pool table?
For a full-size table, expect about 40 hours of total work, spread across several days for cutting, assembling, and finishing.
Can beginners build one of these tables?
Beginners can build smaller or MDF-based tables. For full-size models, intermediate woodworking experience is recommended.
What kind of wood is best for pool tables?
Hardwoods like oak, maple, or mahogany provide superior strength, stability, and aesthetics.
Do I need special tools to level the slate?
A precision level and shims are essential. Some professionals use laser leveling tools for perfect balance.
Is a DIY pool table good for serious play?
Absolutely with proper materials and alignment, your DIY pool table can offer near-professional gameplay quality.


