Pen turning on a lathe is a fascinating and rewarding craft that combines the beauty of natural materials with the precision of modern machinery. It’s a process that allows craftsmen and hobbyists alike to create unique, functional pieces of art from simple blocks of wood or other materials. Whether you’re looking to make a custom gift, start a new hobby, or even kickstart a business, learning how to turn a pen on a lathe can be your gateway into the world of woodworking.
Types of Lathes
Choosing the right lathe is a crucial step in the journey of pen turning. Lathes come in various sizes and capabilities, each designed to suit different types of woodworking projects. When it comes to pen turning, the focus is typically on mini, midi, and full-sized lathes. Understanding the differences and advantages of each can help you select the best lathe for your needs, especially if you’re just beginning.
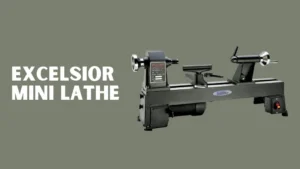
Mini Lathes
Mini lathes are the most compact option available, making them an excellent choice for those with limited workspace or who primarily focus on small-scale projects like pens, keychains, or small bowls. Here’s why they might be right for you:
- Size and Portability: Their small size not only makes them ideal for workshops with limited space but also allows for easy transportation if necessary.
- Cost-Effective: Mini lathes are generally the most affordable, making them a great entry point for beginners.
- Ease of Use: Designed with simplicity in mind, mini lathes offer a straightforward setup that’s perfect for novices.
Midi Lathes
Midi lathes strike a balance between the compactness of mini lathes and the power of full-sized models, offering a versatile option for enthusiasts looking to expand their turning capabilities. Consider a midi lathe for:
- Increased Power and Capacity: Midi lathes often come with more powerful motors and larger turning capacities than mini lathes, allowing for a broader range of projects without taking up too much space.
- Variable Speed Control: Many midi lathes feature variable speed controls, giving you greater flexibility to adjust according to the material and the specific requirements of your project.
- Upgrade Potential: Some models allow for extensions and upgrades, making them a long-term investment that can grow with your skills.
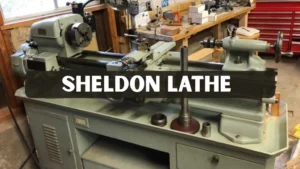
Full-Sized Lathes
Full-sized lathes are the workhorses of the lathe family, designed for serious woodturners who tackle large projects or produce high volumes of work. They are less commonly used for pen turning due to their size and cost but offer several advantages:
- Power and Durability: Equipped with powerful motors and built to withstand heavy use, full-sized lathes can handle almost any turning project you throw at them.
- Large Turning Capacity: If you’re interested in turning large bowls, vases, or furniture components, a full-sized lathe can accommodate such projects.
- Advanced Features: Full-sized lathes often come with advanced features like electronic speed controls, sophisticated indexing capabilities, and more robust construction.
Setting Up Your Lathe
Setting up your lathe correctly is crucial for a successful pen-turning project. This involves ensuring the lathe is stable, selecting the appropriate speed, and securing the pen blank properly to avoid accidents or material wastage.
Materials and Tools Needed for Pen Turning
Before diving into the exciting world of pen turning, it’s essential to gather all the necessary materials and tools. This preparation phase sets the foundation for a smooth crafting process, allowing you to focus on the creativity and precision of turning rather than scrambling for missing components. Here’s a breakdown of what you’ll need:
Selecting the Right Wood
The wood you choose for your pen plays a pivotal role in the final look and feel of your creation. Not only does the type of wood affect the turning process due to its hardness and grain structure, but it also determines the aesthetic appeal of the pen. Here are some points to consider:
- Hardwoods such as maple, walnut, and cherry are favoured for their strength, durability, and the beautiful finish they can achieve. These woods are relatively easy to work with and provide a classic, timeless look.
- Exotic Woods can offer unique colours, patterns, and textures not found in domestic woods. They can elevate the design of a pen to a more luxurious or distinctive level. However, they might be harder to source and sometimes more challenging to turn.
Essential Pen-Turning Tools
Once you’ve selected your wood, you’ll need to ensure you have the right tools on hand. Each tool has a specific function in the pen-turning process, from shaping the wood to applying the final finish. The essential tools include:
- Lathe: The core tool for pen turning, which rotates the wood blank, allowing you to shape it with other tools.
- Turning Tools: A basic set typically includes a gouge, skew chisel, and parting tool. These are used to carve, shape, and detail the pen blank.
- Pen Mandrel: This holds the pen blank in place on the lathe. It’s specific to pen turning and crucial for achieving a centered, symmetrical shape.
- Bushings: These are placed on the mandrel alongside the pen blank. They help you shape the pen to the correct dimensions for the pen hardware (clip, tip, and end cap) to fit snugly.
- Sandpaper: Various grits of sandpaper are used to smooth the pen blank after it’s shaped and before applying the finish. Starting with a coarser grit and working your way up to a fine grit creates a smooth, flawless surface.
- Finish: The finish protects the wood and enhances its natural beauty. Options include CA glue, friction polish, or wax, each offering different levels of protection, shine, and ease of application.
Preparing the Pen Blanks
With your materials and tools ready, the next step is preparing the pen blanks for turning. This involves a few precise tasks to ensure the pen turns out well:
- Cutting the Wood to Size: The blank should be slightly longer than the pen tube to allow for trimming and squaring off the ends.
- Drilling a Central Hole: A hole is drilled lengthwise through the center of the blank for the brass pen tube.
- Gluing in the Brass Tube: A brass tube, which holds the pen’s internal components, is glued into the drilled hole. This tube also reinforces the pen blank, making it more durable during the turning process.
How to Turn a Pen on a Lathe
Turning a pen on a lathe is a rewarding experience, combining the art of craftsmanship with the joy of creating something both beautiful and functional. This section outlines the step-by-step process of turning a pen, from mounting the blank on the lathe to the final assembly of the pen components.
Mounting the Blank
Properly mounting the pen blank on the lathe is crucial for a successful turning process. The pen mandrel, along with the appropriate bushings, plays a key role in this step. Here’s how to do it:
- Insert the mandrel into the lathe: Ensure that the mandrel is securely fitted into the lathe’s headstock, with the tailstock providing support at the other end.
- Slide the pen blank onto the mandrel: With the bushings placed at either end (and sometimes in between for multi-part pens), slide the pen blank onto the mandrel. The bushings serve as a guide for the pen’s final diameter and help in achieving uniformity in size.
- Tighten the tailstock: Adjust the tailstock so that it presses against the end of the mandrel, holding everything firmly in place. This reduces the chance of wobbling during the turning process.
Turning the Pen
The actual turning of the pen is where craftsmanship and creativity come into play. Here’s what to keep in mind:
- Choose the right turning tools: A sharp gouge or chisel is essential for shaping the wood. Begin with rough shaping to get close to your desired profile, then switch to finer tools for detailed work.
- Work with the grain: Turning with the grain, where possible, helps prevent tear-out and ensures a smoother finish.
- Maintain a steady hand: Apply gentle, consistent pressure as you guide the tool along the surface of the rotating blank. Patience is key; removing too much material too quickly can ruin the blank.
Sanding and Finishing
After turning the pen to its desired shape, the next steps are sanding and finishing. These are critical for achieving a high-quality final product:
- Sand the pen: Start with a coarser grit and progress to finer grits until the surface is smooth. Be sure to remove all tool marks and any rough areas.
- Apply the finish: Whether you’re using CA glue for a glossy finish, a friction polish for a more natural feel, or wax for a soft sheen, make sure to apply the finish evenly. This not only protects the wood but also accentuates its natural patterns and colours.
Assembly of the Pen
With the turning, sanding, and finishing complete, the final step is to assemble the pen components. This process varies depending on the pen kit but generally involves:
- Pressing the components into the blank: Using a pen press or a vice, carefully press the writing mechanism, the tip, and the cap into the ends of the pen blank.
- Assembling the pen mechanism: Insert the ink refill and ensure the pen mechanism works smoothly.
- Final adjustments: Make any necessary adjustments to ensure that the pen components fit together perfectly and the pen operates smoothly.
Conclusion
Pen turning on a lathe is a rewarding hobby that allows for endless creativity and personalization. With the right tools, materials, and a bit of practice, anyone can start turning beautiful pens that are both functional and artistic.
FAQs
What is the best wood for pen turning?
- Hardwoods like maple, walnut, and cherry are popular choices for their beauty and durability.
Do I need a special lathe for pen turning?
- No, pen turning can be done on mini, midi, or full-sized lathes, though mini and midi lathes are often preferred for their size and cost-effectiveness.
How long does it take to turn a pen?
- The actual turning can take as little as 30 minutes, but the entire process, including preparation and finishing, can take several hours.